MENU

New Classes Posted to the Calendar!

As I’m getting my schedule firmed up for the fall, I’m starting to slot dates in for my new classes!  I thought I’d highlight my classes at Fibre Space, this Fall.

Fibre Space

I love teaching at Fibre Space (which is located in Old Town Alexandria, VA), and I’ve got a few really great classes I’ll be teaching this fall.  Highlights include: Stained Glass Rug

Darn Those Knits
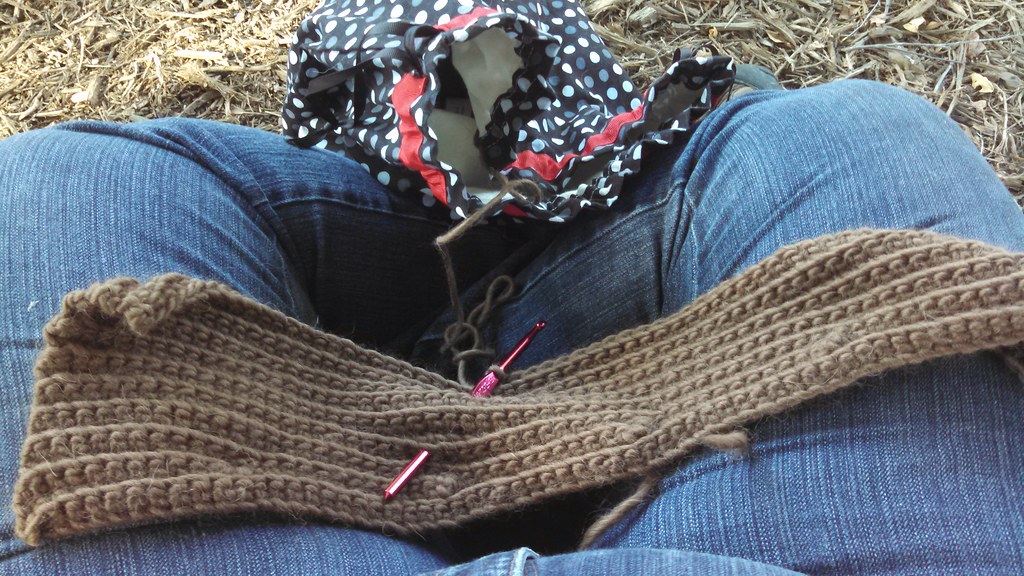
Stranded Crochet Cowl
Finishing Essentials
Intarsia Wrap
Ooops! Fixing Mistakes
Padded Crochet Rug

Fun Times at the Farm

Fun Times at the Farm

Fun Times at the Farm

On Friday I wrapped up the last of my camps with Montgomery College, hastily packed up my belongings, said goodbye to my lovely hosts, and swung around the beltway in DC to pick up Sweetness and Light.

For those of you who have begun following me in the last year, the monikers Sweetness and Light have little meaning, as I haven’t written about them recently.  Sweetness and Light are the name of two girls that I was a nanny to for four years – from mid 2010 until mid 2014, when Mr. Turtle and I moved to Richmond.  I began working for the family when I moved to DC – underemployed and still with the shine of college.  Sweetness was three, Light, just over 10 months.

Now, Sweetness is a precocious eight and Light is going to be six at the end of this month.  In the time in between, their parents have become more than friends, their family has increased by one (a 20 month old boy, now), and my employment has deepened into a friendship.  About once every four months, Sweetness and Light come for a sleepover, and since I was “in town” anyway, it made sense to “borrow” the girls, and bring them home for a few days.

Light rocking a ball-cap.

So what might have been a relaxing weekend unpacking and decompressing from camp became a joyful visit (perhaps relaxing might not be the word I’d use, but invigorating might fit).

Well, perhaps it was relaxing for Sweetness.

This was a particularly special trip, as we got to take Sweetness and Light to the farm.  Sweetness got to drive the riding lawnmower, we took rides in the antique jeep (without seatbelts!), and went to the James River to “ride the rapids,” fish and swim.

On Monday we returned to Ashland, and I dug out the camp materials for one last reprise, and we did needle felting to make 
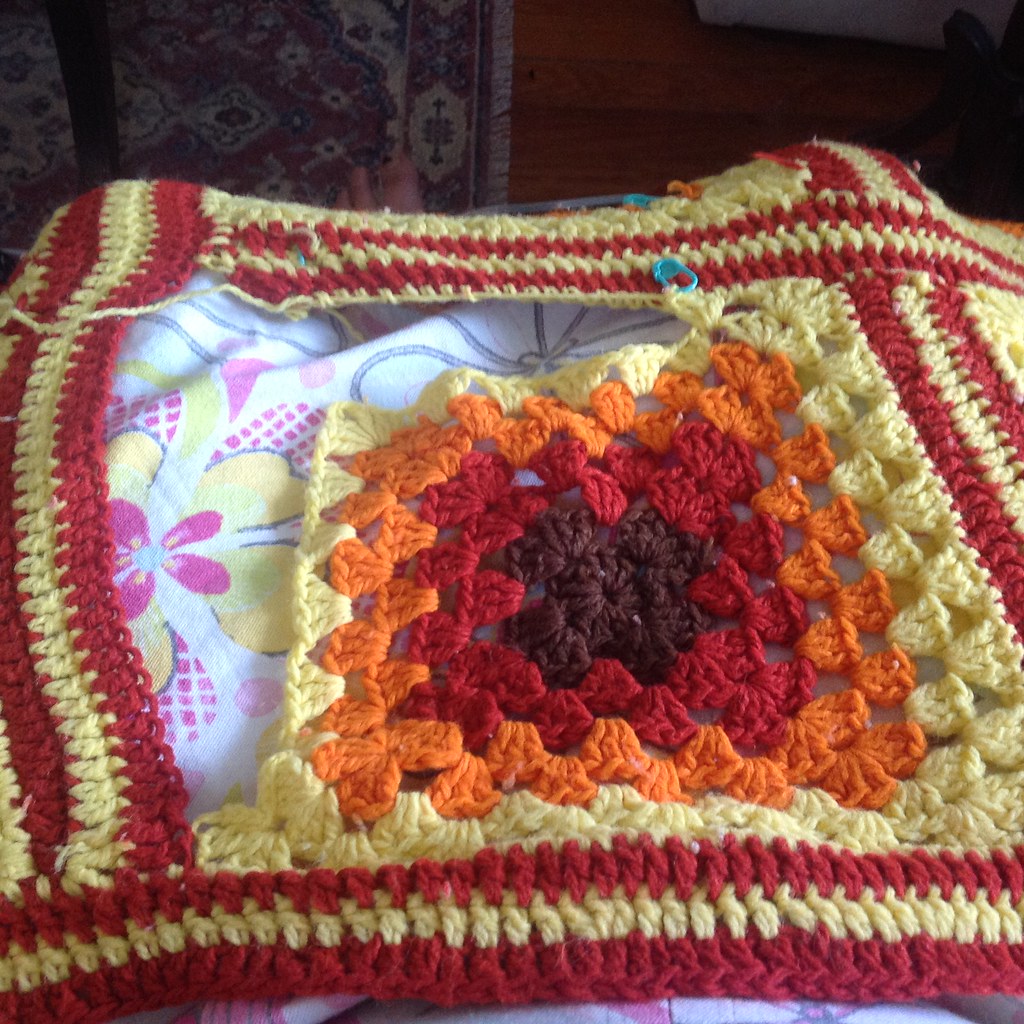
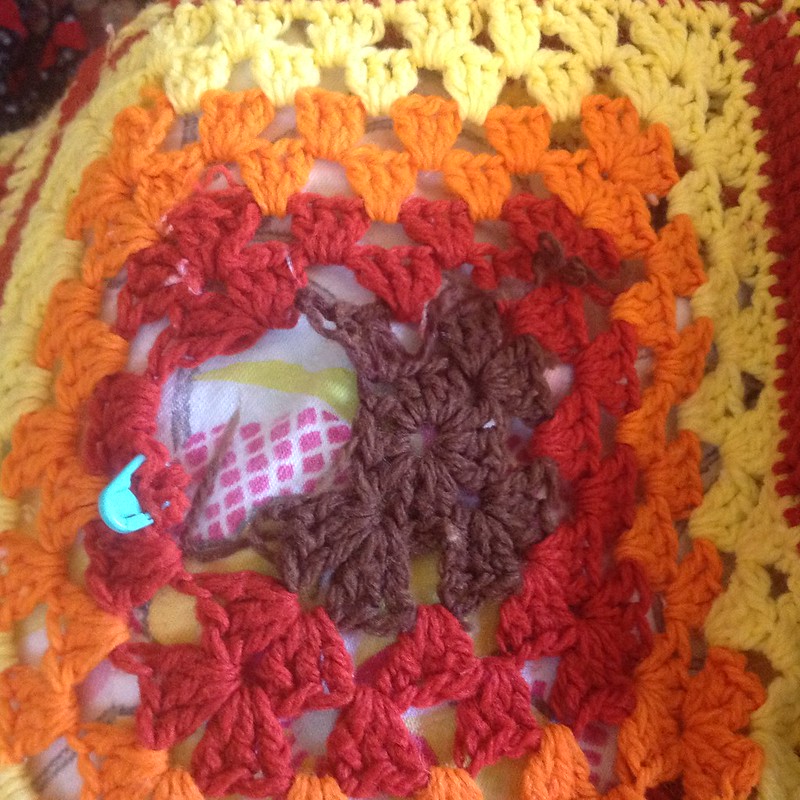
pillows in honor of Mr. Turtle’s birthday, in a week.

Now the girls are gone, and it’s time to get back to the grindstone.  There’s updates to the website, design subs to create, patterns in a backlog that need to be written and edited, and camp stuff to unpack and find homes for.

Come next week, I’ll be trying to get back into the grove of blog-posts that are more informative that update-ish.  I’ve also got a bunch of patterns that have come out in the last four weeks, so I’ll spend some time highlighting those!

3 Essential Rules to Work on Granny Square Crochet Blankets

Tomorrow morning I’ll be winging off our a week long vacation with my family in Alaska, and then I’ll return to quickly packing up for three weeks of summer camps in Rockville, MD.  So I’ve been trying to wrap up a few long-term finishing projects.

Sometime soon I’m going to write a post on how to properly finish off a granny-square blanket so it doesn’t fall apart in 30 years. (Or really, any blanket for that matter.)  Still, it seems like all I’ve been doing lately is repairing granny squares.

It’s meditative work at the best of times, and dead boring at the worst.  I normally like to put on a book-tape or podcast and crank out the repairs.  This time around I took a few photos to share, and decided to add my 3 rules of working on granny square blankets.

Granny Square blanket with split seams

The first blanket, featured above, had two major places it was broken: the last row of the square didn’t have its ends woven in, and I needed to rework the last row and reattach.

Rule #1: Properly weaving in ends is essential in a blanket that you want to last.  Crocheting over them doesn’t cut it.

Repairing hole in Granny Square Blanket

Repairing hole in Granny Square Blanket

As a corollary to Rule #1, the closer an end is to the center, the more stress it takes.  REALLY weave in the ends at the center of a blanket.

Which brings me to my next rule.

Rule #2: include care instructions when you give a blanket to someone.  Don’t expect them to know how to care for the blanket and the fibers!

Let me show you some examples:

Center of granny square lost of love

Center of granny square lost of love

Slowly adding back the center of the Granny Square

Slowly adding back the center of the Granny Square

Granny square center replaced!

Granny square center replaced!

All the black that's  not a

All the black that’s not a “frame” for the granny square is replaced & repaired.

The blanket above is one that’s been well loved, but also subjected to light and heat damage.  The fibers are very very delicate, and I’m working to repair the largest holes so this can be gently loved again. Still, proper care of textiles can extend their life a hundredfold.

Finally, my last rule.

Rule #3: REALLY, REALLY weave in your ends.  Seriously.  Nearly 80% of the granny square repairs I do is in places where they ends have come unraveled, instead of the fibers degrading.  Weave in the ends.  Use a sharp needle.  Skim them in.

Are there things you can think of to extend the life of your afghans?  What are they?

Padded Crochet Tutorial

Padded Crochet Tutorial

In honor of Rag-ety Rug coming out this week from Crochet World, and my recent post about it coming out, I thought it was appropriate to finally post this tutorial, which I’ve been saving for quite a while.

What you’ll need:

  • A crochet hook
  • Some scrap yarn
  • Rags, upholstery cord, or something else nice and thick but flexible to crochet over.  Bulky yarn would work too.

A bit about padded crochet: this technique originally was used to crochet around thicker yarn to create different motifs.  It gives you a lot of flexibility because you don’t have to crochet into the previous row, you can also just crochet around your material.  You see this technique often used in  Irish Crochet.

To begin, work a foundation chain, and work single crochets into the chain.  This can be any width, as we’re working a practice swatch.  After you’ve finished those two rows, you begin by adding in your cord/rag/yarn.  You’ll be crocheting around it much like you do when you’re burying an end into your crochet work, except this will be much larger.

Adding in your cord/rag/yarn

Adding in your cord/rag/yarn

Begin by holding your cord/rag/yarn above the last row you worked.

Joining Yarn around padded crochet

Joining Yarn around padded crochet

In this case, I’m also joining the yarn for this row.  Insert your hook into the last stitch of the previous row, and draw up your yarn.

Attaching yarn, Padded Crochet, Step 2

Chain one, securing yarn around the cord/rag/yarn.  I like to hold my tail together with my working yarn for this first stitch, or no other reason than it makes me feel better, and makes me feel like things are more secure.  I’ve got no proof, though.

Begin working Single Crochets around cord/rag/yarn

Begin working Single Crochets around cord/rag/yarn

Now, begin working your crochet stitches into the stitch of the previous row, working the yarn around the cord/rag/yarn.  In this case, I’m working a variant of the v-stitch.

Some tips:

  • Make sure you’re letting your stitches lie flat.  If you make them tight, they’ll bunch up your cord/rag/yarn.
  • Every once and a while check to make sure that your piece is laying flat.  Because the cord/rag/yarn that you’re working over has a tendency to shift around, it can make things pucker, draw tighter or looser.  I like to measure ever few rows.
  • When you have to add more cord, there’s a few ways you can do it.  In my case, I sewed on my rags together, because it was a bit more tidy.  You can also just hold the end of one rag and the beginning of another together.
  • Make sure if you’re using rags they’re the same width, so your rug doesn’t have a lumpy look, or have irregular rows (unless that’s the effect you’re going for)!
Measure, measure, measure!

Measure, measure, measure!

Have you every worked padded crochet?  How’d it turn out?  What was the project?

New Pattern: Rag-ety Rug, a Padded Crochet Project

Rag-ety Rug by Jennifer Raymond

Rag-ety Rug, a Padded Crochet Project

I’m proud to announce that Rag-ety Rug, my pattern with Crochet World Magazine’s August 2015 issue, is officially out.  (Yes, I know it’s only June.  I’m not quite sure how Annie’s works their release schedule, but even though it’s June, you should be able to start finding the magazine on shelves in the next few weeks).

Rag-ety Rug uses one of my new favorite crochet techniques, padded crochet.  Like Stained Glass Rug and Matryoshka Baskets, Rag-ety Rug uses padded crochet.  Normally padded crochet is worked with smaller items (like in Irish Crochet Lacework), but I like to use padded crochet to make more modern, exploded lace pieces.

Rag-ety Rug was mostly worked on during a vacation to Atlantic Beach with Mr. Turtle’s Parent’s.  It seemed rather fitting: this rug, worked with denim scraps, fits in perfectly with beach decor.  The varied blues of the different denim scraps seemed to echo the blues of the ocean.

walking on Atlantic Beach in January

Walking on Atlantic Beach in January

There is a meditative quality to this rug, as each row the “v-stitch” nests into the following row.  I loved watching the rug gradually grow.  The cotton in the rug is from Lily’s Sugar ‘n Cream line, in a color called Stone Wash.  It was a perfect pairing for the denim.

Padded Crochet Rug from Annie's Crochet World

Rag-ety Rug, done in Padded Crochet, detail shot.

In my original pitch I imagined this rug in rainbow colors, for a children’s room or for someone who loves color.  I think it’d be fun to play around with textures too: perhaps with prints or strips or plaid?  The possibilities are endless!

What colors would you work this rug in?

A quick update and a change of plans

Today’s been quite the day.

Supplies for a class on Saturday at Fibre Space

Right now, I’m in the airport, waiting to get on a plane to head to Boston.  It wasn’t all that long ago I was in Boston for fun with Mr. Turtle, but this time it’s for sadder reasons.  My great-aunt, Janet, died last Saturday morning.  I found out Saturday morning as I was heading out the door to catch a train to Old Town Alexandria for a full day of teaching at Fibre Space.

So today I’m heading back to Boston, and then onward to Newburyport and the family home there.  I’ll be supporting my mother (Momma Turtle) and extended family.  I’ve got mixed feelings about the trip, but we’ll make the best of it.  I’ve got a backpack full of yarn to finish the sweater I need to send off on Monday.

I’ve got a couple of fun blog-posts scheduled to run while I’m gone, so be sure to keep tuning in, but I won’t be checking my email until Monday.


In other news, I got a package in the mail yesterday evening.  It was small, and I couldn’t remember that anything was supposed to be getting back to me soon.  So of course, I immediately ripped it open.

Karner Butterfly

Karner Butterfly

It was my Karner Butterfly socks, returned to me.

Getting projects back after they’ve been published is a bit like greeting an old friend: a little odd, and very welcome.  Oftentimes I worked in these projects quite a while ago (in this case, nearly 11 months ago), and I haven’t seen them since then.  They immediately bring back all the memories that happened when I was working on them: in this case, it was the cruise I went on with my family last year.

If you missed Karner Butterfly the first time around, you should check them out!  They’re a fun little pattern.

My Easy Finishing Technique for Weaving in Bulky Yarn

Techniques for Weaving In Really Bulky Yarn

Today we have a quick little blog post that I’ve been meaning to do for a while, but haven’t quite gotten around to!  I thought it’d be the perfect thing to start out our week: a tutorial on weaving in really bulky yarns.  I think it’s a helpful finishing technique for both knitting and crochet.

What am I going to be talking about? Well, weaving in ends.  Now, I know weaving in ends isn’t everyone’s cup of tea, and I totally understand.  It’s one of the reasons I offer finishing services.  But for those of you who like to sweat the details, weaving in ends can be an important part of finishing a project.

Today’s little tutorial is specifically about weaving in really bulky yarns, which can be hard to pull through the fabric.  Now, this trick only works for plied yarns, but it’s a nice thing to have in your arsenal.

Onward!

  1. First, we’re going to want to take the tail that we plan to weave in above.  See how it’s plied together – that is, it’s got multiple strands all twined around each other?  We’re going to separate those out.  You’ll want to do it by twisting the yarn in the opposite direction it’s twisted together, so the individual strands start standing out from one another.  Once you’ve got one you can grab, pull it from it’s neighbors, until you’ve got them all separated like this:
    Yarn separated out into it's individual plies.

    Yarn separated out into it’s individual plies.

  2. Now that you’ve got the plies separated out, get a sharp-pointed needle and thread one of the plies onto the needle.  Like this:
    Thread one of the plies onto a sharp needle to weave in the end of the yarn.

    Thread one of the plies onto a sharp needle to weave in the end of the yarn.

  3. Make sure the other ends are out of the way, and now, weave in the end.  Do the same with the other strands of the yarn.
    Nearly there: All but one end woven in!

    Nearly there: All but one end woven in!

  4. Finally, trim your ends away as close as you can to your project without cutting anything.
    Trim your ends away, and admire your work! You've finished weaving in your ends!

    Trim your ends away, and admire your work!


Do you have a favored method of weaving in ends, or a finishing technique that you love to share with others?  Tell me about it in the comments!  I love hearing from you!

My First Local Yarn Store: The Needlecraft Center

This last weekend Mr. Turtle and I drove the long five hours to Davidson College, our alma mater.  It was his class reunion (last year was mine, but since the weekend was the same one as TNNA… I chose to forgo it).  Davidson College is a small liberal arts college just outside of Charlotte, North Carolina.  You might have heard of Davidson College in a few different contexts: our free laundry services, when we went to the Elite 8 in 2008, because we’re Stephen Curry’s Alma Mater, or (if your’e in the stitching world) the fact that we’re the alma mater of Ann Shane of ’85 – also known as one half of Mason-Dixon Knitting.

Mr. Turtle and I have been back to Davidson a few times since we moved away five years ago – the most notable instance being at Mr. Turtle’s brother’s graduation.  So the changes to the campus weren’t quite such a shock to us as they were to others.  Still, it’s interesting to see how the campus has grown and changed.

There are few places that have been as formative to my life as Davidson.  There’s Camp, of course, and my family.  But Davidson is where I learned a lot of life skills in a very short amount of time: how to write well, create an ordered argument, set-up an excel sheet like a pro, weld and hammer.  It’s where I met Mr. Turtle.  It’s also where I met my first LYS: The Needlecraft Center.

The Needlecraft Center, Davidson NC

The Needlecraft Center, Davidson NC

So while Mr. Turtle spent his time socializing with old friends, I took a quick hour to stop by the store, say hello to the staff, and just revisit a place that got me through many college crisis.  And then, on Sunday before we left, I took some time to spend with the owner, Elaine McArn, who has run the store for 43 years – since 1971.

It was lovely to visit with Elaine.  When I was in college I was a little intimidated by her: she was so very knowledgeable and experienced.  She was the one who caught that I was knitting twisted stitches, who gave a word to the knitting style I preferred.  She was the one who educated me on why it was worth it to save your pennies and use good yarn.  She started me on my first terrible socks.  I didn’t always welcome her advice: after all, I was young and didn’t always appreciate being told what I was doing was wrong, or not the best way to go about things.  But I respected her – especially when I realized she was almost always right.

The year after I graduated my perception of her changed.  I was working for the college, living in a house, and beginning to figure out the “adult thing.”  I began to really respect the fact that Elaine had a long-time respected business, especially in the crafting world.  I got to know her better through knitting nights at the store, and by hanging out more as she talked about the difficulties of owning a store: dealing with “missing merchandise,” how to market yarns and tools, and making tough choices about where her business was going to go.  We bonded over gardening: growing peas and tomatoes, zucchini and squash.

young hatchlings in a nest cozied in a potted fern

Young Hatchlings in Elaine’s Fern

We’ve kept in touch on and off since then.  Elaine was one of the first people I contacted when I knew I was going to TNNA.  We met over breakfast the morning before the show floor opened, and she gave me advice about how to conduct myself.  It made me relax when I was SO nervous!

So on Sunday it was more than nice to visit with Elaine, to talk about families and business, gardening and textiles.  To talk about having to make tough decisions when you run a business: are you going to buy a new printer, or do workarounds so you can have the cash in reserve?  Which yarns do you carry, what things are fads and which are not?  We bonded over the young birds hatching in one of her ferns, and the way rosemary smells just after it rains.  As we were talking I had a moment where  my younger self looked through my eyes – not quite believing we were discussing tatting and crochet in heirloom textiles.

Have you had people in your life whose relationship has changed and grown?  I’d love to hear about some of them!

A weekend in Pictures: Davidson Reunion

Mr. Turtle and I got back from our Davidson College Reunion later last evening.  It was just enough time to unpack, read through emails, feed the cats, and start a load of laundry.  I swear, this traveling every weekend thing has to stop.

Tomorrow I’ll talk more about the reunion, as my thoughts settle.  Today, a few quick pictures of what I’m working on:

Swatching for my current design!

Swatching for my current design!

I’m working with some lovely yarn called chocolate. I’m trying not to get hungry every time I use it.

Working on the sleeve of the piece. Knitting bag in Davidson colors!

Working on the sleeve of the piece. Knitting bag in Davidson colors!

Davidson College has a lake campus, where Mr. Turtle spent many an afternoon as Commodore of the sailing team.  We went to revisit the lake campus, and I plopped myself by a tree near the water, and worked on the sleeve to this project.

All the revisiting members of 2010. I'm not there as I'm class of 2009.

All the revisiting members of 2010. I’m not there as I’m class of 2009.


Tinking Turtle’s Summer Camps: Knitting, Crochet, Sewing and More!

young child learning to sew

Sewing with Next Step Needlecraft from Tinking Turtle Designs

It’s that time of year again: the weather is warming (despite all the rain we’ve had this week), and on my walk this morning, I found the first delicious blackberries.  It’s summertime – and it won’t be long now until school wraps up and those hot days will be around the corner.  It won’t be long until Tinking Turtle’s Craft Summer Camps start!

For me, this means a shift in Tinking Turtle’s focus: I’m beginning to get ready for the summer camps that I’ll be running.  They’re one of my favorite parts of the year.

You see, way back before Tinking Turtle was a name written on a piece of paper, before I’d even dreamed up my first pair of socks, I was a camp counselor at Chimney Corners Camp.  I’ve talked about CCC (as it’s known to campers and alumni alike) before: it’s the place where I met my longtime friend Becca, and where Mr. Turtle proposed to me.  CCC’s been a huge part of my development as a person – not only personally, but professionally as well.  CCC was the place I taught my first students: figuring out how to break down knitting, crochet, embroidery and cross stitch to campers aged eight to fourteen.  I was only about seventeen myself, and I had very little clue what I was doing, but I figured out.

Since then, I’ve continued to love working and crafting with children.  I worked as a nanny for many, many years, and last year I ran the camp String Theory through Montgomery College.  It was a hit and a blast, and this year I’m adding to the lineup with two new classes: Next Step Needlecraft and Knockout Punch Rug Needlework.  Let me tell you a bit about the classes:

String Theory is my flagship class, now in it’s second year.  It’s a variety introduction to needlework

young girls showing off their finished knit mitts

Finished knitted mitts from String Theory!

and crafting for both boys and girls ages 8-12.  Campers learn how to knit a fingerless mitts (or two!), sew and decorate a project bag, learn to process, card and spin fiber, and the basics of how to dye wool.  This year we’re offering three sessions: 7/20 – 7/24 from 1-4 pm, 7/27 – 7/31 from 1-4 pm, and 8/3 – 8/7 from 9 – 12 pm.  You can click on the links to find out more and signup!

Because we received such a great response to String Theory, we’ve added Next Step Needlecraft.  Intended for campers who loved String Theory and want to learn more, or for older students looking to learn some more interesting crafts, it’s a great next step.  Students learn how to crochet, how to spin yarn, the basics of needle felting, and how to create stunning punch rug pieces.  This class is meant to sink students’ teeth into needlecrafts you don’t get exposed to nearly anywhere else.  This year I’m offering two sessions: 7/20 – 7/24 from 9-12 pm, and 8/3 – 8/7 from 1-4 pm.


My last class: Knockout Punch Rug Needlework is a very focused class.  Unlike the other two camps which focus on variety, this one dials down into the art of rug making.  In this class students will have a lot more independence to learn, plan and execute one, if not two projects.  This class focuses on giving students the independence to decide and plan their own projects, and my help to make them a reality.  We’ve got just one session of this camp, so if it sounds like something your child would enjoy, make sure to sign up as soon as possible. Knockout Punch Rugs will run 7/27 – 7/31 from 9 – 12 pm.

Child learning to knit with multicolored yarn

Learning to Knit in String Theory

If you’re looking for a great crafting camp for the summer, these camps are for you.  Don’t have children of your own?  Tell your friends about these camps.  Teaching kids crafts improves dexterity, problem solving and creativity – and preserves these traditions for the next generation.

Let me know what you think about the camps – and what other crafts I should look at adding to the repertoire!