MENU

How to Set a Zipper in a Sweater

The rights have reverted back to me for a number of blog posts I did for Jordana Paige’s blog a few years ago, and I’ve begun re-posting them on occasion to have them on my own website, and so students can reference them.  This particular tutorial about setting a zipper into a sweater, I’ve updated and refreshed, but much of the technique remains the same.


Setting in a zipper is a process that takes time, patience, and a certain amount of willingness to fiddle.  Not everyone likes to do that, which is why so many of the finishing projects I do involve setting in zippers.  But if you’re willing to take the time, setting in a zipper can be very satisfying!

To set in a zipper you will need: a zipper, yarn to match the garment, yarn (or embroidery floss) in a contrasting color, a sewing needle (with a sharp point!), pins, and the 2 sides that you are attaching to the zipper.

a sweater, matching yarn, a zipper, needle and red embroidery floss are shown on a white background.

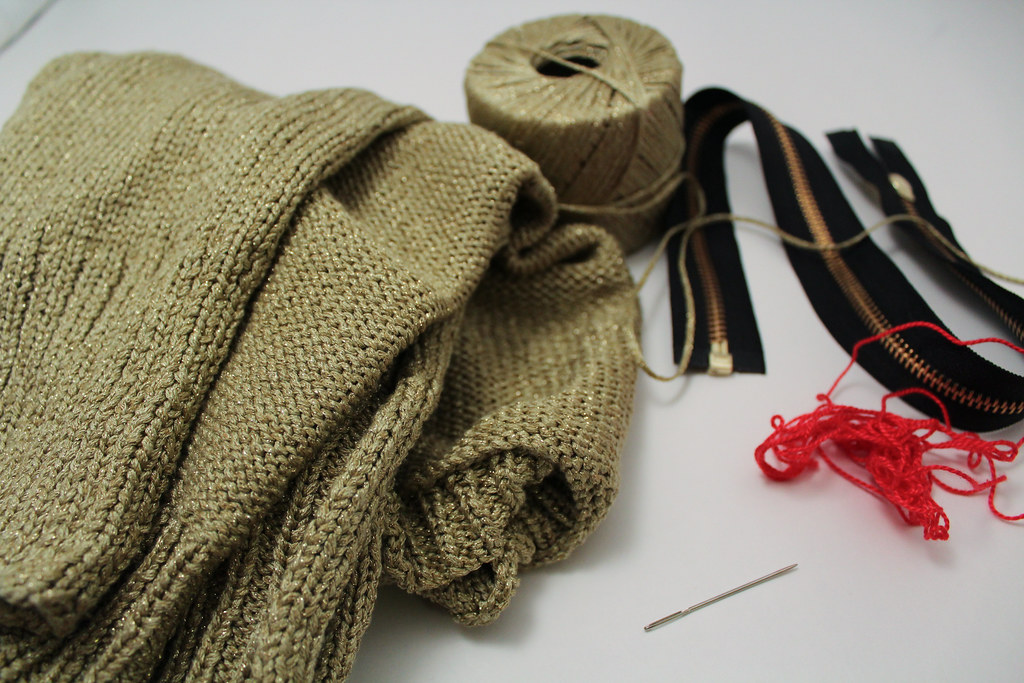
It’s helpful to have all your materials available!

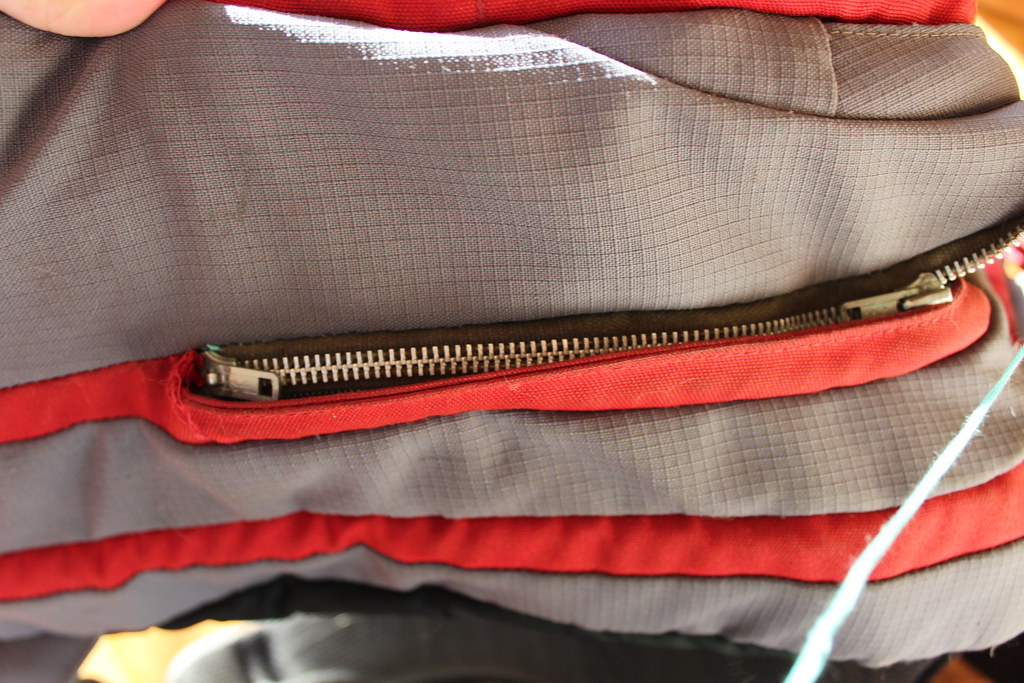
Please note: When purchasing a zipper, make sure you get the correct type!  You don’t want a zipper for a bag, as it is attached together at both ends – you’d never be able to get your garment off!  Same thing with double ended zippers.  Take time to read the package and know what you are getting.  Also pay attention to length.  As I explain below, get the right size zipper, or a little longer.

The first thing I do is block the two fronts to the garment I’m attaching the zipper to.  Make sure the front is blocked to the correct measurements, and that your zipper will match those measurements, or be slightly longer.  If you need to, you can trim the top of the zipper to the length you want.  Make sure you use a file to eliminate any rough edges, and sew a new stopper so your zipper tab doesn’t come off.

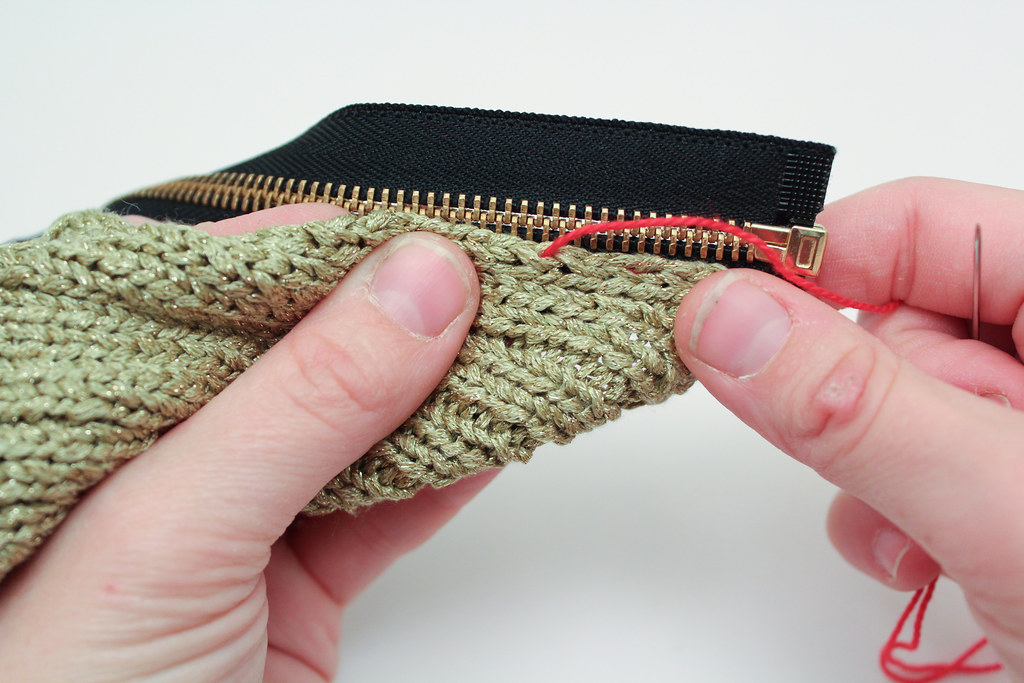
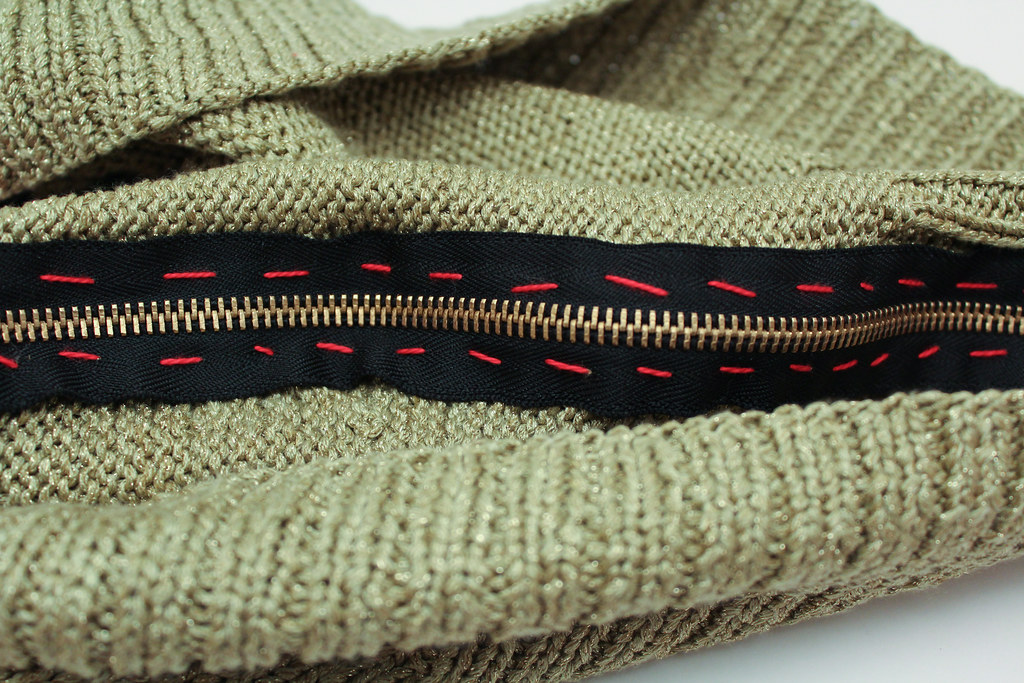
Next, pin the zipper into place on the inside of the garment.  Make sure that you are not pulling or distorting the knit fabric – at all.  If you pull the fabric to stretch to the zipper, it can cause the zipper to pucker or wave.  After you’ve gotten things in place, I like to run a basting stitch along the zipper, as I don’t like to get poked with pins.  It also makes super-sure your zipper doesn’t shift around.

To do a basting stitch, take some waste yarn or thread, and use a running stitch, sewing the zipper to the fabric with big stitches.  When you’re done attaching the zipper, you can remove the basting stitch, so don’t worry if the basting stitch isn’t perfect.

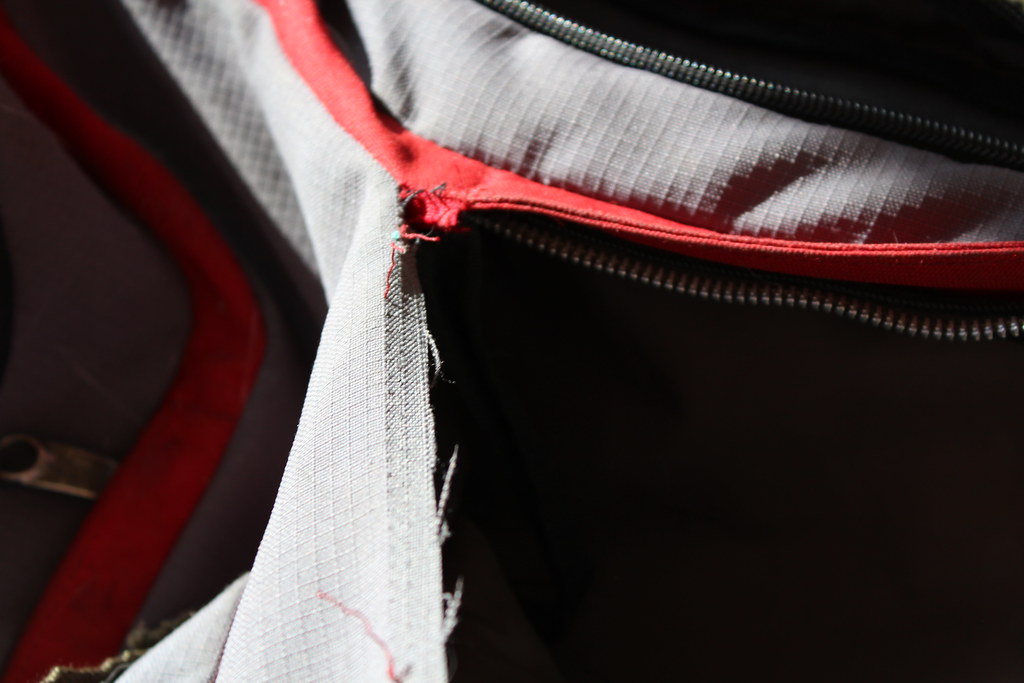
Using a running stitch to baste the zipper to the fabric.


After I’ve finished basting (and this is another good reason to baste your work, because you can’t do this if the zipper is pinned), I check to make sure that the zipper can zip up and down without catching on any fabric.  Better to find this out now than after I’ve sewed everything together!  This is your opportunity to make any adjustments.

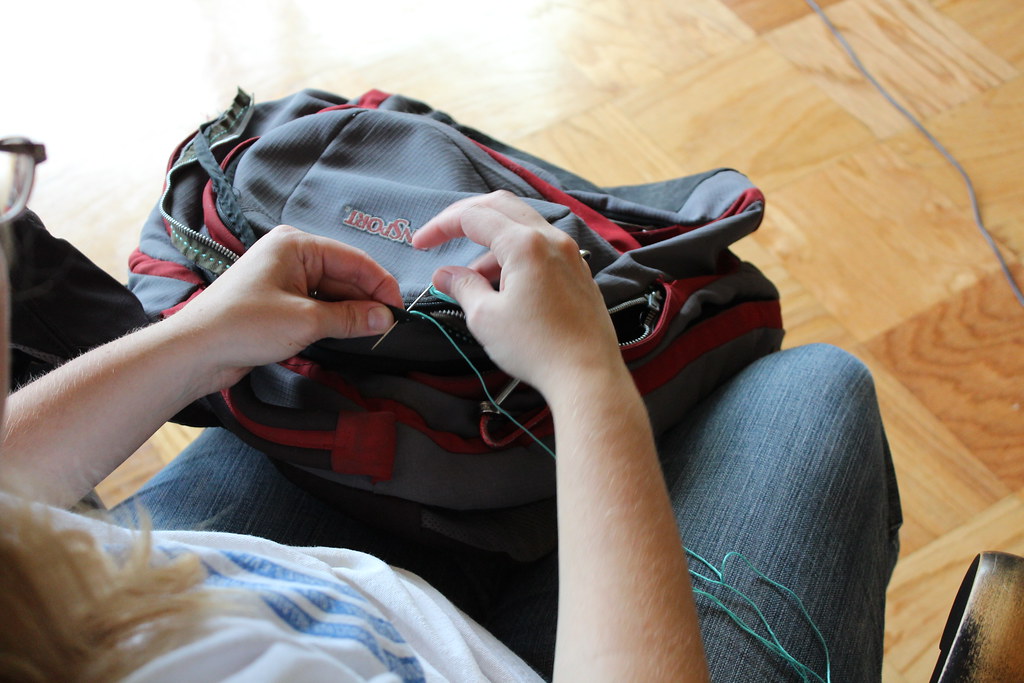
The basting stitch on the wrong side of your work.

Finally, you can sew the zipper to the piece.  Depending on the piece, sometimes I use the yarn the sweater was worked in.  Other times, if the yarn is delicate, loosely plied, or extremely fuzzy, I’ll use sewing thread in a color that is close to the color of the yarn.  Either way, I use the same technique.

Working from the back, I secure the yarn.  When I sew, I make sure that each time I’m going over only a single strand of yarn between two stitches.  Basically go into the purl bump if viewing from the back.  Mostly, I choose the space between the first and second stitches against the edge.

Working very slowly, I sew my way up one side, then up the other.  Be patient. Take your time. Check your work often.  Use small stitches.  Because the zipper is located at the front of the sweater, I’m super careful to make sure that my sewing doesn’t show.  Sometimes, if the fabric is wide, I’ll run a second set of stitches further out along the zipper band, so it doesn’t flop and lies nicely down.  You can see I did this from the picture below.

The zipper, sewn to the sweater with two rows of stitches.


When you’ve finished attaching the zipper to both sides of the fabric, I check my work.  Check again to make sure the zipper moves smoothly along the track.  Then, and only then, if I’m happy with what I’ve done do I remove the basting stitches.  Finally, weave in your ends.

Zipper in sweater


Tinking Turtle’s Summer Camps: Knitting, Crochet, Sewing and More!

young child learning to sew

Sewing with Next Step Needlecraft from Tinking Turtle Designs

It’s that time of year again: the weather is warming (despite all the rain we’ve had this week), and on my walk this morning, I found the first delicious blackberries.  It’s summertime – and it won’t be long now until school wraps up and those hot days will be around the corner.  It won’t be long until Tinking Turtle’s Craft Summer Camps start!

For me, this means a shift in Tinking Turtle’s focus: I’m beginning to get ready for the summer camps that I’ll be running.  They’re one of my favorite parts of the year.

You see, way back before Tinking Turtle was a name written on a piece of paper, before I’d even dreamed up my first pair of socks, I was a camp counselor at Chimney Corners Camp.  I’ve talked about CCC (as it’s known to campers and alumni alike) before: it’s the place where I met my longtime friend Becca, and where Mr. Turtle proposed to me.  CCC’s been a huge part of my development as a person – not only personally, but professionally as well.  CCC was the place I taught my first students: figuring out how to break down knitting, crochet, embroidery and cross stitch to campers aged eight to fourteen.  I was only about seventeen myself, and I had very little clue what I was doing, but I figured out.

Since then, I’ve continued to love working and crafting with children.  I worked as a nanny for many, many years, and last year I ran the camp String Theory through Montgomery College.  It was a hit and a blast, and this year I’m adding to the lineup with two new classes: Next Step Needlecraft and Knockout Punch Rug Needlework.  Let me tell you a bit about the classes:

String Theory is my flagship class, now in it’s second year.  It’s a variety introduction to needlework

young girls showing off their finished knit mitts

Finished knitted mitts from String Theory!

and crafting for both boys and girls ages 8-12.  Campers learn how to knit a fingerless mitts (or two!), sew and decorate a project bag, learn to process, card and spin fiber, and the basics of how to dye wool.  This year we’re offering three sessions: 7/20 – 7/24 from 1-4 pm, 7/27 – 7/31 from 1-4 pm, and 8/3 – 8/7 from 9 – 12 pm.  You can click on the links to find out more and signup!

Because we received such a great response to String Theory, we’ve added Next Step Needlecraft.  Intended for campers who loved String Theory and want to learn more, or for older students looking to learn some more interesting crafts, it’s a great next step.  Students learn how to crochet, how to spin yarn, the basics of needle felting, and how to create stunning punch rug pieces.  This class is meant to sink students’ teeth into needlecrafts you don’t get exposed to nearly anywhere else.  This year I’m offering two sessions: 7/20 – 7/24 from 9-12 pm, and 8/3 – 8/7 from 1-4 pm.


My last class: Knockout Punch Rug Needlework is a very focused class.  Unlike the other two camps which focus on variety, this one dials down into the art of rug making.  In this class students will have a lot more independence to learn, plan and execute one, if not two projects.  This class focuses on giving students the independence to decide and plan their own projects, and my help to make them a reality.  We’ve got just one session of this camp, so if it sounds like something your child would enjoy, make sure to sign up as soon as possible. Knockout Punch Rugs will run 7/27 – 7/31 from 9 – 12 pm.

Child learning to knit with multicolored yarn

Learning to Knit in String Theory

If you’re looking for a great crafting camp for the summer, these camps are for you.  Don’t have children of your own?  Tell your friends about these camps.  Teaching kids crafts improves dexterity, problem solving and creativity – and preserves these traditions for the next generation.

Let me know what you think about the camps – and what other crafts I should look at adding to the repertoire!

Additive and Subtractive

I’ve been working on a skirt this week using some lovely wool fabric my mother and great-aunts had, and it’s been going very well.  This morning I set in my invisible zipper (my first zipper set into woven fabric – gasp!), and I’m pleased at the results.  I guess reading sewing blogs for 3 years means you pick up something!

But it’s got me thinking about the differences between sewing and knit/crochet – and this morning I finally hit on why I’ve not quite ever taken to sewing the same way that I do knitting.

It’s all about the addition and subtraction.

You see, when I took my two sculpture classes my senior year of college, I generally liked the types of sculpture that were additive; that is, I liked things that started from nothing and I added material, shaping it along the way.  I liked things like clay, wax-work, and plaster.

Plaster sculpting was perhaps my very favorite medium, because it was additive as well as subtractive.  Plaster bonds to itself very well, and after you add plaster to already existing plaster, and it sets – it’s like one whole piece of plaster.  You can then chip away at the material you added, for further shaping purposes.

Activities like woodwork were harder, because you had to plan things out ahead of time.  With the exception of wood glue, the place where you fasten wood together will always be weaker than the rest of the wood.  Places where you use things like nails, joints, or staples will always be weaker than the original whole thing.

Sewing is like wood: the seam is nearly always the place where a garment wears out.  It’s also a subtractive craft, to me.  Each time you shape a piece of cloth, you start by a large piece and you gradually cut stuff away to shape it (using darts, for example).  You might add more fabric, but there will always be a join.

It is perhaps not a coincidence that when I started doing sewing crafts, I started with quilting, which is much more of an additive activity.

Crochet and knitting, on the other hand, both start with nothing, and you add more and more stitches to make the thing.  If you mess up with crochet or knitting, you can pull your work out and start again (it’s a pain, but you can do it).

Whereas sewing, if you make a mistake with your cutting… well, you’ve just ruined that piece of fabric.

Do you do any other crafts other than knit or crochet?  Do you think of them as additive or subtractive?

Pictures from Atlantic Beach

As promised, some of the shots from Atlantic Beach.  The light the one evening was stunning!

In other news, I’ve been doing a little bit of sewing… one of my goals this year was to try and learn how to sew some basic skirts – both because I figure they’re pretty forgiving, and because I know I’m not so very good about reading directions – and I figure I can’t fall too far astray with some circle skirts or other items.  We’ll see how it goes!

Do you have any sewing experience?  What do you like sewing?

Stitching, other than Knitting and Crochet

While Michael and I were in India, my backpack gave up the ghost.  I’d been babying it for a while, as the zipper had some weak spots where the toggle would jump the track.  But I’d been making it work.  While we were shopping one day, Michael was putting our purchases in the backpack, and being rather rough with it.  I told him, “Be careful, the zipper is delicate.”

He said, “I’ve got it.”

A moment later, he yanked and it broke broke.

Try as we might, that zipper pull wasn’t going back on the track.  In desperation, we cut a hole in the fabric to strap it shut with a length of twine, and I struggled not to be mad at him the rest of the day.

When we got home, we had one gift card left from the wedding that we hadn’t used.  We decided this was going to be used to buy me a new backpack.  So I looked for a new backpack.

Now, it must be said.  I’ve had this backpack for eight years.  It’s been with me since the first day of college, and has carried two computers, books, projects, and more things than I can count.  It’s been to Sweden, across the United States, to India, Norway, and I’ve carried it 5 days out of 7 for the last eight years.  I haven’t had a seam split or a strap break or anything. (It’s one of the higher end models by Jansport).  It has a place to put my computer, with ample padding and a shock absorbing insert on the bottom in case I drop it (which I’ve done a lot).  A roomy main pocket, a headphone pocket that is perfect for a pair of in-progress socks, and plenty of other pockets.

When I looked online, nothing fit.  None of the backpacks I could find (even the ones out of my price-range) had adequate padding.  The shoulder straps were wonky.  I wasn’t looking for much, but nothing fit.  After hitting up multiple stores to look at backpacks in person, and searching online more than I cared to admit, it occurred to me that I might be happier if I just replaced the zipper myself.

So I went digging in my stash of zippers (as my grandmother threw nothing away, and this included clipping buttons and zippers out of everything). Miracle upon miracle, I found a jacket zipper that worked (it means that instead of zipping out from the middle, it zips out from the sides) and fit the hole.

Below follows the process of resurrecting the backpack, if you ever are interested in doing the same:

I unpicked the stitches to the zipper on one side.  On the other side (the part with the red zipper flap) the seam also
held the zipper flap, so I just sewed the new zipper flush to the old zipper.  This worked surprisingly well.
A simple running stitch made in super-tiny stitches worked really well.  I used a bright color for my eyes, and because
 when making repairs of this nature, I had no ability to hide the repair, so might as well make it a design feature, right?
New zipper lying flush to old zipper.
Patience is a virtue.  Halfway through I realized that I’d sewn the zipper in with a twist, had to unpick it and re-sew it.
The cats could not stop staring at me the whole time.  Thread, flicking and moving and
oh-so-pounce-able, and they got spritzed every time they tried to go for it.
Zipper nearly finished, working as it should.