MENU

An Example of a Great Repair Request

Have you ever wondered what goes on before I take on a project to repair?

Before I accept an item to fix, I like to have a dialogue with clients about the piece, their goals, and my ability. All of this starts with the Repair Request I have on my Contact Me Page.

So what makes a good repair request? I often have to clarify to potential clients what I need to come up with an accurate estimate to repair the item they’d like me to work on. When you, the client, fills out our contact form, it asks you a series of questions such as:

  • How important is matching color or matching fiber content?
  • How important is it to you that the repair be machine washable vs. needing to be washed by hand?
  • How are you intending to use the item?
  • How fragile does the fabric appear?
  • How important to you is cost?
  • How important is it for you to preserve as much of the textile as possible?

When you answer these questions, they help me understand where your priorities lie in the the repair. Some repairs can be functionally stable, but the color or fiber content might not be the best match. Finding a good color match can be time consuming – are you willing to reimburse me as I purchase different yarns to find the best match for the repair? If you are intending to put the item on display vs use it everyday, that may influence how much of the object needs to be repaired – daily use means I should also prioritize areas I see are going thin, because with more use they may easily become holes soon.

One of the best ways I can get a sense of the item (aside from sending it to me) is to take good photographs. Take a look at the photos below as I show what was really helpful about them.

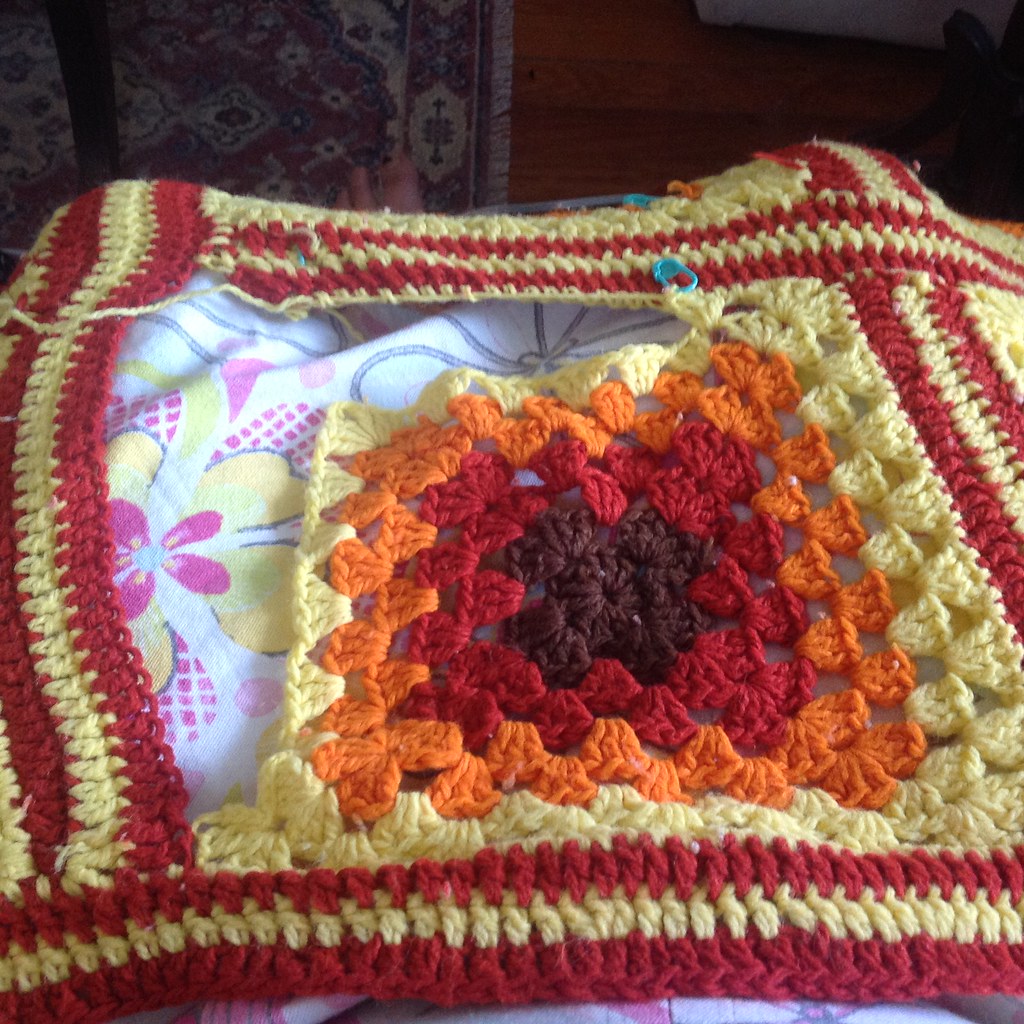
This is a great overall photo of the piece. I can see the pieces of paper that mark the holes, and I know where the holes are in relation to each other. It gives me a sense of the scale of the piece, the overall pattern, and if there are any edgings or other factors I have to take into account while working.

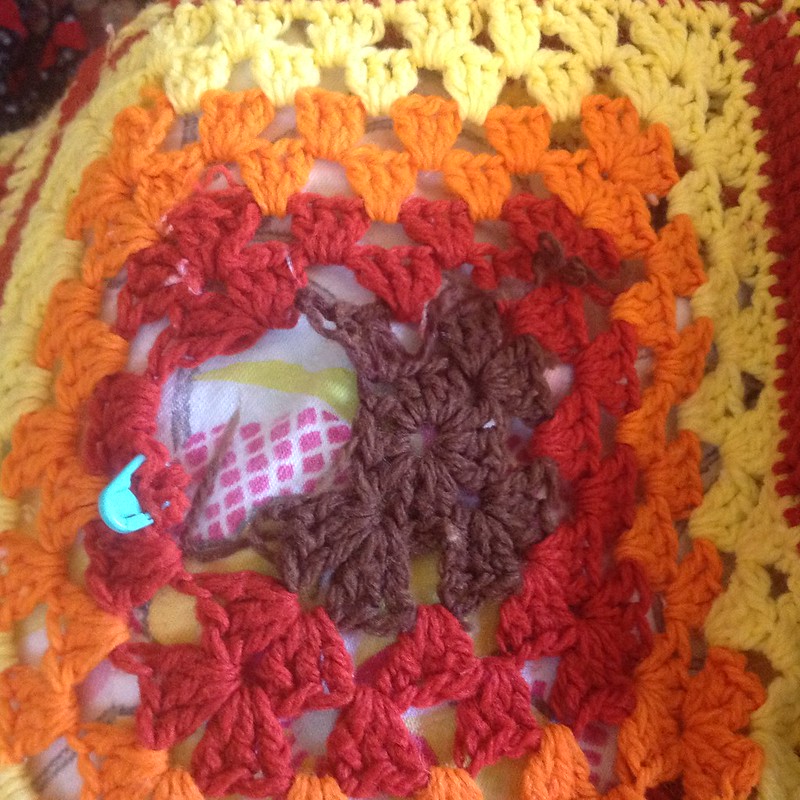
Great photo with a number. The ruler provides a lot of detail for me: I can tell the size of the yarn and how big the hole is. The hole is filling enough of the frame that I can zoom in to look at how the fibers are worn away (ie: frayed, cut, ragged).

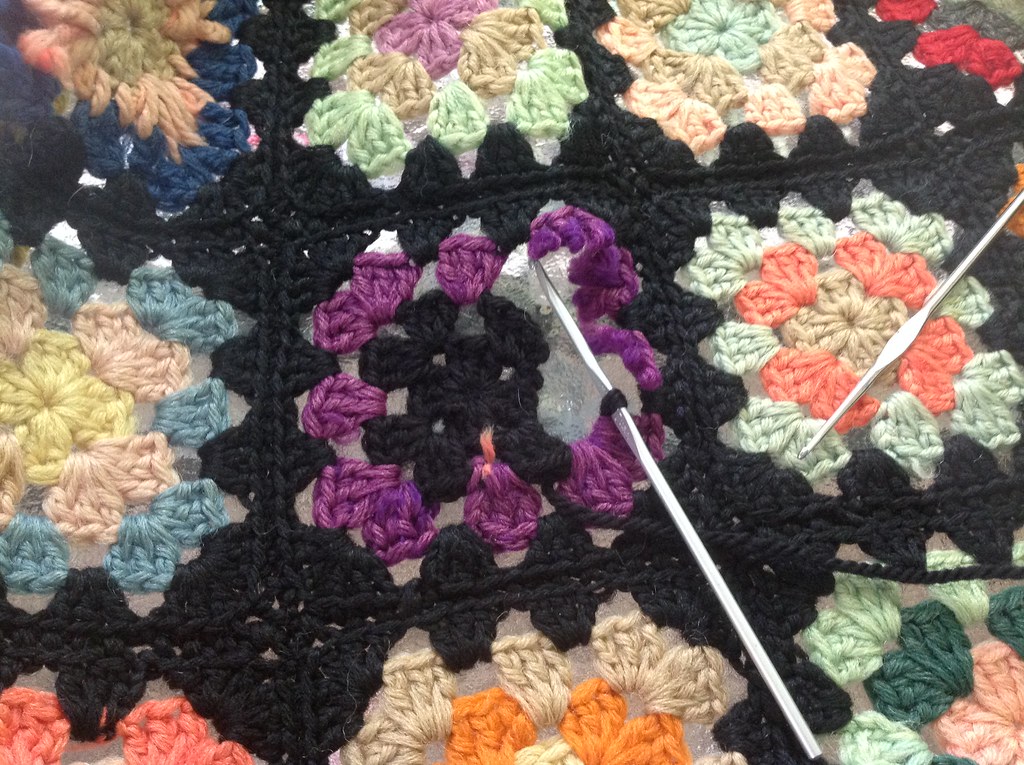
Again, the ruler is super helpful. I can also tell the customer had their hands on either side stretching the fabric slightly so I could see everything.

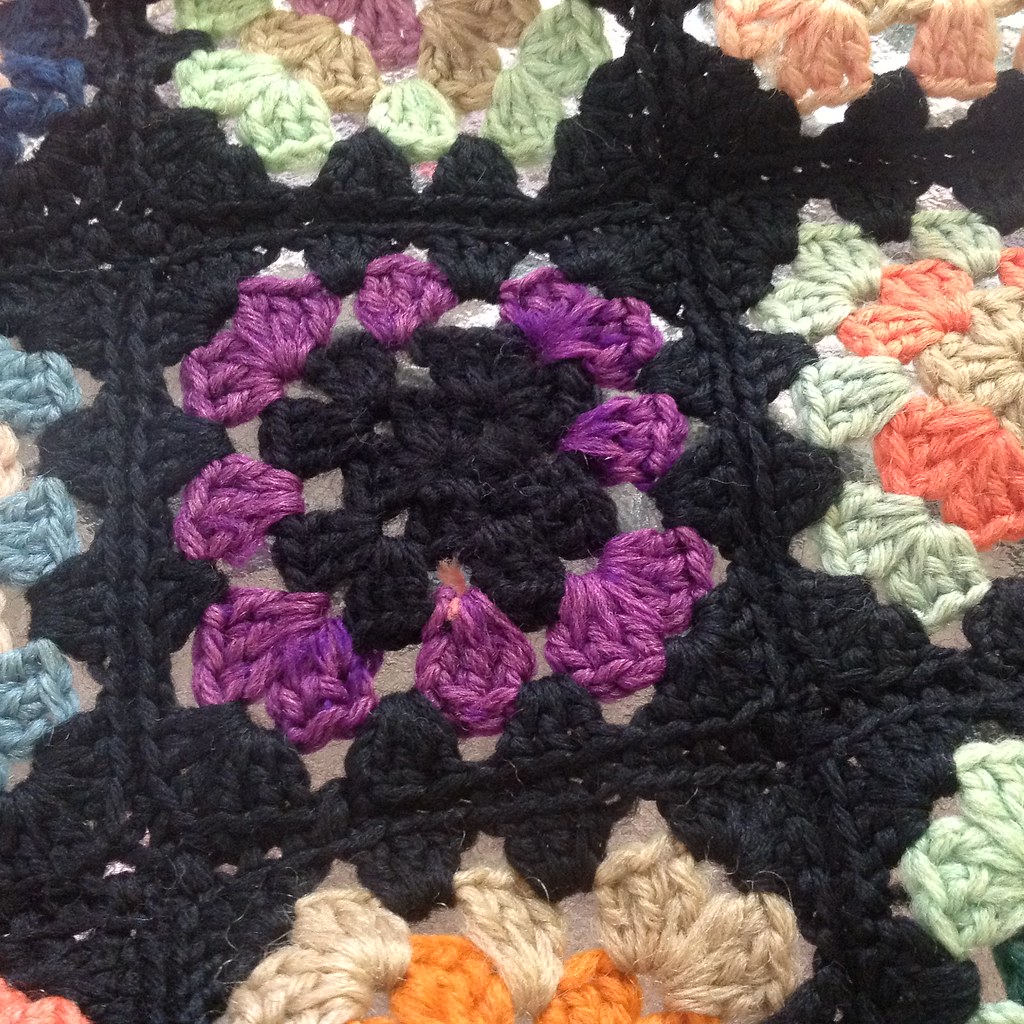
So helpful to have number 3 and 4, which are close together, numbered! In cases where holes are close together, the location of the holes can impact how I approach the repairs, so it’s helpful to see that relational information.

Here the hole was small enough that I couldn’t see it in the overall picture, but can see it here. It was so helpful!


One of the other things this client did was mark each hole with a piece of string. This really saves both of us time. While sometimes people don’t realize there is a hole that I catch, the time it takes for me to find holes that the client already knows about is time I could use on doing repairs. Ultimately it saves us both time, and in the end, the client money.

Got a piece you’d like me to look at? Now that you have a sense of what I’m looking for, head over to Let’s Connect, and get the conversation started.

Mending a Midwest Inspried Crochet Afghan

This midwest inspried afghan had a lot of damage done to it over the years, and the owner contacted me about doing some repairs and mending to bring it back up to shipshape! This was an interesting piece – each row was done through the back loop (hence the distinct ridges, and each row the yarn was cut on the end, resulting in the creator only ever going from right to left when working on it.  The cut ends became part of the fringe.

It did make the repairs a lot easier to do, as I didn’t need to flip the blanket over for each row. Working through the back loop does mean that the last row invoves a lot of sewing, though.

The two holes right above the the black line were so close together it made more sense to pull out the yarn between them and work them as one large hole. I decided to tackle that first.

To keep track of each stitch, I used locking stitch markers to hold each leg of the single crochet together.  This will help when I reweave the last row. 

Nearly done! After working each of the rows, I’m finishing up by joining together the last row. I had to take out the black row later in the process as it had more damage to it than I realized.

Finally Done!

Now I’ve got everything worked up and the ends woven in. I mark each area of repair with a piece of yarn, so the repairs are easier to find. When the clients get the repaired piece they can take the markers out.

See that the stitches look a little more lively where I’ve done the repairs? This will improve as the piece gets used, and the newer stitches gain some wear.

Now I’m tackling the repair that is further up in the blanket. You’ll notice there’s the larger hole, and to the left, another smaller hole. It made sense in this case to also pull out and combine the holes. The yarn in between the two holes was worn away enough that I was concerned about its stablility.

As in many repairs, this is a slow process of just adding the new yarn to the old, crocheting across the row, and then sewing and reweaving the old to the new.  What you can’t see on the backside is all the ends I still need to weave in.

And now we’re at the end: the hole is closed up and the ends are woven in.  A bit of yarn to mark the spot.  Now it’s time for this afghan to have a quick wash before it leaves to go back to its owner.

Recent Repair of a Knit Afghan

Now that I’m getting back into the swing of things, I wanted to document a unique repair that I worked on.  This 52-year old afghan was in need of some TLC before it got handed off to the next generation.  Working with this piece was a true pleasure, with the yarn in remarkably good condition for it’s age.  The afghan was a huge ripple pattern, with 9 panels joined together by intarsia.

INTARSIA. Think about that… it wasn’t seamed.  It was 9 balls of yarn that were worked on at the same time across the blanket.

But back to the repair!  There were several holes – mostly along the edge where ends had worked loose, but also one spot in the center of the piece.

[Read more…]

Restoring Harmony to a Household with a Crochet Repair

I had a client get in touch with me a couple of weeks ago.  In my client’s words the situation was this:

I got your name from the local yarn store.  I have a blanket my wife made for my daughter.  My daughter’s dog put a hole in it (see photos) and now I need a repair to restore peace and civility to my family.  Is this something you could do (I hope)?

Clearly I had to help!

IMG_20170427_151351804

The hole was oriented across two of the different colors in the blanket, spanning 5-6 rows, depending on how you want to count it.  On a big plus, the person who crocheted the blanket had kept all the yarn that was leftover, giving me plenty to work with when making the repairs – a true luxury! I was able to dive into the repairs right away.

IMG_20170427_162743653_HDR

In most cases it’s better to make the hole bigger to make the repair, as long as you have a good amount of yarn to work with.  This way you aren’t working into damaged yarn, and you have enough of the ends to weave in.  Here, I’ve already worked the first row of the repair.  I like to pin my ends out of the way using locking stitch markers.  Because this was worked in rows and turned, I flip the entire blanket each time I repair a row, to work it in the direction of the repairs.  Re-crocheting each row isn’t the tricky part.  The tricky part is the last row when you have to connect the old rows with the new.  You’ll see I’m using stitch markers to hold the base of each of the half-double crochets that have been worked.


IMG_20170502_151107808_HDR

After working a couple of rows normally, it’s time to close up the hole and reconnect the old stitches to the new.  This takes some real patience, as each row you need to crochet a stitch, then take a needle and sew together the newly created stitch through the one above it.  I’m finding that the final row sometimes takes as much time as the entire rest of the repair, depending on how big the hole is!

IMG_20170502_151910461

Getting to the end with all the tools I use in play.  A smaller crochet hook for maneuvering things right where I want them, and the larger crochet hook so I can match gauge.

At this point Mr. Turtle wanders through and asks what I’m doing.  “I’m restoring peace and civility to a client’s home,” was my response.


IMG_20170502_152906802

Finally finished weaving things together!  I was so pleased with how the repairs came out!


IMG_20170502_155002822

Now it’s time to finish weaving in the ends and this piece can go back to its owner.


All the Handknits!

I’ve had a number of people asking me if I’ve knit a lot of things for Little Turtle, or if I was planning to.  Truth is, other than my Shamrock Dress, there hasn’t been much knitting on my behalf for the baby.

I’m fortunate, though, in that I have a community around me of crafty people who do knit and crochet, and have made our future child some lovely gifts.  I thought I’d share a few of them!

The first one has a bit of a story – I’m part of a stitching group that meets in Ashland every Monday night.  They’re a great group of ladies, and it’s always one of the highlights of my week getting to meet and catch up with them.  On Monday evening I walked into the room, running slightly late, to a big surprise.

There was cake and decorations, and , much to my unexpected joy, was a gift beyond words.  The ladies of the group had made Little Turtle a blanket – squares filled with elephants and bunnies, trains and boats, flowers and butterflies.  It was an amazing show of joy and anticipation and love.

26363876004_c892e70f80_c

I’m finding that it is more than a little humbling to have someone craft for you.  When someone makes you a blanket or a community makes you an object, I know how much it means.  I know how much time goes into working on something, I know how much thought and work goes into each motion.  The person carries that item around with them for weeks, snatching time between other tasks, in the evening before bed or while waiting in the car.  There’s a message that you’re worth that time to them – you’re worth the effort of setting aside those minutes to make something for you.

I have another friend, who’ll I just call L (since I don’t have permission to use her full name), who I’ve known for the last 5 years.  We struggle with some of the same faults in our personalities – we can both sometimes have trouble with boundaries and we’ve struggled with our weight.  She’s a big spinner and knitter, and when we get together it’s like we’re both 5 years old again.  She also knit a blanket for Little Turtle.

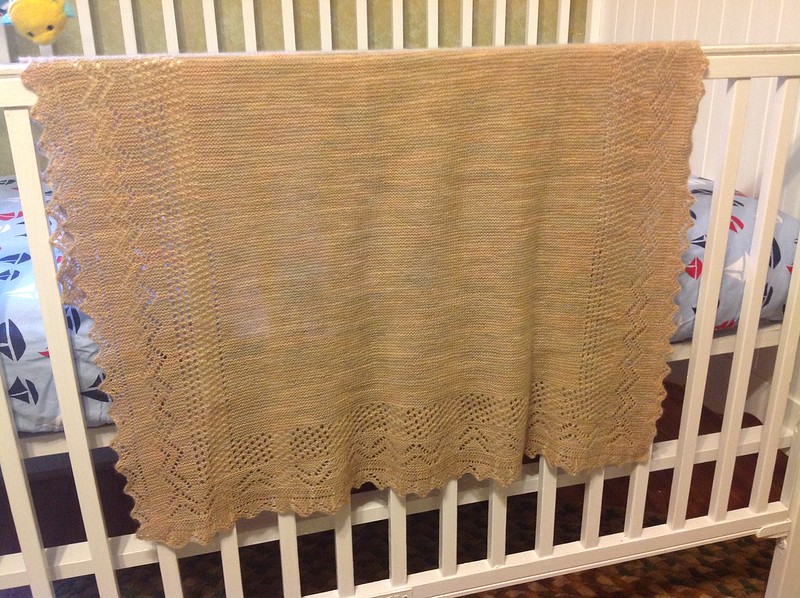
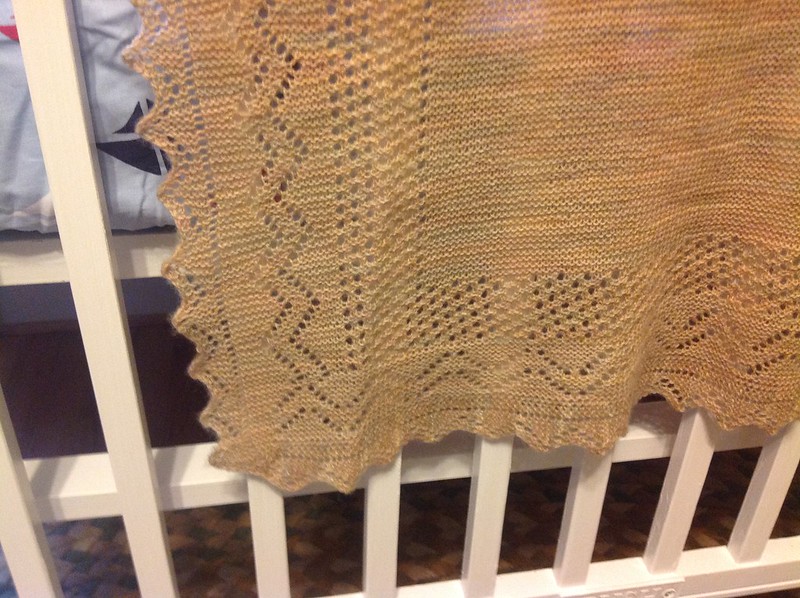
Her blanket is different than the first blanket as night and day.  For one, this is made by one knitter’s hands.  It’s a wool and cashmere blend, as light as a feather and softer than my cats.  I’ve picked it up and held it to my face multiple times.  It’s knit in fine, fine yarn.  It’s also one of the reasons I tell people not to discount garter as being elegant.  Many people associate garter stitch as being more rustic, and perhaps even a little basic.  I can understand why as it’s often used in sturdy garments and in baby wear.

But here the lace is as fine as the yarn, subtle and stunning.  The yarn actually shares a name with L’s dog, Gracie.  The colors are subtle and more mature.  This blanket isn’t in a yarn that’s superwash, that’s meant to be thrown in the laundry when it has spit-up on it.  This is a christening blanket, that then becomes the nursing blanket you bring to church or synagog.  Later it may become a shawl or a treasured heirloom for the child.  Still, the message is the same: I thought of you and your child.  Here are my prayers and well wishes, my hope for the new life to come.

Again, so humbling.

The next two blankets are also from close friends.

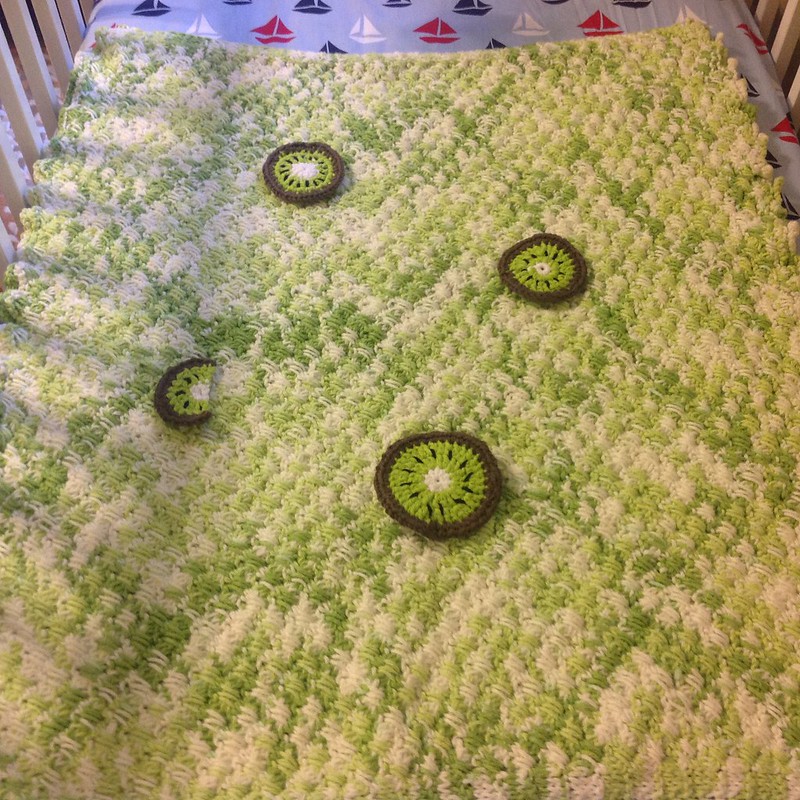
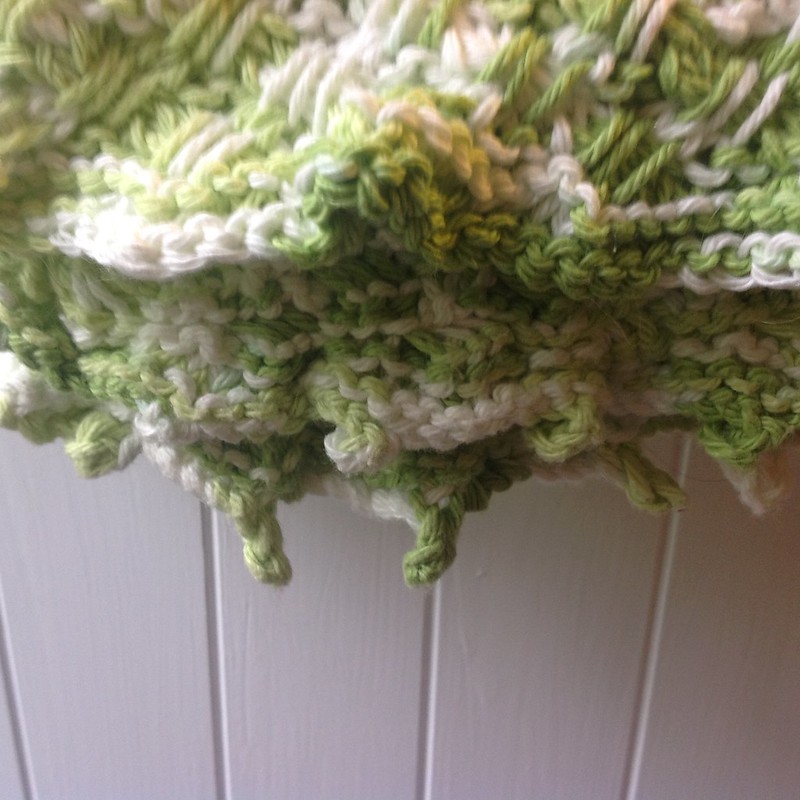
This blanket was made by my workout buddy and altogether closest friend in the Richmond area, Krista.  It’s made as a nod to Little Turtle’s nickname before we decided on her real name.  Mr. Turtle and I called the babe Kiwi, after one of the fruits she was the size of in the first trimester, and somehow it stuck. (It may well also be because of how many kiwi’s I’ve eaten over the course of this pregnancy).  This is a rough-and-tumble blanket, made from a sturdy knit stitch with a fun little border.  It’s cotton, easily washable and it holds up to wear and tear.  This is the blanket for taking outside (grass stains will blend in!) and throwing into the car.  Krista, working with kids, knows the type of blanket needed for an active child, which is what I’m sure Little Turtle will be!

The last one is from my high-school friend Jess, who is also expecting a baby.  Her knit ripple blanket seems like the end of a perfect quintet – this is a blanket meant for snuggling under on cold winter day, the ripples and texture providing extra warmth.  Almost the same size as the blanket from my knitting group, it’s knitted in a worsted yarn, so is a little thicker and sturdier – the difference between spring and true winter.  I love the vibrant purples!


Repair and Restoration: Behind the Scenes

Last Thursday I had a lovely surprise: Jeanne Huber, a reporter in the Washington Post, quoted me heavily in answer to a question about repairing an afghan.  She had been asked a question: was there a way to get the holes in her afghan repaired?  Huber called Fibre Space (one of the yarn stores I often teach at), who in turn recommended her to me.  Huber had gotten in touch with me on a Friday afternoon, and between packing up to leave for a long weekend, I chatted to her on the phone about how I do repair.

Huber did a lovely job with the article, taking my rambling replies and distilling them into the pertinent information.  As a result, I’ve been able to chat with a number of people looking to have family pieces repaired.

Still, it left me realizing that there’s a bit of mystery to what I do, and I wanted to expand a little upon the article.

20479758521_1a7f106415_b

Blanket in the process of being repaired

How I Approach Repair Work

When someone gets in touch with me looking to get an item fixed, I try and have a dialogue with the customer about their goals.  What is it they want from the repair?  What would be the ideal results for them?  Are they looking to have an item repaired so they can use it further or are they looking to have the holes fixed so that the problem doesn’t get worse?  Are they on a budget?   Are they looking for the item to look pristine or are they willing to allow the repair to become part of the character of the object?

Each person has a different idea of what “fixed” means.

21831892331_7742a4b943_b
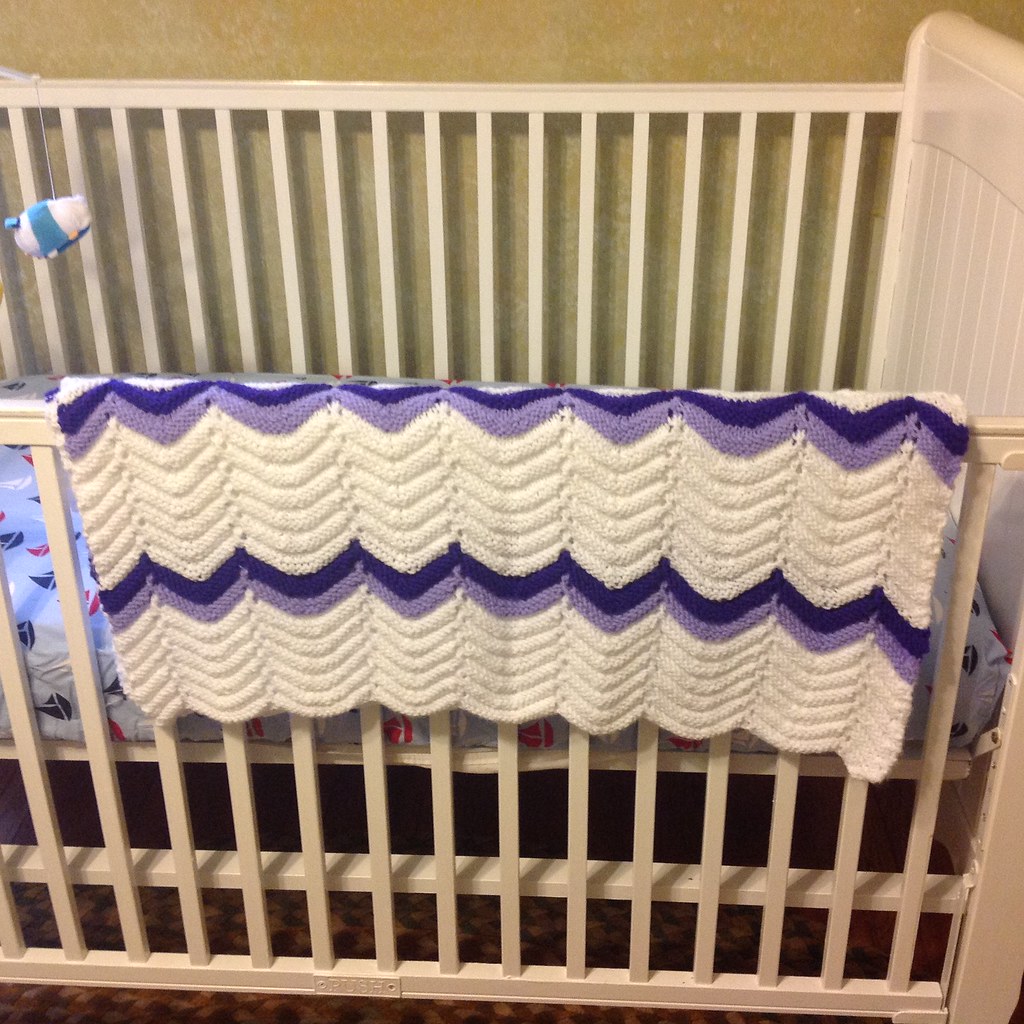
Meanwhile, I’m also looking at the practical part of the project.  How damaged is the item?  How widespread is the wear?  Would attempting to fix the item hurt things further?  When I’m looking into this I’m often learning about the history of the item: if it was stored in a place where a lot of sunlight, heat or humidity could get to it, the fibers may be damaged.  Are the places where wear is showing from use – such as worn out fingers on mittens, or a handle on a bag becoming worn, or because of a different factor?  Often the answers form the type of repairs I can do – mittens that are going to get further wear over each winter are going to receive different treatment than a Christmas stocking that’s taken out once a year.

Based on the customer’s feedback, I come back with a number of options.

Sometimes this means the repairs are visible repairs: so that the owners can show where the original piece is, and where the repairs are.  Sometimes this means we transform a piece: adding a cute embroidered kitten over an elbow patch.  Other times the repairs are nearly invisible as I splice new yarn into the old.

Just as I put time and thought into repairing damaged items, so can you put the time and thought into what you want from your repair.  Worried that a piece of yours might need help?  Check out my post on what to look for.  Already decided to have your piece fixed?  Get in touch with me through my finishing form– I’d love to start our conversation!

3 Essential Rules to Work on Granny Square Crochet Blankets

Tomorrow morning I’ll be winging off our a week long vacation with my family in Alaska, and then I’ll return to quickly packing up for three weeks of summer camps in Rockville, MD.  So I’ve been trying to wrap up a few long-term finishing projects.

Sometime soon I’m going to write a post on how to properly finish off a granny-square blanket so it doesn’t fall apart in 30 years. (Or really, any blanket for that matter.)  Still, it seems like all I’ve been doing lately is repairing granny squares.

It’s meditative work at the best of times, and dead boring at the worst.  I normally like to put on a book-tape or podcast and crank out the repairs.  This time around I took a few photos to share, and decided to add my 3 rules of working on granny square blankets.

Granny Square blanket with split seams

The first blanket, featured above, had two major places it was broken: the last row of the square didn’t have its ends woven in, and I needed to rework the last row and reattach.

Rule #1: Properly weaving in ends is essential in a blanket that you want to last.  Crocheting over them doesn’t cut it.

Repairing hole in Granny Square Blanket

Repairing hole in Granny Square Blanket

As a corollary to Rule #1, the closer an end is to the center, the more stress it takes.  REALLY weave in the ends at the center of a blanket.

Which brings me to my next rule.

Rule #2: include care instructions when you give a blanket to someone.  Don’t expect them to know how to care for the blanket and the fibers!

Let me show you some examples:

Center of granny square lost of love

Center of granny square lost of love

Slowly adding back the center of the Granny Square

Slowly adding back the center of the Granny Square

Granny square center replaced!

Granny square center replaced!

All the black that's  not a

All the black that’s not a “frame” for the granny square is replaced & repaired.

The blanket above is one that’s been well loved, but also subjected to light and heat damage.  The fibers are very very delicate, and I’m working to repair the largest holes so this can be gently loved again. Still, proper care of textiles can extend their life a hundredfold.

Finally, my last rule.

Rule #3: REALLY, REALLY weave in your ends.  Seriously.  Nearly 80% of the granny square repairs I do is in places where they ends have come unraveled, instead of the fibers degrading.  Weave in the ends.  Use a sharp needle.  Skim them in.

Are there things you can think of to extend the life of your afghans?  What are they?

4 Warning Signs Your Handmade Afghan is Falling Apart

My business has many arms – my teaching, pattern writing, and more recently, finishing.  Normally finishing involves piecing together sweaters or blocking shawls, but sometimes I get another type of request.  Sometimes I get requests to do repairs on well loved a
fghans and blankets that are lovingly knitted or crochet.  Many times I’m able to fix things before they get too bad, but sometimes I have to be the person saying, “I’m sorry, but there is no way to fix your family heirloom.”  This is a terrible thing to say, and so I have a list of things to look for to know when your afghan is in need of repair, before it gets irreparable.

  • At the First Sign of Trouble, seek help.  There’s an old adage that says, “A stitch in time saves 9.”  And it is so true – making repairs before they happen is the best way to prevent tears, rips and holes.  Look for weak spots in your knitting or crochet – where the thread is getting thin or wispy.  These are places where holes will form.  Find someone to help you retrace the stitches and reinforce the work.
  • Pulls or loose threads.  Sometimes yarn that has been carefully woven in works its way loose, or gets caught and creates a pull or snag.  Don’t panic! If the thread is not broken, just stretched and out of the weave of the fabric, carefully pull it in different directions, and see if you can ease it back into place.  If not, see if you can find someone (like a finisher or a more experienced knitter or crocheter, that can help you work the yarn back into the stitch.

  • Seams coming undone. So many crochet (and even knit) afghans have their seams come undone.  One of my very first repairs to a blanket was my father’s well-loved afghan, made in long strips of knitting and seamed together.  If a seam comes undone, don’t panic.  Take a bit of matching yarn or thread, and carefully seam the edges back together, using a ladder stitch or running stitch.
  • The center of motifs are a common place I see in need of repair.  Either because the original creator didn’t secure the ends enough, or just because of stress, this can be a common cause for problems.  If you can, try to pick up as many of the loose loops and put them on a stitch older or locking stitch marker, to prevent further unraveling. This is one repair I’d say, if you can, to get a professional to do, as it takes a deft touch and a good understanding of how stitches work to get it back to matching the others.
The key to all of these problems is if they are caught early, they can be fairly painless repairs.  If you let the problem go, the worse things get, and the more likely that the afghan will need to be reconstructed or have more extensive repairs.Have you ever had to repair a project?  Tell me about it on twitter or facebook.  Looking to have your own repaired?  Get in touch with me through my finishing form!