MENU

Welcome Marly Fans!

Stained Glass Rug

The right and wrong sides of Stained Glass Rug

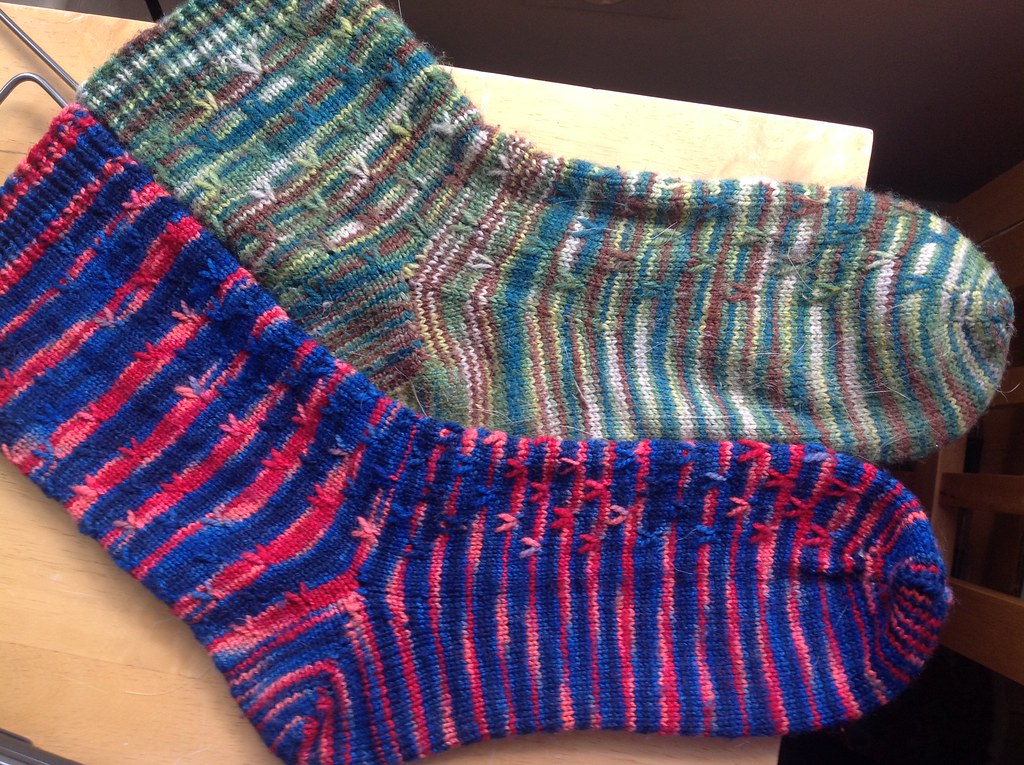
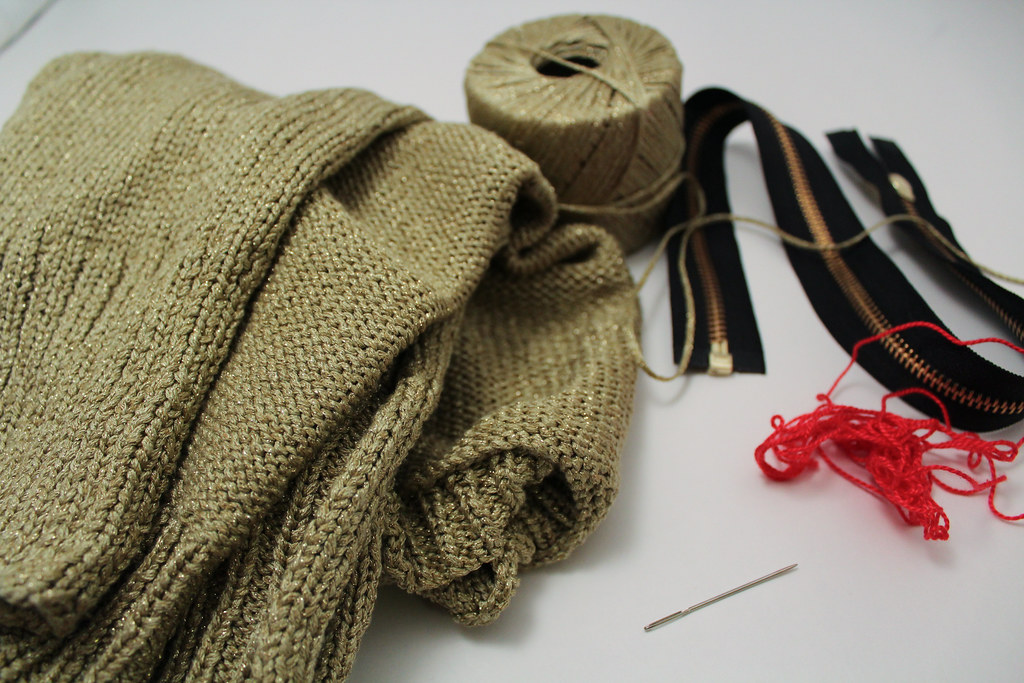
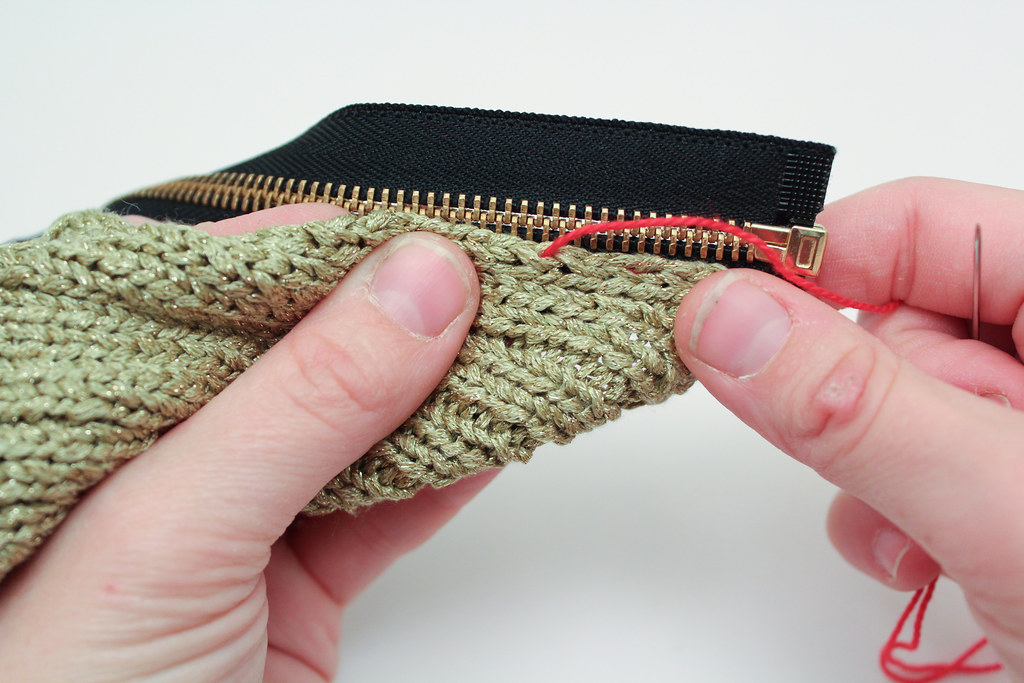
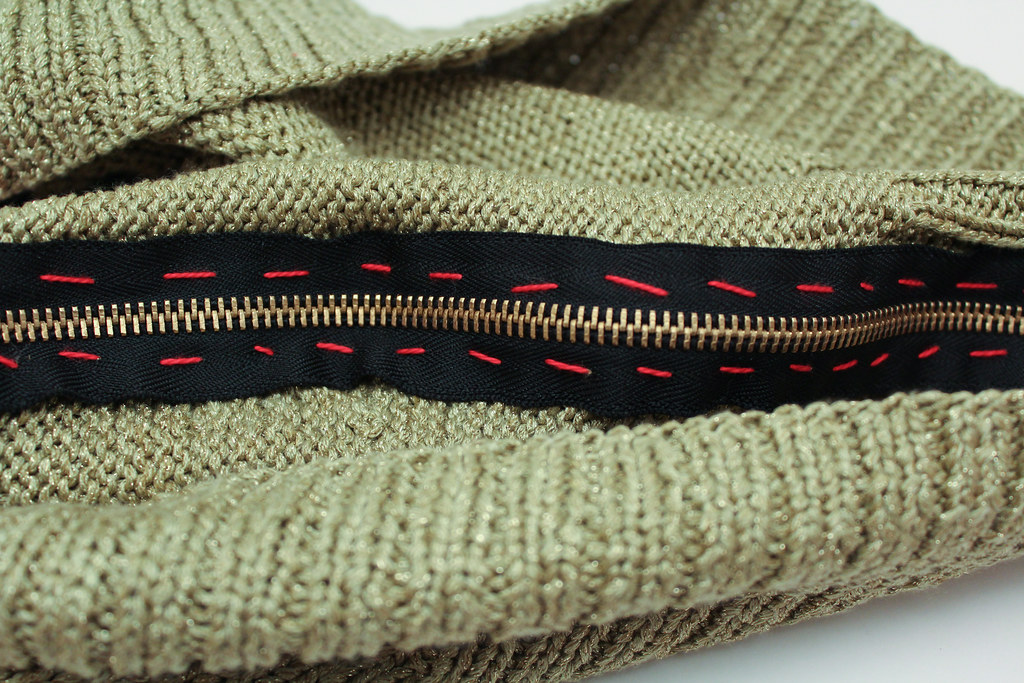
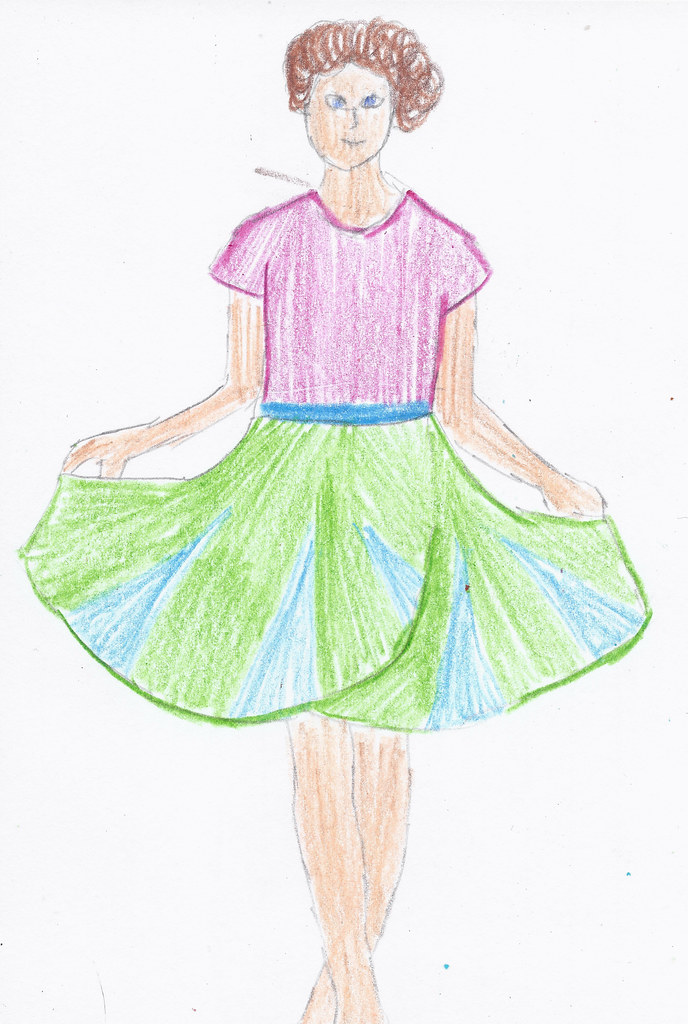
If you’re coming here from Marly Bird’s The Yarn Thing, welcome!  I’d love to have you sign up for my newsletter or follow me on Facebook or Twitter.  Feel free to read some of my previous blog posts!  If you enjoy tutorials, check out How to Set a Zipper in a Sweater.  If you like a behind-the-scenes look at designing, check out some of my posts on my designs in Crochetscene.  And if you’d like to revisit some of my oldest sock designs, check out a side by side comparison of two older designs.

If you’re already a regular… have you listened to my interview with Marly Bird on her podcast?  We just wrapped the interview up!  You can listen on  BlogTalk Radio.


Tomorrow I’ll give you a glimpse into some of the things I’ve been working on lately!

Tomorrow I’m Appearing On The Yarn Thing!

Marly-Bird-Podcast

Tomorrow I’ll be appearing on Marly Bird’s The Yarn Thing Podcast.  I’m terribly excited: Marly is an incredibly smart businesswoman and very genuine with an infectious laugh.  I’ve only gotten to meet her a couple of times – I’m so enthused to be able to chat with her on her podcast!

If you’ve never listened to a podcast before, they’re terribly fun.  Basically radio shows for the internet, there’s a variety of shows I love.  The Yarn Thing is one of the ones I listen to when I need to get some serious stitchin’ done.

Lest you think the show is all about yarn, knitting and crocheting, fear not – Marly is well known for arranging some killer prizes to give away during the show.

The Yarn Thing podcast runs live at 10 AM Mountain Time, but you can listen even after the podcast is done.  The link is HERE.

I’d love to hear what you think of the podcast after the fact.  Shoot me an email, comment, or send me a tweet or facebook message!

Isis Wings and Totoro: Old and New Handknit Socks

Yesterday I got a welcome package in the mail from Three Irish Girls: a pair of handknit socks.  Now, these weren’t just any two pairs of socks.  This pair of socks were the samples made for Three Irish Girls’ back in the day when I designed Totoro and Isis wings for them – two of the very first patterns I ever designed for them.  Seeing these two pairs of socks was like meeting old friends you didn’t know you had – both these samples were made by hired knitters, and sent straight to TIG headquarters.

Meanwhile, since I was new to the designing, I also created my own pairs of the socks, testing out the idea before I wrote it into a pattern.

I thought it would be interesting to compare the two samples side-by-side.

Two handknit socks, both the same pattern, one heavily worn and darned, the other new.

Isis Wings: Old Pair on Bottom, New (to me) pair on Top

Here you see Isis Wings, in both variations.  First, note my pair, worn with many washings and faded to grey from a sit in the sun.  There’s a stitch I noticed I need to mend marked by a stitch marker; the bottom is more darn than original sock.  The yarn I made my sample for was a little larger than the final yarn used for Isis Wings – the motif on mine ends up looking more open and bold.  For the final Isis wings I decided to set the heel decreases in a little, and I created a little bit of rounder toe.  The ribbing for the cuff on the final version is shorter, and I did something simpler and less distinctive than the 2×2 ribbing on my sample.  You might notice that one of my Isis Wings socks is taller than the other: I’ve mentioned before how I forgot a repeat on one of my socks.

Two handknit socks, same pattern, older one faded, newer one still vibrant.

Totoro; Old Pattern on Top, New Pattern on Bottom.

On Totoro the differences are a little more subtle.  The patterning with the slipped stitch V is the same; I changed the heel from a riverbed heel to a short row heel.  At the time, I couldn’t figure out how to write a Riverbed heel and grade it the way I wanted.  I added more repeats to the top on the final version.  Again, I couldn’t figure out how to wrap the pattern around the leg and grade it for different sizes, so the cuff of the sock has a column of missing V’s up each side.  If I were to go back, I’d either re-grade the pattern, or add some other feature up the leg on the side so it doesn’t look so empty.

Mitts and Crochet: New Classes at Untangled Purls

Starting next week I’ve got a great lineup of Fall classes at Untangled Purls, in Fredericksburg, VA.  I’m looking forward to the opportunity to teach at Untangled Purls: Most of my classes for the last year (with the exception of my camps) have been workshop based – that is, one and done.

I’ve missed the camaraderie and relationship that builds with a class when you teach week after week: you get to know your students better, and you get to watch students progress in a way that is different than workshops.  I wanted to highlight two of the classes I’ll be teaching at Untangled Purls.

Photocredit: © Ambah O'Brien

Photocredit: © Ambah O’Brien

Beginning Stranded Knitting is based of of a wonderful pattern called Maroo Mitts by Ambah.  This is a great introductory project to stranded knitting, and I hope you might be able to join me!  Learn more about the class here.


Photocredit: Freshstitches

Photocredit: Freshstitches

Crochet Softies is based around four of Stacey Trock’s FreshStitches patterns: Kepler the Lion, Nelson the Owl, Flavia the Unicorn and Cliff the Brontosaurus.  I love these patterns because they’re a great next step for students who have learned how to crochet, but haven’t quite mastered reading a pattern or working in the round.  I have so much fun helping students create these fun stuffed animals: and they make perfect gifts!  You can find out more about the class here!

Talking with Marian Schembari

This morning I spent some time talking to Marian Schembari, a Davidson College classmate of mine.  Marian’s been a person I’ve enjoyed following since we graduated: from her facebook ad that got her a job in publishing, to her dynamic transition from a Couchsurfer user to employee, and finally to the freelance career she has today – she’s always doing something smart and interesting.  Oftentimes I’ve drawn parallels between the tracks of our careers – as we’ve both struggled to figure out what to do when the career we thought we wanted to do didn’t quite work.  While I realized that I wasn’t suited to academia and an office job, Marian realized that publishing wasn’t quite a good fit for her.  In the years since 2005 (when we were across the other in our freshman dorms), I’ve went from being a little in awe of Marian (she had a great roommate and a great sense of style and an amazing writing voice) to being respectful of her as a businesswoman – one who has managed to make several right-turns in her career and still remain passionate and articulate and true-to-herself.

So I was curious as I sat down to chat with Marian over Skype this morning.  She had put out a call on Facebook, wanting to talk to women who ran small businesses, and I figured it would be a fun way to say hello and reconnect.  It’s funny – despite never being good friends in college (probably due to me often just feeling/being awkward), we managed to chat for just under an hour about so many different things we had in common.

One of my goals each month this year was to call up and talk to someone I thought was neat or cool and just chat.  I’ve mentioned this before (especially on twitter).  The goal was a simple one: the job I have now, on an everyday basis, is a largely solitary one, and I wanted to reach out to people who I thought were neat and just connect.  Also, because I tend to have a fear of calling up people I don’t know, this was a way to work on that problem!  Think of it as establishing my own water-cooler.  I kept the rules loose – the chat could be in person or on the phone, and it didn’t have to really be for any reason other than I thought the person was nifty.  This mission has led to me establishing connections I didn’t think was possible, and even some young friendships.

Talking with Marian brought home why I started this project.  We were able to chat about how our Alma Mater has both been a boon (in friendships) and a frustration (our work-ethic is perhaps permanently warped).  Marian gave me some great ideas about how to talk and present myself online, and I told her a bit about my business and the fiber arts industry.  At one moment Marian shared her love of adult coloring books, and I reached just out of the frame to hold up my mug of colored pencils.  Laughing, Marian reached out of the video frame on her end, to show me a bunch of colored pencils – also in a coffee mug.

It also brought home several things I shouldn’t forget: that I need to remember to keep doing the things I love, in between the things that keeps a business running.

When was the last time you reached out to an old acquaintance?  How did it go?

Shenandoah Valley Fiber Festival!

Tomorrow morning I’ll be heading off to the Shenandoah Valley Fiber Festival – one of my favorite to teach at!  Last year was my first year teaching at the fairgrounds, and I loved every moment of it.  The staff are great; the venue is lovely, and the drive to Berryville is a pleasure.

Last year I was so busy teaching both days that I barely had time to breathe.  This time I’ve got a little more flexibility –  I’m teaching one class on Saturday afternoon, and another Sunday morning.  Mr. Turtle and I talked about going apple picking on the way home.

If you’ve never been to SVFF, it’s a great fiber festival for kids, and a feast for the eyes for stitchers.  Last year Mr. Turtle was fascinated by the sheep dog demos.

I was glad to see some of my favorite vendors.  When you do the fiber festival circuit, various vendors become your friends, and it’s good to see them again and catchup for a few minutes between sales or setting up.  If you go to the festival, go and look up Turtle Made – a company that makes the most clever turkish spindles.  Also check out Dragonfly Fibers – they’ve been the lovely sponsor of a few of my designs!

Meanwhile, I’ll be in the instructor tents doing what I do best, teaching my heart out.  This weekend we’ve got a reprise of a constant favorite, Duct Tape Dress Forms, and also a class on repairing handknits.  If you have a spare moment, keep an eye out for me at lunch, as I grab a quick bite and say hello to as many people as I can!

How to Set a Zipper in a Sweater

The rights have reverted back to me for a number of blog posts I did for Jordana Paige’s blog a few years ago, and I’ve begun re-posting them on occasion to have them on my own website, and so students can reference them.  This particular tutorial about setting a zipper into a sweater, I’ve updated and refreshed, but much of the technique remains the same.


Setting in a zipper is a process that takes time, patience, and a certain amount of willingness to fiddle.  Not everyone likes to do that, which is why so many of the finishing projects I do involve setting in zippers.  But if you’re willing to take the time, setting in a zipper can be very satisfying!

To set in a zipper you will need: a zipper, yarn to match the garment, yarn (or embroidery floss) in a contrasting color, a sewing needle (with a sharp point!), pins, and the 2 sides that you are attaching to the zipper.

a sweater, matching yarn, a zipper, needle and red embroidery floss are shown on a white background.

It’s helpful to have all your materials available!

Please note: When purchasing a zipper, make sure you get the correct type!  You don’t want a zipper for a bag, as it is attached together at both ends – you’d never be able to get your garment off!  Same thing with double ended zippers.  Take time to read the package and know what you are getting.  Also pay attention to length.  As I explain below, get the right size zipper, or a little longer.

The first thing I do is block the two fronts to the garment I’m attaching the zipper to.  Make sure the front is blocked to the correct measurements, and that your zipper will match those measurements, or be slightly longer.  If you need to, you can trim the top of the zipper to the length you want.  Make sure you use a file to eliminate any rough edges, and sew a new stopper so your zipper tab doesn’t come off.

Next, pin the zipper into place on the inside of the garment.  Make sure that you are not pulling or distorting the knit fabric – at all.  If you pull the fabric to stretch to the zipper, it can cause the zipper to pucker or wave.  After you’ve gotten things in place, I like to run a basting stitch along the zipper, as I don’t like to get poked with pins.  It also makes super-sure your zipper doesn’t shift around.

To do a basting stitch, take some waste yarn or thread, and use a running stitch, sewing the zipper to the fabric with big stitches.  When you’re done attaching the zipper, you can remove the basting stitch, so don’t worry if the basting stitch isn’t perfect.

Using a running stitch to baste the zipper to the fabric.


After I’ve finished basting (and this is another good reason to baste your work, because you can’t do this if the zipper is pinned), I check to make sure that the zipper can zip up and down without catching on any fabric.  Better to find this out now than after I’ve sewed everything together!  This is your opportunity to make any adjustments.

The basting stitch on the wrong side of your work.

Finally, you can sew the zipper to the piece.  Depending on the piece, sometimes I use the yarn the sweater was worked in.  Other times, if the yarn is delicate, loosely plied, or extremely fuzzy, I’ll use sewing thread in a color that is close to the color of the yarn.  Either way, I use the same technique.

Working from the back, I secure the yarn.  When I sew, I make sure that each time I’m going over only a single strand of yarn between two stitches.  Basically go into the purl bump if viewing from the back.  Mostly, I choose the space between the first and second stitches against the edge.

Working very slowly, I sew my way up one side, then up the other.  Be patient. Take your time. Check your work often.  Use small stitches.  Because the zipper is located at the front of the sweater, I’m super careful to make sure that my sewing doesn’t show.  Sometimes, if the fabric is wide, I’ll run a second set of stitches further out along the zipper band, so it doesn’t flop and lies nicely down.  You can see I did this from the picture below.

The zipper, sewn to the sweater with two rows of stitches.


When you’ve finished attaching the zipper to both sides of the fabric, I check my work.  Check again to make sure the zipper moves smoothly along the track.  Then, and only then, if I’m happy with what I’ve done do I remove the basting stitches.  Finally, weave in your ends.

Zipper in sweater


Crochetscene 2015: Riverbend Skirt

Riverbend is the final of the patterns I worked for Crochetscene 2015.  Like Bow Wrap and Crossed Arrow, I had a really good idea of this pattern long before I turned it into a proposal.  Unlike the other two, Riverbend’s genesis and maturing happened at a lot slower of rate.

Part of this was I was working on other projects, and part of it was wanting to let the genesis pattern have a bit of distance before I created something in the same vein.

Sketch for Riverbend

Riverbend became a design idea back when I was working on Victoria’s Riflebird.  Victoria’s Rifebird is a wrap that should be familiar – it has very similar shaping to Riverbend!  You could say they are siblings.  Once I had finished Victoria’s Riflebird, but before I wove in the ends, Sweetness, one of the girls I nannied at the time, wrapped the wrap around her waist and gave a swirl.  I realized then that a similar shape would work really well with a skirt – with some minor adjustments!

I love the idea of wrap skirts.  I like the versatility and the sizing flexibility.  When I was a kid one of my favorite skirts for about a year was a wrap skirt made of two layers of fabric.  Now, I have another wrap skirt that I wear at least once a week in the summer and the fall.  Riverbend is directly influenced by both those skirts.

Riverbend is also defined by the finishing details of this skirt: there’s a bold fun button in he same color of the wedges (a vintage one harvested from my great-grandmother’s collection), and another vintage button in the main color on the inside.

Riverbend, all finished and on one of my new models – this one being more full-hipped.

Riverbend is a wrap skirt, and sizing makes it super flexible.  The subtle a-line of the skirt makes it great in multiple colors for a summery cover-up for every-day skirt, or do it in solid colors for a more professional look.  The distinctive wedges are created using my special technique to work crochet short rows.  (Keep an eye out, there’s a class on that with Interweave coming soon!)  The ribbed fabric gives it a bit of a sexy silhouette – it hugs the hips just a bit before flaring out.  Unlike my original sketch, which had the skirt looking a lot more full, math and practicality made the finished project a little bit less flared.

Riverbend, on my model that’s a bit less full-hipped, you can see the difference in the way the skirt hangs.

Riverbend is currently available in the newest issue of Crochetscene 2015.  You can check out it, and my other three patterns, in the issue!  Also check out my Ravelry page, where you can read my personal notes and the stats about the time I spent on this project!

This Fall: Teaching at Shenandoah Valley Fiber Festival

Shenandoah Valley Fiber Festival

This will be my second year at this lovely and fun location, located in Central Virginia!  If you’ve never been to this fiber festival, it’s small and personable and has some great vendors, as well as classes.  I’ll be offering:Duct Tape Dress Form

Finishing Knitted Garments
Ooops! Repairing Your Knits
Make a Duct Tape Dress Form
Beginning Knit Repair
Crocheting with Beads

Click through to see more about the classes, as well as signup at the website.  Or just check out my new calendar – it’s a lot more spiffy, and it makes it easier to see classes!

Crochetscene 2015: Bow Wrap

Bow Wrap from Interweave Crochetscene 2015 by Jennifer Raymond

Photo Credit: Interweave/Harper Point Photography

My original sketch for the design proposal.

They say that copying is the highest form of flattery.  While I’m not quite sure that’s true, this piece is directly inspired by a cute little miniature wrap I saw on a small child last winter.  While I wouldn’t be surprised if the little girl’s version was more complicated, I immediately thought that I’d wear her wrap, in an adult size.  Bow Wrap was then put in my brain’s back pocket, until I submitted the idea to Crochetscene.

As I mentioned on Monday, when I was working on proposing these designs for Crochetscene, I was also coming off of working on a few projects in finer yarn, and I knew that I wanted something a little bit more sized up.  Bow Wrap is made holding two yarns together, but you could easily substitute for a bulkier yarn with similar results.  Holding the two yarns together creates a cushy, stretchy and warm ribbed fabric.  The ribbed fabric is created by working crochet through the back loop.

The “gather” is made in a contrast color, with a single yarn held together.  I toyed with the idea of creating another version of this, in a sparkly yarn or fastening some glittery pin over top of the gather, for some added class and interest.  Well, I may yet make a second version!

Bow Wrap from Crochetscene 2015

I love the look of the textured stitches, and the way the wrap drapes over the shoulders!

There’s two things I think that make Bow Wrap stand out as a project.  The first is simplicity: Bow Wrap is essentially made up of two squares – the magic happens in the seaming.


Bow Wrap by Jennifer Raymond

Wear over the neck and shoulders to keep out the chill!


The second thing I love about Bow Wrap is the styling options.  It can be worn like it’s featured in the magazine, but it can also be worn a few other ways!  I had fun taking pictures of a couple of different styling options.


Bow Wrap by Jennifer Raymond

Wear it like a traditional cowl, with the “gather” in the back

Bow Wrap can be found in the latest issue of Crochetscene 2015, or on Interweave’s website.  For more information and notes about my sample, you can read about it in my Bow Wrap pattern page.