MENU

Snowday, again.

We got about 5 or 6 inches of snow today.  Needless to say, everything was pretty much shut down.  Mr. Turtle and I stayed holed up in our apartment.  Mr. Turtle was recovering from a cold, and every time he coughed the cats got startled.  For once in my life (shockingly!) I was the preferred human to cuddle, which was a little awkward as I was working on an upcoming pattern.

At one point both cats were poured into my lap, a rather startling feat.

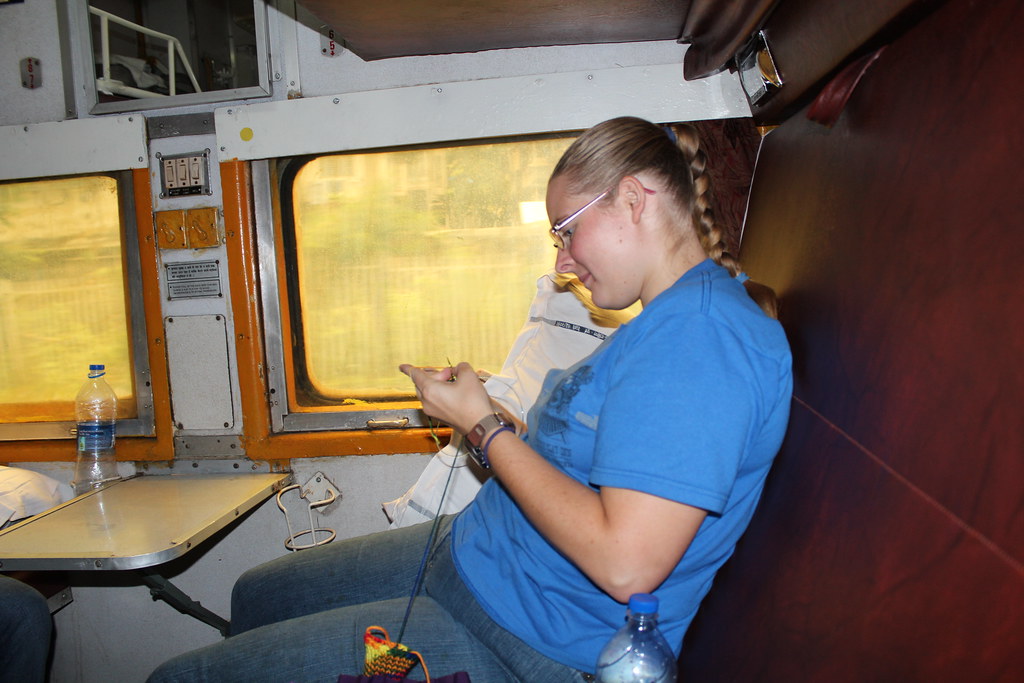
Michael snapped a picture.

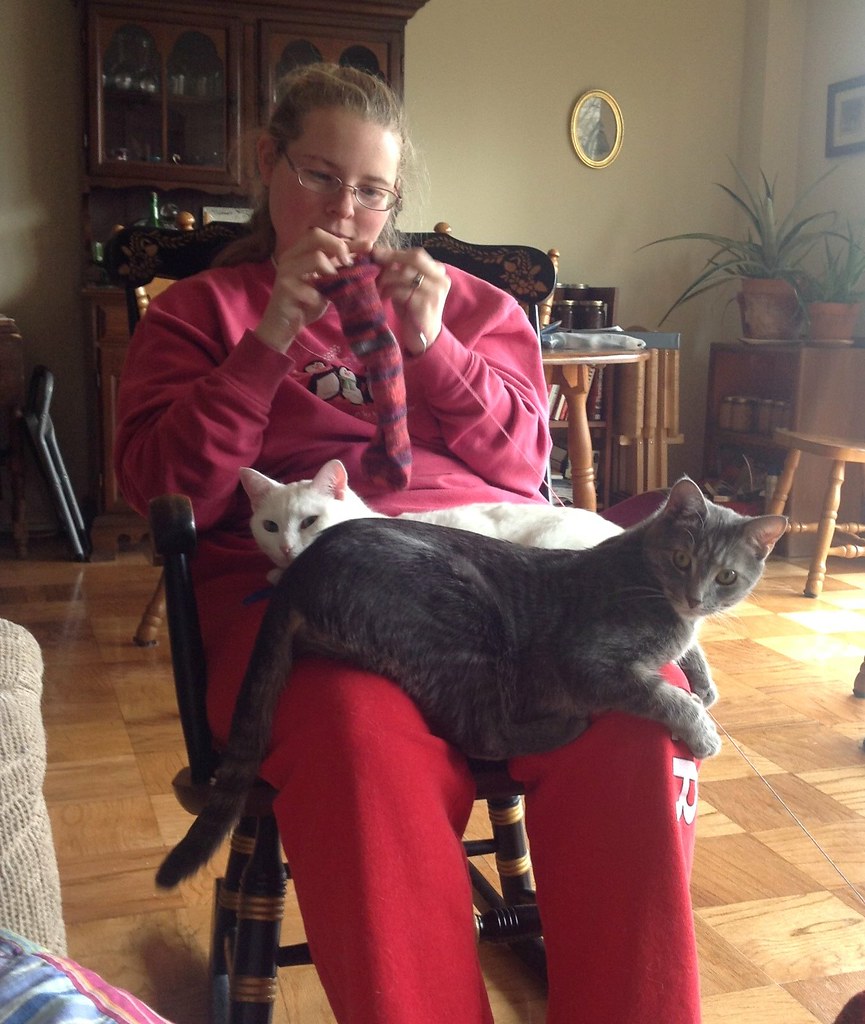
Me, lovely in my “Knitter” Sweatpants and Penguin Sweatshirt;
the cats, keeping my lap warm.

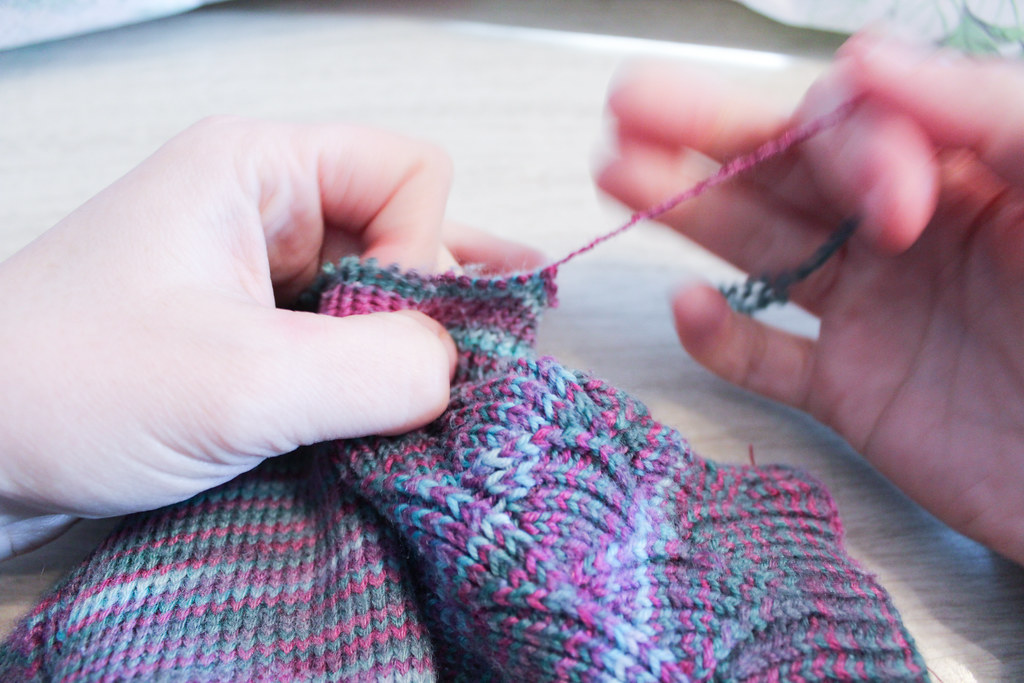
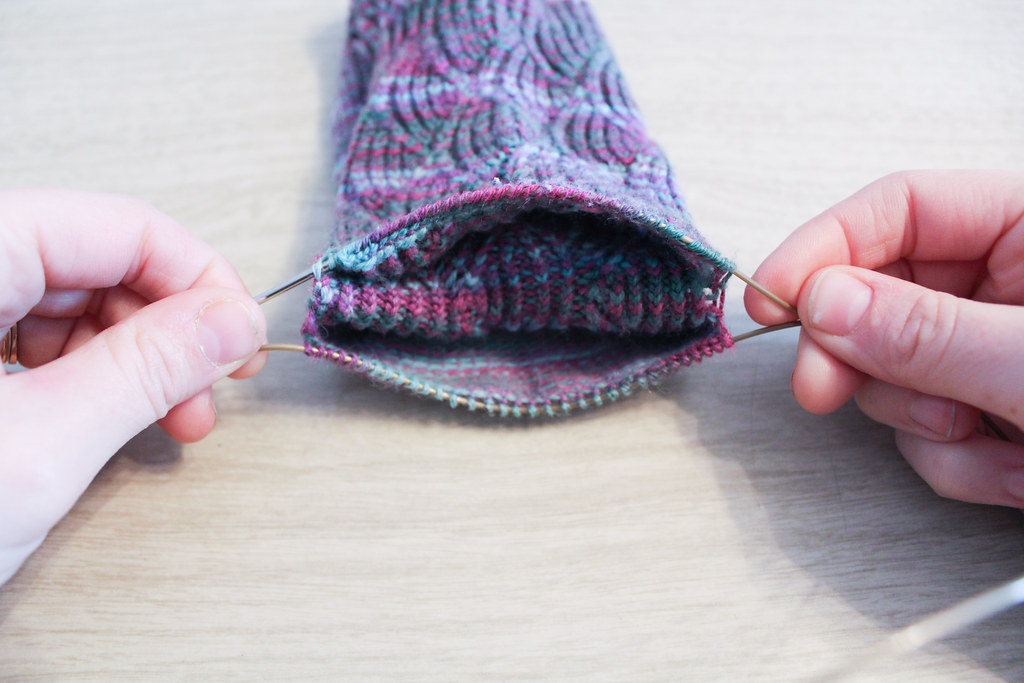
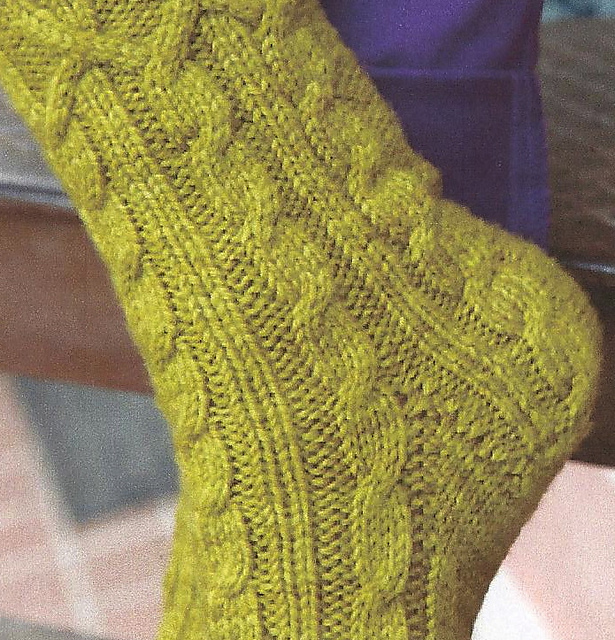
The pattern was giving me fits today.  It’s a new sock pattern, and the heel took three tries to get right.  It’s a perfect fit now, but I had to try out everything that didn’t work before I settled on a shape that worked.

Stay tuned – next week I’ll be announcing some exciting news!

I shrunk my socks in the wash – now what?

I’ve been winding down from a mad sprint that began shortly after Thanksgiving and wrapped up this past week.  It’s been several months of multiple deadlines every week, and staying on top of all the personal and professional obligations has been difficult, to say in the least.

For the first time in what feels like forever Mr. Turtle and I got chores done on Saturday instead of Sunday. It’s our habit to do grocery shopping and laundry on the weekend, and over the last few months laundry has been done on Monday or Tuesday night (or even there’s been weeks skipped), and grocery shopping late on Sunday when we get home.  While it seems like a small thing, being able to get our chores done not at the last minute has been wonderful – once the chores are done I can relax into the weekend.

Since laundry had been skipped last week, there was a plethora of hand-knit socks that needed to get washed.  I like knitting my socks in superwash wool – they go into the washer with the rest of the clothes (cold or warm cycle) and then get pulled out to hang dry.  The rest of the clothes go in the dryer.

My highly technical way of drying socks – over the edge of the sock drawer.

Well, we missed a sock… which made it into the dryer.

Now, this is no great tragedy – I’ve had socks go into the dryer before, but I don’t particularly like it because in the dryer my row gauge shrinks. (I’m not sure why – perhaps because when they are hang drying the weight of the socks keeps the row gauge stretched out?)  Still, it was an interesting comparison between the line dry sock and the hand-dry sock.

Line dry sock left, dryer sock right.

This is a quick snapshot from the ipad – not particularly well exposed, but you can see the difference between the line dried sock (on the left) and the dryer sock (on the right).  The dryer sock is a good inch and a half shorter, and while the ribbing is pleasantly snug, the heel is nearly too small and if I put the sock on… my toes would be quite squished.

Luckily there’s an easy way of fixing the situation.  Now, let me make it clear – the sock on the right did not felt.  It just shrunk a bit – and got blocked in a particularly enthusiastic way.

So I dunked both of the socks in the sink filled with water, blotted them dry with a towel, and then hung them damp on my sock blockers – by tomorrow afternoon latest, they’ll be as good at new.

My socks, looking particularly nice on my sock blockers.

What You Need to Know to Repair Handknit Socks: Adding a New Afterthought Heel

One of the reasons I love my mother is because she gives me back the hand-knit socks I made her to repair.  Today I’m going to show you why I love afterthought heels, and how easy it is to replace the heel in an afterthought heel sock.

These socks are Pomatomus, an older pattern on Knitty.  You might notice here that my stitches on the sole are twisted… I had a theory a few years back that socks with twisted stitches might wear better.  While I don’t think that’s the case anymore, please just ignore the twisted stitches if you notice such things.

holes in my hand knitted sock
Holes in the Sock

As you can see above, a hole has developed between the heel and the body of the sock.  This is due to a few different things – first, I didn’t really know how to weave in my ends as well as I do now, so things are not staying together as well.  Second, my mother has a rather wide heel-to-ankle ratio (like me) and I’ve learned since I made this pair that it’s better to add a bit of extra room at the heel.  Finally, these socks are over five years old, and one of my mother’s favorite pairs I’ve made her – so they are just wearing out.

holes in my hand knitted sock thin yarn
Thin Stitches

You can see how thin the stitches are wearing.

So I’m going to make my mother a new pair of heels, and in the process save the yarn to do some other repairs to the sock (mostly reinforcing).  The first step is to remove the old heel.

cutting away knitting heel
Make small cuts!

I used scissors to just cut the first few rows because the yarn was so felted together there, and I’d done a better job weaving in the end at the heel, so I could find the end to unravel.

Snip!

holes in my hand knitted sock
All Gone!

Heel tip is gone.

I then began pulling the little bits of cut stitches away from the yarn that didn’t get snipped, until the fuzzies were all out.

unraveling afterthought heel
Removing little fuzzies

It took a while, and I ended up with a lot of lint to throw away.

Then I found an end to start pulling.  It worked for about half a row, and then ended, because I had snipped it in the process of snipping out the other end.

pulling out old afterthought heel
pulling yarn

The second end I started pulling was good. I kept pulling that until I was on the last row of the afterthought heel.  I then started picking up stitches as I pulled out each stitch.  I was slow and careful – I didn’t want to drop any stitches!

picking up stitches
Picking up stitches

The thing that worked to my advantage was that this sock has been washed and dried many times – the yarn wanted to stay in the place where it had been – in the stitch.  So I’d have to actively tug at stitches in order to make then drop, because the yarn is so matted together with wear.

kinky yarn

As you can see, the yarn wanted to stay crinkly even after I’d pulled it all out.  It reminded me of a spring.

kinky old yarn
boing!

This yarn I gathered up and made into a mini-skein.  I wet it down, hung it from a hook in the Farm’s basement, and hung a wrench from it until it was dry, to straighten the yarn out again so I could use it for other repairs.

But back to the sock heel.

When you’ve picked up all the stitches on both sides, it should look like the sock has sprouted a mouth.

stitches picked up for heel
open heel

Om-nom-nom-nom.

You’ll notice how, at each side of the live stitches on the cable to the needle, there’s a little gap, where there’s no stitches.  In a bit, when we’re working with the new yarn, we’ll pick up stitches along those gaps so there aren’t any holes.

knitting new heel

I like to slip to the middle of the sock to join my new yarn.  This makes the join less obvious, and also because I think it’s easier to weave in ends in plain stockinette rather than where the gaps are. (Another trick I learned since making these socks!)

knitting new heel

I joined the yarn by just beginning to knit with the new yarn, along the old stitches.  I left the tail hanging, as I’d weave that in later.

picking up heel stitches to close hole

When I got to the gaps I was talking about earlier, I picked up 2 stitches, along the edge, trying to keep the yarn nice and tight here, so the stitches didn’t become sloppy.

Then I kept knitting all around, doing the same for the 2nd gap as I did for the 1st gap.  After I knitted all around, then I began my preferred method of decreases, whichever you prefer for an after-thought heel.

knitting new afterthought heel

I worked, continuing to decrease, until I only had a few stitches left.  Rather than doing the Kitchener, I just mattress stitched the live stitches together, pulling tight as I went.  I think it creates a nicer ending, rather than trying to get my Kitchener stitches to match my gauge.

You’ll note, below, that I happened to work the heel in a slightly tighter gauge than the rest of the sock.  This happened for three reasons.  First, my gauge has changed in the last five years. Second, the yarn I used for the heel is slightly lighter weight than the yarn for the sock.  This is because I wanted to match for color rather than for the exact right yarn.  Third, I used a smaller needle size to accommodate the smaller yarn.  I think, after wearing them  a few times, the difference in gauge will even out, or at least become less noticeable.

new afterthought heel in sock
fixed sock – the stitch marker is to mark a place I need to fix

Got questions?  Shout them out!  I’d love to help troubleshoot your own sock repairs!

Bleeding Socks: The Good, The Bad, and the Ugly

Sock Siblings.

I have a pair of socks I made out of Blue Ridge Yarn’s Dragon’s Breath.  They’re… interesting socks to say in the least.  They are siblings – resembling each other in coloring, but in features very different… I was trying out two different ideas for sock patterns, both of which I was not quite happy with.  One of them I still am working on, the other pattern idea I trashed.

I knew they were going to bleed.  When I was working with them, they would leave a line of red on my finger where the yarn slid over my hand.  So, knowing this, I took them into the shower and used them as washcloths for a month, and each time I used them the red dye would go down the drain.  Finally, they seemed to be running clear, so I decided to dry them out and wear them.

Four Color catchers, arranged as they got lighter each soak.

I often have to double up on socks – I have poor circulation and my hands and feet are always cold.  The under-layer wicks moisture from my foot, the outer layer is wool, which keeps things warm.  It has an added benefit of mitigating the wear on my socks.

I wore my white under-layer socks with my Dragon’s Breath socks… and my under layer promptly got stained red.

Back into the shower the socks went.  This time, I also began soaking them in a bucket of hot water with a few Shout color catchers.  They’ve worked wonders, and after using a few of them, my socks haven’t bled since.  You can see that they took up quite a bit of dye – imagine if I had washed them with other things.

Well, coming off of the positive experience with the color catchers, I had a second pair of socks, these ones Crayon Box by Schaefer Yarns on Nichole.  Unfortunately, they are no longer selling yarns wholesale, though I hear a rumor that she is running a small outlet.  You can see a picture of me working on the yarn on a Train in India.  It’s bright and rainbow-like, and it filled me with delight as I was working with it.

You can see the pretty rainbow sock peeking out of my bag in the lower left corner.

It no longer is that bright.

Six color catchers, and they are all about the same color –
no tapering off as the dye gets out.

I had an inkling that the yarn might bleed a bit – I had gotten my knitting bag a bit wet and some of the blue from a strand of yarn transferred to a piece of paper.  But Schaefer has a really good reputation, so I figured that the yarn would only bleed a little bit.  I decided I could put a few color catchers in a bucket, like I did with the last socks, and that would be the end of the issue.  Presto!  Beautiful rainbow socks.

Not so much.

The blue has traveled quite a bit into the other colors.  Interestingly, when I soak them, the water comes out reddish, but when I wash them, the water comes out blueish.  So we’ve got several different colors that are bleeding.

So last night, feeling pretty frustrated, I put them into the bucket for another soak (I’d given up on the color catchers).  But just before I put them in, it occured to me – what if the bleed isn’t from excess dye?  What if it’s because the colors didn’t really fix in this pot?  What if there just wasn’t enough acid to do the work?

I added a generous slug of vinegar to the water (enough Michael smelled it two rooms over), and put the socks in – not really expecting much.

This is the socks this morning.

Can it be?  The water is clear?

See the water?  It’s clear.

Let me show you again.

Completely clear water.

Completely clear.

I am tentatively hopeful.  I’m going to give them a wear later this week as soon as they are dry, and see how they do.

Waiting on them to dry.  Still pretty, in their own way, but not really a rainbow.

Swirl Socks are Out!

If you didn’t see by the last post, my Swirl Socks are out.  This is pretty exciting, as it marks the beginning of this year’s effort to self-publish between 1 & 2 designs a month.  It marks several months of back-end prep-work, as I’ve established relationships with Technical Editors, Sample Makers, and a Layout Designer.

All on top of planning my wedding, which is in 2 1/2 weeks.  Ack!

Swirl Socks are a great pattern for someone who needs just a little something to keep them busy.  After the first few rows, the pattern hits a rhythm, and next thing you know you are turning the heel.  It’s also a great pattern for saying… “just one more row…!”

I love how the cable passes right by the short row heel, and the differences in texture as it moves around the foot.  I love how it’s a surprisingly good pattern for very variegated yarns, because I’m prone to buying hand dyed yarns and then going, what now?

Go check out the socks here, or check out the Ravelry page here.  Let me know what you think!

Swirl Socks

Swirl Socks
by Jennifer Crowley

Published in: Tinking Turtle Designs
Craft: Knitting
Category: Feet / Legs → Socks → Mid-calf
Published: March 2013
Yarns suggested: Three Irish Girls Kells Sport
Yarn weight: Sport / 5 ply (12 wpi)
Gauge: 8 stitches and 13 rows = 1 inch in stokinette
Needle size: US 0 – 2.0 mm
Yardage: 250 – 380 yards (229 – 347 m)
Sizes available: 7, 8, 9″ circumference, 7, 8, 9″ foot length, length can be adjusted

This pattern is available for $6.00 USD

These socks are toe-up with a short-row heel. You will need to know how to work wraps and turns. You can, of course, substitute your own heel or toe quite easily.

Ravelry Link

Week of Interviews – Rachel Coopey and Bockleton Socks

Rachel Coopey creates the most amazing socks.  And’s she’s rather prolific too.  She’s also the creator of the Bockleton Socks, which feature distinctive color-work around the ankle.  She’s stopped by to answer some questions today about her design process, plus some silly questions I threw in.

How did you come up with the colorwork and stitch pattern? 

When I was designing the colourwork patterns I used in these socks I doodled with a pencil for a while, when I came up with something I liked I transferred it to a chart making program and worked on it a bit more before I started to swatch. I wanted a textured pattern for the foot, something simple but interesting to knit.

Where there difficulties you encountered as you worked on the pattern? 
It’s important to make sure your stranded knitting isn’t too tight, it won’t have as much stretch as stockinette stitch and it need to be able to go over the heel when you put the socks on. Some knitters use a larger needle for colourwork and a smaller needle for the non-colourwork sections in order to get the same gauge on the different sections. 

How do you come up for names for your pattern? 
The name of this pattern is also a village close to where I live, I like the sound of the word!

What is inspiring you right now? Do you have pictures, patterns or motifs? 
I’m really inspired by tiles at the moment, a lot of geometric patterns are flying around my head waiting to get out!

Quick, your some yarn! What are you? Why?
Sock yarn of course! Something with a bit of nylon because I work hard(!) and maybe a bit of cashmere because I’m soft and fluffy!
Enjoyed Rachel?  Go over and visit her blog!

This is part of an ongoing series of interviews with Sockupied Designers.  You can trackback to other interviews at:

If you would like to track back to the other interviews they are as follows:

Second Day of Interviews – Kim Haesemeyer and Bowden Cable Socks

Kim Haesemeyer is the delightful designer of Bowden Cable Socks in Interweave’s most current issue of Sockupied.  Kim is a pretty prolific designer, and has a variety of her patterns available at her Ravelry page. She most graciously agreed to answer some questions for me about her socks, and what inspires her.  Without further ado, here is Kim:

How did you come up with the cable pattern?
Simple cables are some of my favorite stitch patterns to knit because with very little effort you have a wonderful new fabric. I wanted the cuff ribbing to naturally flow into the main cable pattern, so I just played with combinations until I found what I thought worked well. Plus, cabling is truly just another fancy ribbing since the pull-in of the stitches creates wonderful stretch to fit your foot nicely. This is also an ideal pattern to practice cabling without a cable needle.

How do you come up for names for your pattern?
Interweave chose the name for me and I love it! Classic with a bit of zing.

What is inspiring you right now?  Do you have pictures, patterns or motifs?
I always have fun finding a particular part of a garment like the silhouette or stitch pattern and wonder how I can rework it for my purposes. What makes this garment work? What do I like about it? Would that stitch pattern a fun body pattern? Or just a hint of excitement along a neck or cuff edge? Would that work for a hat or mitten? 

Why do you like to design socks?
Socks are a great way to try stitch patterns without having to commit to a huge garment. Plus, colors that may be too crazy for you to wear in other ways is the perfect amount of excitement in a pair of socks. Slightly zany socks absolutely brighten my day and even if the world cannot see them, I know they are there. If I am feeling more adventurous, I have seen the clear boots advertised in knitting magazines and thought they would be a fun way to showcase socks.

What do you hope to design in the future?
The exciting (and often overwhelming!) part of knitting design is how there are so many possibilities. I look forward to learning different sweaters and as well as other types of heels and toes in sock knitting.

What is your favorite item to knit?
I enjoy accessories because you can splurge on fancy yarn a bit if there isn’t too much yardage. I love to knit socks for the same reason — often just one hank makes the perfect pair and they travel well without taking up much space. Vests are my other favorite because they are so fast to knit seamlessly and they are the perfect layering piece to enjoy nearly year round.

Is there a favorite time of day you prefer to knit?
I like to process my day with my knitting so I have to knit at least for a bit in the evening. I have recently combined my two favorite things, knitting and reading, by listening to audio books. Why it took me so long to figure this out, I don’t know. Before I could only do one or the other, but now I can do both all day long!

Quick, your an animal!  What are you?  Why?
The ocean is my favorite and I always thought it would be amazing to explore the seas being a dolphin. Imagine how much they have seen that we know nothing about!

If you would like to learn more about Kim, visit her at her website,  bigskyyarnsandcrafts.com.
To read yesterday’s interview with Claire on my blog visit here.

A Week of Interviews Claire Ellen and Uloborus

Welcome to a week of interviews!  This week I have a special treat for you… I’ll be featuring interviews from various designers from the latest issue of Sockupied.

Today, Tuesday, we have an interview with Claire Ellen, who created the truly stunning Uloborus Socks.  Claire is currently in Hungary in Karcag, and writes very eloquently about her experiences abroad.  And without further ado, I’ll let Claire tell you about her Uloborus Socks, and the process they went through before they became what you see in Sockupied today.

One of the things I love most about designing socks– any socks, all socks, all the time!– is that each element of the knitting can have a different motif or idea. A sock has so many different planes and angles, and each one can host a different pattern or the same pattern or a combination of different ideas. I love that the foot can be different than the ankle; the gusset can host a pattern or be plain; etc. The possibilities are endless. 

I was an English major in school, and an English professor once I graduated, and I love finding connections in novels and poetry. When I began playing with yarn, it was a simple process to include literary connections– they’re the two things I love most. Sometimes the connections only make sense in my brain, but it’s as though I can see a knit pattern that embodies some theme or character from the literature. It began when I saw a yarn at The Swift Stitch (my LYS in Santa Cruz) that just screamed Gimli, from the Lord of the Rings. That began my designing whirlwind, and it just keeps getting better! I’d never have dreamed that this silly little hobby of mine combined with an obsession with literature would result in such a degree of fame and fortune. Ha! But seriously, this was all really unexpected. 

As far as the Uloborus socks go, well, they’re really a continuation of the Lord of the Rings series of socks that I thought I had finished. I don’t know if it makes any sense to anybody else, but the collections of patterns are broken into groups of characters I thought went well together– The Fellowship of the Nine was an obvious starting place. Then came what I think of as the “Other Heroes” then “The Ladies,” and finally, a small (but hopefully growing soon) collection from The Hobbit. People were pressuring me to do a “Villains” group, but I’d had enough. I just don’t like the villains. Because, you know, they’re villains. Besides, I thought, how much black yarn can a person knit with? Anyway, I’d thought the collection was finished, and I wanted to knit other things. 

But Shelob (Tolkien’s big spider monster) got under my skin. Scary thought, that! I’d seen several spider-themed socks on Ravelry, and they’re beautiful! But none of them really captured the creepy-ick factor of Shelob in my mind. So I started swatching. And reswatching, and playing around with cables, then with lace, and then bam. It just happened. I was looking through a stitch dictionary, and there it was. Perfect! Just the right amount of Creepy-ick, with some beauty and some delicacy thrown in for good measure. The pattern needed a bit of fiddling, and I needed some additional stitches to fill out the sock, but I just knew this was it. 

Sockupied contacted me the day that I finally got the ankle swatch to work the way I wanted it. They were looking for submissions with a short deadline; I was playing with a stitch pattern, but also planning a move from California to Budapest! It’s a good thing these socks practically knit themselves, and the staff of Sockupied were so helpful, or they’d never have gotten finished up. As for the name, someone at Sockupied came up with “Uloborus” which is a super icky tropical spider of some sort. Good, eh? 

Working on these socks has left me wondering if I might not just return to Tolkien as a source of inspiration and do some villain socks after all. The Mouth of Sauron has a certain horrible charm to him that might translate well to a sock. Right now, though, I’m working like crazy trying to adapt to a new country, new language, sparsity of sock yarn, and a whole host of other issues. I’ve also got Shakespeare on the brain of late, and several socks published, in process, and being tested that borrow from the “Sweet Swan of Avon” for inspiration. 

I began designing socks on a lark. It was something to do with my evenings while my family watched basketball finals or CSI reruns. How could I have guessed that I’d love it the way I do. I’d rather knit socks than just about anything else. I’d do it whether anybody else ever knit my designs or not, and I’ll keep on doing it till it’s not fun anymore. 

Inspiration for Totem

I am a liberal arts major, and was a straight A student throughout high school.  This was  not because I love to get good grades, but rather because I love to learn (grades were just a bonus).  I like knowing about things I had no knowledge of.

Totem has the genesis in several different ideas.  I was on the train home from one of Michael’s and my many journeys , and I had just finished Totoro, a slipped stitch pattern idea I had been playing with.  I was proud of the design, but I knew that this slipped stitch technique could be pushed father; that I could do more with it.

So I started noodling around with the leftover yarn I had from Totoro.  Because it was a highly varigated yarn, I knew I wanted a design that did a good job breaking up pooling.  The first idea wasn’t quite right, so I pulled out some more yarn and made this first swatch.

Okay, that pattern was pretty cool.  And the slipped stitches looked pretty neat.  But I didn’t think it was enough.  Was this really that different from what I did in Totoro?  I’d already done slipped stitches once, and a new pattern had to be interesting enough not only for me to knit the swatch, but different enough to be accepted as a unique pattern submission.  What else could I do?


I thought maybe I could add a cable, but I get frustrated when cables vanish in highly varigated yarns, and I wanted this to work with yarns like the one I was using.  I’d just finished reading through The Principles of Knitting by June Hemmons Hiatt, and I remembered that she had used another type of slipped stitch – a wrapped stitch.  Wrapped stitches would be perfect – not only would the necklace around the stitches stand out because of the yarn’s highly varigated nature, it would break up any pooling that could occur.  Sweet.

So I swatched some more, and I thought the pattern was doing well – but it was getting awfully repetitive.  Was there any way I could break it up periodically with something else?  I went back to my pinterest board to look at stitch patterns I had favorited – nothing.  So I went on Ravelry hoping that if I gave my brain a break something would pop up.

I came across a post that thesexyknitter (otherwise known as Sarah Wilson) on raverly posted about her pattern, Jon’s Sweater.  It uses slipped stitches and the lateral braid to create a wonderfully subtle texture.  I’d never heard of the lateral braid, but it looked so cool.

How hard could it be?

So I learned how to do it, using this video.

And then I added it to the pattern.

So now I had the pattern that you see here.  It has the lateral braid, the slipped stitches, the wrapped stitches, and it’s the picture that I sent to Sockupied for my proposal.

What do you think? Have you ever done a lateral braid?  How about wrapped stitches?