MENU

Show Notes from the Last Few Weeks

Aboard a cruise ship, sailing with Mr. Turtle, my parents and his parents.  It’ll be our second (third? – depends on how you count it) vacation together.  It’s all part of Mr. Turtle’s and my project to integrate our families.  You see, Michael’s grandparents didn’t get along, and he can’t remember a time when they were both in the same room.  In contrast, my grandparents were good friends, and I can remember many holidays, visits and trips where my family and grandparents were all in tow.

It was a perfect arrangement, really.  With 4 Crowley grandchildren and 4 grandparents, it was glorious to get some really good one-on-one grandparent love.  I want that for my family, so Mr. Turtle and I have been trying to create situations where our parents, who live pretty far away, can spend time together.


Which actually wasn’t what I was planning on writing about.

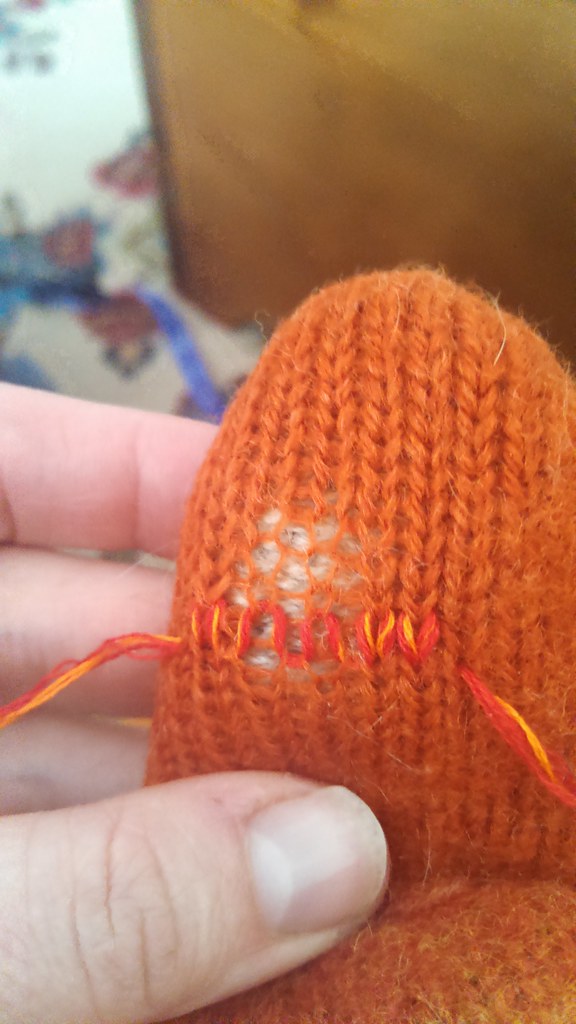
I was planning on writing about my missing sock.  You see, about a month ago I finished a pair of socks, for myself, that I’ve been wanting to finish for a while.

This is a really poor picture of the sock, but I didn't even get to take a picture of them!

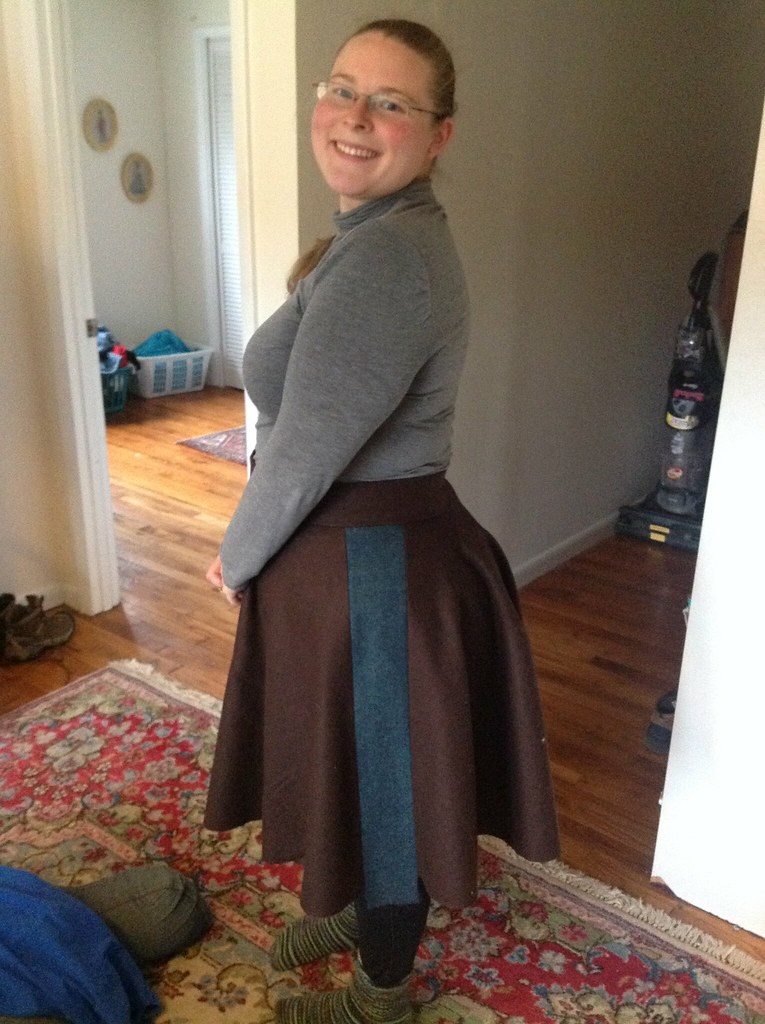
This is a really poor picture of the sock, but I didn’t even get to take a picture of them!

I was pretty excited about them, so I wore them nearly for three days straight, washed them, and wore them once more.

And now one of the socks are missing.

The kicker is, the sock is somewhere in my house.  I figured, when we had company over this 4th of July, and were cleaning things, it’d turn up.  I wasn’t really concerned.

But now it’s after the 4th, the sock still hasn’t shown up, and I’m disappointed: I wanted to take them on the cruise with me.  No such luck.  I can’t find them anywhere, darn-it!

Have you ever lost a knitting or crochet item?  Did you find it again? After how long?  I’m really starting to get bummed about this missing sock.

My Easy Finishing Technique for Weaving in Bulky Yarn

Techniques for Weaving In Really Bulky Yarn

Today we have a quick little blog post that I’ve been meaning to do for a while, but haven’t quite gotten around to!  I thought it’d be the perfect thing to start out our week: a tutorial on weaving in really bulky yarns.  I think it’s a helpful finishing technique for both knitting and crochet.

What am I going to be talking about? Well, weaving in ends.  Now, I know weaving in ends isn’t everyone’s cup of tea, and I totally understand.  It’s one of the reasons I offer finishing services.  But for those of you who like to sweat the details, weaving in ends can be an important part of finishing a project.

Today’s little tutorial is specifically about weaving in really bulky yarns, which can be hard to pull through the fabric.  Now, this trick only works for plied yarns, but it’s a nice thing to have in your arsenal.

Onward!

  1. First, we’re going to want to take the tail that we plan to weave in above.  See how it’s plied together – that is, it’s got multiple strands all twined around each other?  We’re going to separate those out.  You’ll want to do it by twisting the yarn in the opposite direction it’s twisted together, so the individual strands start standing out from one another.  Once you’ve got one you can grab, pull it from it’s neighbors, until you’ve got them all separated like this:
    Yarn separated out into it's individual plies.

    Yarn separated out into it’s individual plies.

  2. Now that you’ve got the plies separated out, get a sharp-pointed needle and thread one of the plies onto the needle.  Like this:
    Thread one of the plies onto a sharp needle to weave in the end of the yarn.

    Thread one of the plies onto a sharp needle to weave in the end of the yarn.

  3. Make sure the other ends are out of the way, and now, weave in the end.  Do the same with the other strands of the yarn.
    Nearly there: All but one end woven in!

    Nearly there: All but one end woven in!

  4. Finally, trim your ends away as close as you can to your project without cutting anything.
    Trim your ends away, and admire your work! You've finished weaving in your ends!

    Trim your ends away, and admire your work!


Do you have a favored method of weaving in ends, or a finishing technique that you love to share with others?  Tell me about it in the comments!  I love hearing from you!

Tinking Turtle’s Summer Camps: Knitting, Crochet, Sewing and More!

young child learning to sew

Sewing with Next Step Needlecraft from Tinking Turtle Designs

It’s that time of year again: the weather is warming (despite all the rain we’ve had this week), and on my walk this morning, I found the first delicious blackberries.  It’s summertime – and it won’t be long now until school wraps up and those hot days will be around the corner.  It won’t be long until Tinking Turtle’s Craft Summer Camps start!

For me, this means a shift in Tinking Turtle’s focus: I’m beginning to get ready for the summer camps that I’ll be running.  They’re one of my favorite parts of the year.

You see, way back before Tinking Turtle was a name written on a piece of paper, before I’d even dreamed up my first pair of socks, I was a camp counselor at Chimney Corners Camp.  I’ve talked about CCC (as it’s known to campers and alumni alike) before: it’s the place where I met my longtime friend Becca, and where Mr. Turtle proposed to me.  CCC’s been a huge part of my development as a person – not only personally, but professionally as well.  CCC was the place I taught my first students: figuring out how to break down knitting, crochet, embroidery and cross stitch to campers aged eight to fourteen.  I was only about seventeen myself, and I had very little clue what I was doing, but I figured out.

Since then, I’ve continued to love working and crafting with children.  I worked as a nanny for many, many years, and last year I ran the camp String Theory through Montgomery College.  It was a hit and a blast, and this year I’m adding to the lineup with two new classes: Next Step Needlecraft and Knockout Punch Rug Needlework.  Let me tell you a bit about the classes:

String Theory is my flagship class, now in it’s second year.  It’s a variety introduction to needlework

young girls showing off their finished knit mitts

Finished knitted mitts from String Theory!

and crafting for both boys and girls ages 8-12.  Campers learn how to knit a fingerless mitts (or two!), sew and decorate a project bag, learn to process, card and spin fiber, and the basics of how to dye wool.  This year we’re offering three sessions: 7/20 – 7/24 from 1-4 pm, 7/27 – 7/31 from 1-4 pm, and 8/3 – 8/7 from 9 – 12 pm.  You can click on the links to find out more and signup!

Because we received such a great response to String Theory, we’ve added Next Step Needlecraft.  Intended for campers who loved String Theory and want to learn more, or for older students looking to learn some more interesting crafts, it’s a great next step.  Students learn how to crochet, how to spin yarn, the basics of needle felting, and how to create stunning punch rug pieces.  This class is meant to sink students’ teeth into needlecrafts you don’t get exposed to nearly anywhere else.  This year I’m offering two sessions: 7/20 – 7/24 from 9-12 pm, and 8/3 – 8/7 from 1-4 pm.


My last class: Knockout Punch Rug Needlework is a very focused class.  Unlike the other two camps which focus on variety, this one dials down into the art of rug making.  In this class students will have a lot more independence to learn, plan and execute one, if not two projects.  This class focuses on giving students the independence to decide and plan their own projects, and my help to make them a reality.  We’ve got just one session of this camp, so if it sounds like something your child would enjoy, make sure to sign up as soon as possible. Knockout Punch Rugs will run 7/27 – 7/31 from 9 – 12 pm.

Child learning to knit with multicolored yarn

Learning to Knit in String Theory

If you’re looking for a great crafting camp for the summer, these camps are for you.  Don’t have children of your own?  Tell your friends about these camps.  Teaching kids crafts improves dexterity, problem solving and creativity – and preserves these traditions for the next generation.

Let me know what you think about the camps – and what other crafts I should look at adding to the repertoire!

Making and Fixing Mistakes

darning and fixing a hole in knitting, repairing a mistake

Fixing a Mistake: a hole, in knitting

I’ve been thinking a lot about mistakes lately.

One of my most popular classes is titled “Oops!”  The class hits home with knitters and crocheters: sometime, somewhere, we all are going to make a mistake.  Probably even more than one mistake.  And if it’s a big enough mistake, it’s going to need to be fixed.  It’s a simple premise for the class.  Let’s take the pressure off making mistakes, and deliberately make them – and then learn how to fix the mistakes we’ve created.  Oops is a class, that, at it’s heart, is about being human.  Instead of pretending that mistakes don’t happen, it faces them head-on.

I’ve heard it quoted a couple of times that in Navajo rug work the weaver puts a deliberate “mistake” into their work: the idea being that only the Creator is perfect.  You hear this idea echoed in Indian or Persian rugs, or in Islamic geometric designs.  While some people believe the myth is not true, there’s a point to be made in the story: by being human, we make mistakes, and in some ways we should make peace with it.

The Yarn Harlot’s written about mistakes dozens of times.  Elizabeth Zimmerman held the idea that there are no mistakes in knitting, as long as the results turn out the way you want.  Heck, mistakes are so common in patterns that there’s a word for it: errata.

Yet, two weeks ago I was a stew of anxiety as I went through tech editing for three of my patterns coming out in the fall.

darning a hole in a worn out glove - repairing a mistake

Fixing a hole formed in a worn-out glove

It’s funny: a large part of my income comes from doing away from imperfections: repairing broken things, and fixing mistakes in pieces seen as unsaveable.

Yet, when it comes to my *own* mistakes, I’m hesitant to talk about them.

Perhaps it’s because of the scale. To me, a mistake in a blanket affects nothing except the blanket.  If I make a mistake cooking, or gardening, or in any of my personal activities, the only person harmed is myself (and perhaps Mr. Turtle, if he’s forced to eat my cooking).  In contrast, a mistake in a pattern affects someone else’s life.  It can inconvenience them.  A mistake in a pattern can take hours for a tech editor to untangle; in worst cases, it can derail publishing deadlines and hurt the bottom line.  Mistakes on that scale can be costly.

I’m not one to let go of my own mistakes lightly.  In 10th grade, on a field assignment, I broke a thermometer that my teacher was letting me borrow.  I was heartbroken and that night I cried myself sick, thinking about telling my teacher the next day that I’d let him down.  The whole day before I could go see him, I worried the situation over like a sore tooth: poking and prodding at it, envisioning the worst case scenario. By the time I got to last period when I could speak to him, I was physically sick and trembling.  My small mistake had become so big in my mind it has physiological effects.  When I went to tell him what was wrong, I ended up just crying from the stress.

It’s why I love working for myself: I can choose the people, and the situations, where I’m held accountable.

I’ve grown up since 10th grade, but big mistakes still have the ability to immobilize me, at least a little.  Crafting an email in response to an irate customer can still leave me feeling queasy.

So two weeks ago, when I had not one, but two patterns in tech edits with some significant problems, I struggled to keep my composure.  In a conversation to my friend Becca, she put things into perspective.

A while back I hired a woman to help me crochet some pieces that were on a deadline.  They were samples, and the patterns were already written, but they needed to be worked up in different yarn.  I had very specific instructions.  I handed off the yarn to her, with a firm emphasis that if problems came up, if her gauge was off, if she made a mistake, she should contact me right away. I knew that she might make mistakes, but as long as she communicated with me, I could manage things.

Unfortunately, when she made mistakes, as sometimes we are wont to do, she kept working the pattern, hoping that if she went further the mistake would be less obvious.  Instead, when I got the pieces, I had to do quite a bit of work to fix things she hadn’t shared with me.

I was angry.  It wouldn’t have been a problem if she had just gotten in touch with me, but instead, she waited until the deadline to inform me of the problems.  It left me with very little time to do damage control.

In the same manner, Becca pointed out, I should handle the mistakes I make.  If I made a mistake, I should be upfront about it.  I shouldn’t cover it up.  Instead, I should communicate what my problem is, and ask for help.

Not so very easy.

Why am I talking about all this?

Well, I’m thinking about how mistakes are viewed in crafting, in the knitting and crochet industry, and in my own personal life.  And I’m thinking about ways I can both respond to mistakes I make, and other’s make, with more grace.

Have you made a mistake in your personal or professional life?  How do you handle them?  I really, really would like to know.

A Brief Visual Tour of TNNA 2015, in Columbus, OH

I’m at TNNA this weekend (I’m leaving tomorrow afternoon), and having a ball.  It’s a lot of networking (which can sometimes be a little hard), but it’s also just so wonderful to spend time with people who are passionate about the same things.

However, after using my words all day. I’m fairly worded out.  So today’s a brief visual tour to TNNA, with captions.


Bags full of knitted and crochet goodies, for the fashion show!

Getting Ready to the TNNA Fashion Show, backstage.

Painted Canvas Trolley with Ashland, VA on the side

Ashland, VA represented! I was shocked.


Knitted and Crochet Teepee with Addi's booth.

Knitted and Crochet Teepee in Addi’s booth.

My mittens at the Willow Designer Breakfast at TNNA.

My mittens at the Willow Designer Breakfast at TNNA.

Making net out of Sprang.

Learning how to work Sprang with Carol James – she’s a really great teacher!


There were so many other things I want to share with you, and I will, once I get home.  I have yarns I’m excited about, patterns and opportunities.  But for now, I really should get ready for tomorrow… and figure out how I’m going to get all my yarn home.

Sock Yarn Shawls II Review & Contest

picture of a POC wearing a lace shawl on cover of book by Jen LucasJen Lucas is a designer I’ve been aware of for a while.  How could I not know about her stunning shawl patterns?  We also, if you haven’t noticed, had the same name, and I generally keep an eye on the other designer’s with the name of Jennifer – call it a sense of kindred names.

Recently I got my hands on Jen Lucas’ newest book: Sock-Yarn Shawls II: 16 Patterns for Lace Knitting.  I’ve spent the last two weeks with the book, reviewing patterns and sinking my teeth into the book, and I wanted to share my thoughts here.

First off, the book is gorgeous.  The clean and simple lines mean the focus is really on the patterns.  The book’s model is also a POC, which is wonderful: all too often in the knitting world the models are of western descent.

The book is divided into three sections: Small Shawls (featuring 6 designs), Midsize Shawls (featuring 7 designs), and Large Shawls (featuring 3 designs).  While I would have liked one more larger shawl, I also have to admit that the larger shawls feature a LOT of knitting.  And several of the Midsize Shawls could have extra repeats to make them bigger.  Overall, I think the spread and sample size is fairly balanced.

Sunburst

It is now time to declare my bias: I tend to prefer shawls that are solid most of the way through, with a lace edging.  Allover lace patterns, while lovely, aren’t generally my cup ‘o tea, but I understand some people love them.  My favorite patterns ended up being Sunburst, Earth and Sky, and Floe.  Still, the Lycopod, which is the pattern on the cover, is also gorgeous, and I’d think about modifying the shawl to suit my tastes.

I love the amount of variability in shape and construction the shawls have.  I also love how closely Jen’s color taste aligns with my own.  I also love how each pattern has some good close-up shots of the lace, to give you a really good sense of how the lace flows and looks.

On a last note, how approachable is this book to someone who has never done a lace shawl before?

The book has a lovely introduction on managing stitch markers (a must for lace knitting!).  I do wish there’d been a mention of lifelines, considering there’s a few different shawls I’d be tempted to use them on.  However, lifelines are sometimes hard to explain concisely in pictures, so I could see how there might have been a page limit.  There’s also an excellent pictorial reference section, with good pictures on knitting a garter lace tab, and a few other helpful tutorials when working with lace.  Some of the smaller shawls would definitely be approachable to beginners, and you could build on that success.

Sock Yarn Shawls II is available for sale on Amazon as both a physical book and an e-book.  It is also available as a Ravelry Download.  If you love lace, you should pick it up!

And as an extra-special reward, I’m running a contest where one of you will receive a free copy of Jen’s book!  Just enter the Rafflecopter widget below!

 a Rafflecopter giveaway

Breaking it Down: Russian Join

The Russian Join is one of the tricks I love to teach in my class.  It’s a great way to join two yarns, and I love how strong the join is!  While sorting through some photos on Friday, I realized I’d taken all the photos to do a tutorial on the Russian Join… and simply had forgotten to post them.

So here you go: my tutorial on the Russian Join!

If you enjoyed this, share it with others!  Pin, tweet, or post this to facebook!

Additive and Subtractive

I’ve been working on a skirt this week using some lovely wool fabric my mother and great-aunts had, and it’s been going very well.  This morning I set in my invisible zipper (my first zipper set into woven fabric – gasp!), and I’m pleased at the results.  I guess reading sewing blogs for 3 years means you pick up something!

But it’s got me thinking about the differences between sewing and knit/crochet – and this morning I finally hit on why I’ve not quite ever taken to sewing the same way that I do knitting.

It’s all about the addition and subtraction.

You see, when I took my two sculpture classes my senior year of college, I generally liked the types of sculpture that were additive; that is, I liked things that started from nothing and I added material, shaping it along the way.  I liked things like clay, wax-work, and plaster.

Plaster sculpting was perhaps my very favorite medium, because it was additive as well as subtractive.  Plaster bonds to itself very well, and after you add plaster to already existing plaster, and it sets – it’s like one whole piece of plaster.  You can then chip away at the material you added, for further shaping purposes.

Activities like woodwork were harder, because you had to plan things out ahead of time.  With the exception of wood glue, the place where you fasten wood together will always be weaker than the rest of the wood.  Places where you use things like nails, joints, or staples will always be weaker than the original whole thing.

Sewing is like wood: the seam is nearly always the place where a garment wears out.  It’s also a subtractive craft, to me.  Each time you shape a piece of cloth, you start by a large piece and you gradually cut stuff away to shape it (using darts, for example).  You might add more fabric, but there will always be a join.

It is perhaps not a coincidence that when I started doing sewing crafts, I started with quilting, which is much more of an additive activity.

Crochet and knitting, on the other hand, both start with nothing, and you add more and more stitches to make the thing.  If you mess up with crochet or knitting, you can pull your work out and start again (it’s a pain, but you can do it).

Whereas sewing, if you make a mistake with your cutting… well, you’ve just ruined that piece of fabric.

Do you do any other crafts other than knit or crochet?  Do you think of them as additive or subtractive?

Monthly Theme: Mysig

Sweetness, snuggled up against the cold in Silva Shawl

It’s a dreary rainy day out today.  I was supposed to meet up with a college student from Randolph Macon to photograph some knitwear.  We’re rescheduling for later in the week.

Days like today remind me of a word I learned while I was in Sweden: Mysig.  It means, roughly, an activity/place that is comfy, agreeable, snugly, brings comfort and has a relaxing vibe.  Most often I heard it used in contrast: that is, it’s nice to go home after a hard day of work and mysig; a place that has mysig might be warm and cushy after being out in the dark and the cold.  It’s a word that encapsulates that feeling of holing up and relaxing when it’s rainy/snowy and cold outside.

Mysig is particularly appropriate, I feel, for the month of December.  It’s been fall really winds down and winter sets in: it’s a time for handknits, truly.  I find I finished with a pair of socks only to launch into another pair: I feel a need to make things both warming and comforting.  I want my tried and true sock pattern, and none of that new-fangled stuff.

I was working on a design submission this week, and I found myself struggling to come up with transitional pieces like the call was asking for: all I wanted to work was warm and snuggly things in bulky and lofty yarns.  Meanwhile, my recovering cat Watson is a drugged and warm and oozy kitty in my lap (in that way only cats and small children can go boneless).

I am particularly enamored of this set of design submissions: if they don’t get chosen I’m afraid I’ll just have to make them all myself.

So in the tradition of Mysig, I’m going to try something a little bit different this month – all my posts will somehow tie back to that theme of cozy, comforting and warming.

Indie Design Gift-A-Long

The Indie Design Gift-A-Long starts tonight!  I’m so excited!

What is the Indie Design Gift-A-Long (GAL)?
This is a multi-designer promotion done on Ravelry.  It begins with a sale: Between tonight and Friday Nov. 21st, independent designers will have between 4 and 20 of their designs discounted by 25%.  Then, all the way until New Years, will be an epic Knit-A-Long (KAL) and Crochet-A-Long (CAL) as people race to get holiday gifts finished.  Meanwhile, prizes and contests will be held.

What patterns is Tinking Turtle discounting?
I’m discounting my entire self-published catalogue.  You can look at it here.

Where is all the action happening?
The Ravelry group is here.  That’s where the the contests, chatter and whole event is happening!  I’d love to see you there!
As part of the Gift-A-Long, I’ll be doing a bunch of interviews and other fun things to encourage participation.  I hope you join us!