MENU

Mitts and Crochet: New Classes at Untangled Purls

Starting next week I’ve got a great lineup of Fall classes at Untangled Purls, in Fredericksburg, VA.  I’m looking forward to the opportunity to teach at Untangled Purls: Most of my classes for the last year (with the exception of my camps) have been workshop based – that is, one and done.

I’ve missed the camaraderie and relationship that builds with a class when you teach week after week: you get to know your students better, and you get to watch students progress in a way that is different than workshops.  I wanted to highlight two of the classes I’ll be teaching at Untangled Purls.

Photocredit: © Ambah O'Brien

Photocredit: © Ambah O’Brien

Beginning Stranded Knitting is based of of a wonderful pattern called Maroo Mitts by Ambah.  This is a great introductory project to stranded knitting, and I hope you might be able to join me!  Learn more about the class here.


Photocredit: Freshstitches

Photocredit: Freshstitches

Crochet Softies is based around four of Stacey Trock’s FreshStitches patterns: Kepler the Lion, Nelson the Owl, Flavia the Unicorn and Cliff the Brontosaurus.  I love these patterns because they’re a great next step for students who have learned how to crochet, but haven’t quite mastered reading a pattern or working in the round.  I have so much fun helping students create these fun stuffed animals: and they make perfect gifts!  You can find out more about the class here!

Sockupied Fall 2015: Electrostatic Lines Knee Socks

As I mentioned yesterday, I’ve got a bunch of patterns that have come out in the last four weeks.  If you’ve been paying attention to my design page on Ravelry (you know you can follow the page on Ravelry, right?), my published patterns page jumped from 35 patterns to 45 – a full ten (TEN!) patterns released this last week.  It’s also part of the reason I was sooo busy the beginning of this year.  Today I want to take the time to highlight Electrostatic Lines, featured in Sockupied’s Fall 2015 issue.  Electrostatic Lines is a pair of stranded knit knee socks with a fun twist to make the calf fit you perfectly!

I’ve loved designing for Sockupied.  They’re one of the smaller magazines out of Interweave, but I love the focus on quality patterns, and the editor’s commitment to bringing really great sock articles forward.

Sockupied Fall 2015

Credit: Interweave/Harper Point Photography

In this issue, Electrostatic Lines are on the cover (my fourth pair on a Sockupied Cover!) – and I think these are one of my favorite pairs of socks I’ve ever designed.

Credit: Interweave/Harper Point Photography

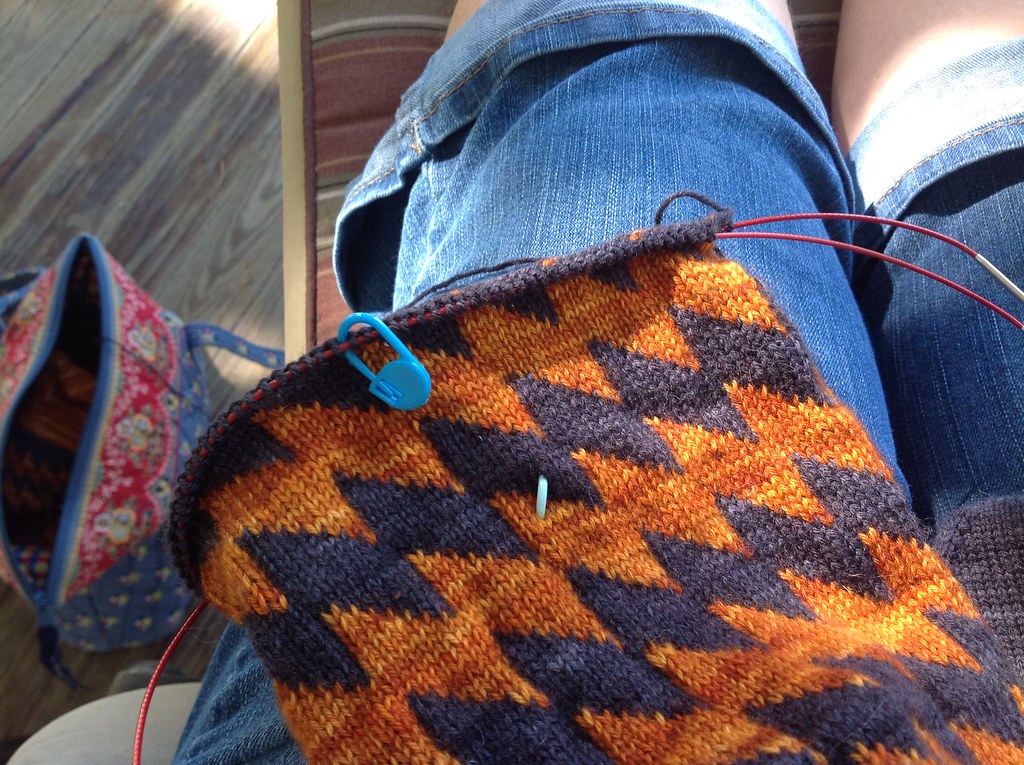
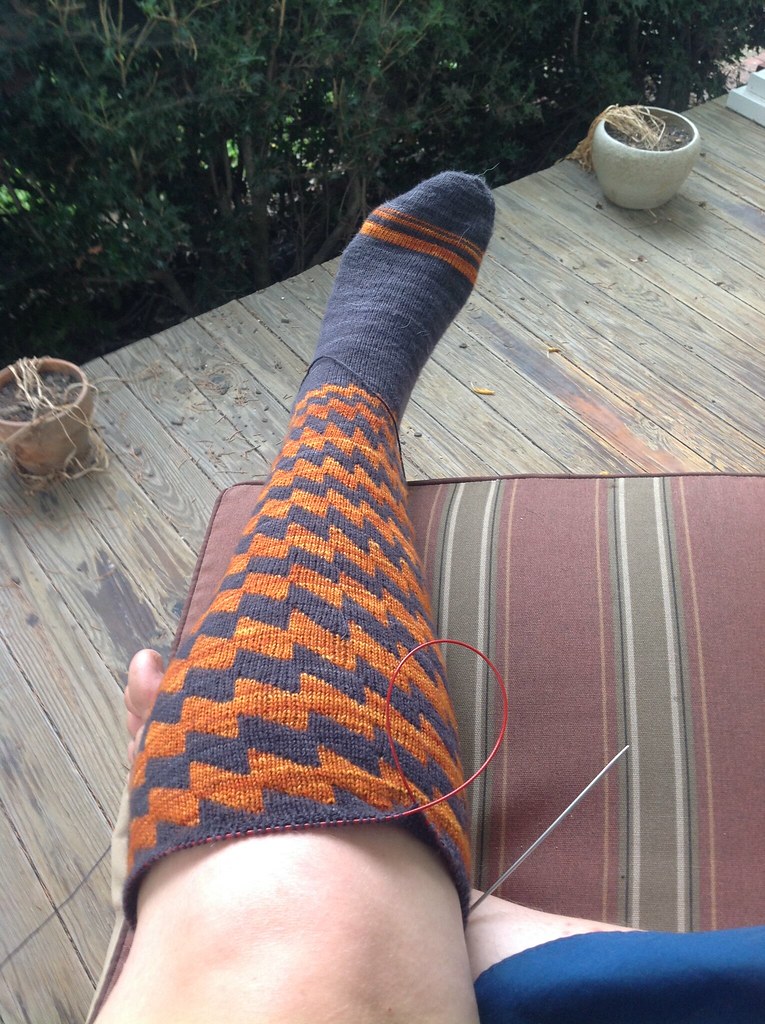
I was working on these socks nearly a year ago today.  I knew these were going to be a particularly difficult pair of socks – not only did I have to finish them and Karner Butterfly in about 4 weeks, but knee socks are a haul.  When you get past the heel, you’re barely halfway done.  But I loved sitting on the front porch of our house in the mornings and afternoons and just steadily churning through the rows.  I love how there’s a bit of interest at the toe, the mini-gusset followed by the short row heel, and then the fun joy of working stranded knitting up the leg.  Knee socks are a commitment – but they’re worth it.

Steadily working up the leg

This was one of my first projects using ChiaoGoo’s Red Lace Needles, and I was in the process of falling in love, leaving my Addi’s in the dust.

Trying socks on as you go – toe up all the way!

There are so many things I’m proud of in this pattern.  I love that you can try these socks on as you go, to make sure that the calf fits just as it should.  The stranded knitting for the leg is written in such a way that increases can be added or subtracted as needed, so the pattern will fit perfectly for your calf.

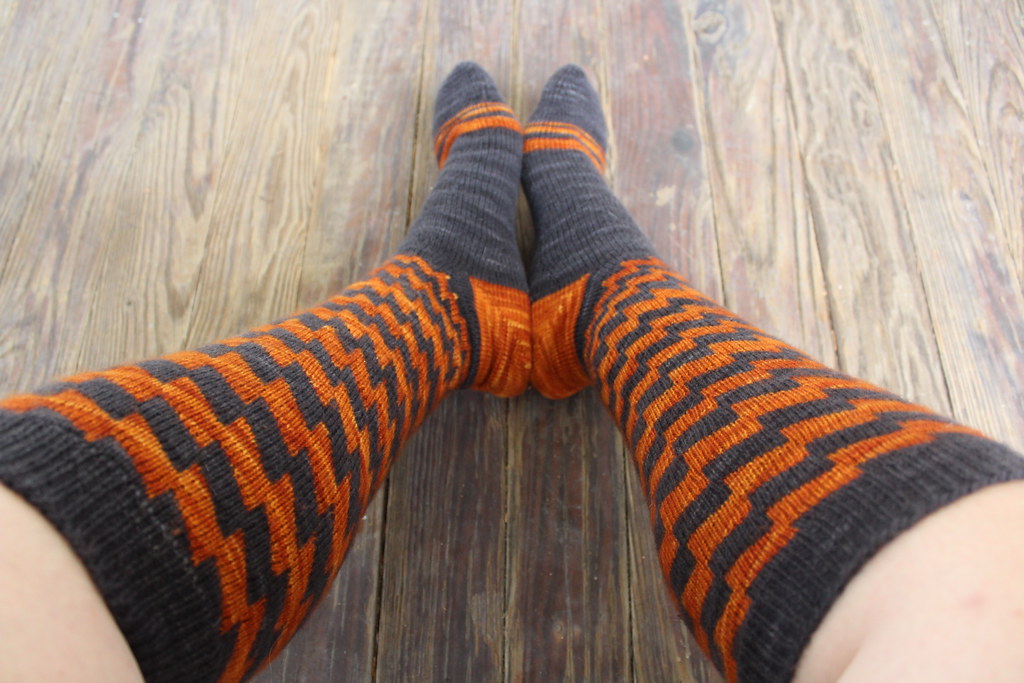
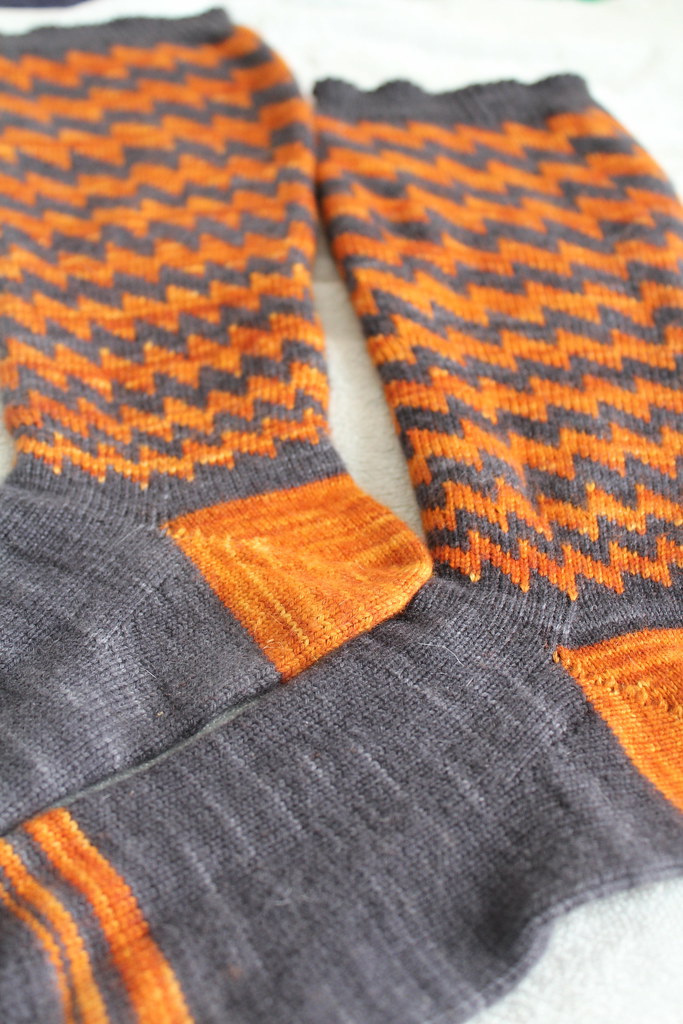
And quite simply, I fell in love with this color combination: nearly a perfect, yet counter-intuitive combo for fall.  Hedgehog Fiber’s Rusty Nail and Graphite work lovely together.  They just seam to glow, especially in the sunlight.

You can check out more details about my sample pair of Electrostatic Lines on Ravelry, which includes the time information for this particular pair of socks.

Rusty Nail seems to glow

Electrostatic Lines is available from Sockupied, along with a bunch of other quality patterns.  Buy your copy here!
Update From the Camp Front

The last week has been a flurry of busy – I’ve been running camps in the morning and the afternoon, and totally been immersed in fiberarts.

I wanted to share some of the highlights from this past week.

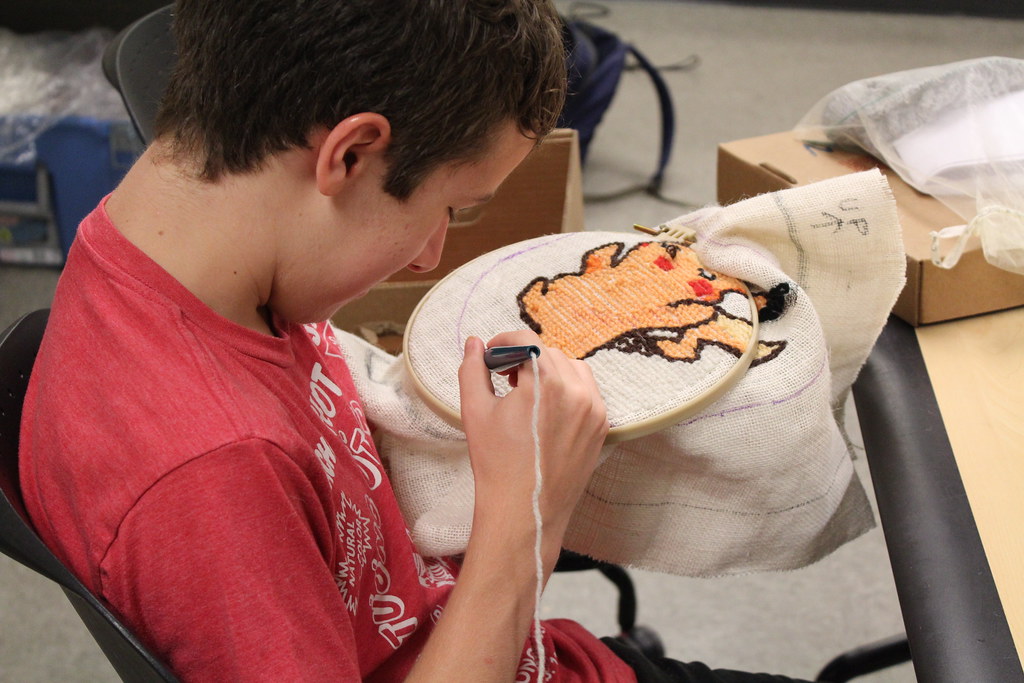
Working on Pikachu in Punch Rugwork

Working on Pikachu

One of my students in Knockout Punch Rug Needlework created an absolutely stunning Pikachu.  Working in Punch Rug Work (like rug hooking, except you’re looking at the wrong side right now), he blasted through the piece displaying both creativity and problem solving, expecially considering the limited palette I had available.

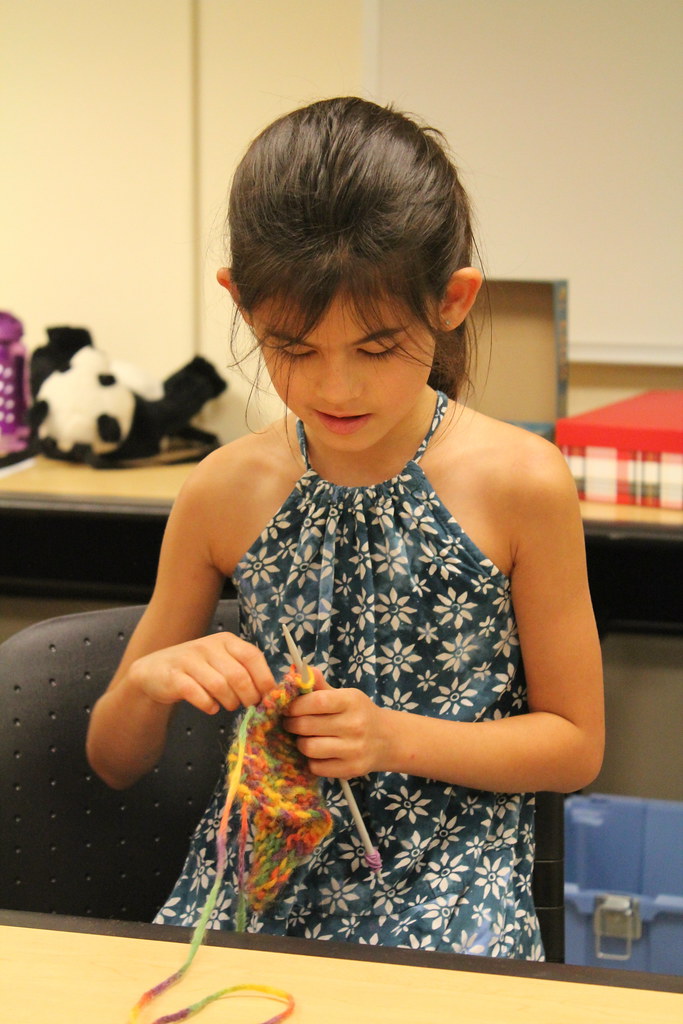
Fingerless Glove - in knititng!

Working on a Fingerless Glove

I had a young eight year old who was ABSOLUTELY DETERMINED that she would finish her fingerless glove, no matter what.  Everything else was secondary, every second we had “free work” time, (and some times we did not), she was pulling out her knitting to work “just another row.”

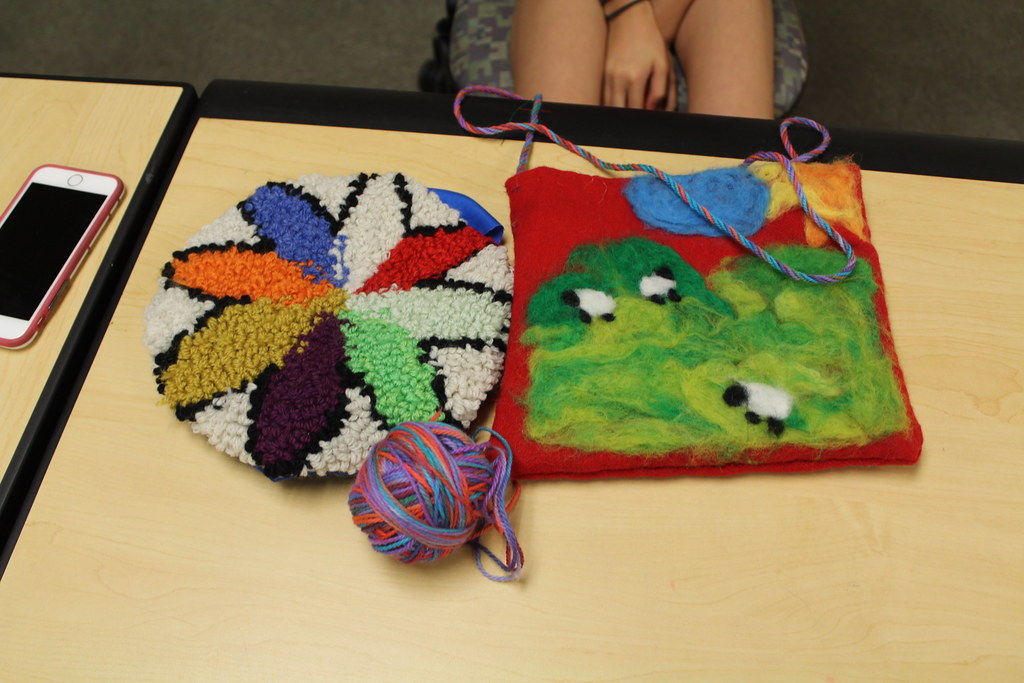
Needle felting, Punch Rug Hooking, Dyed Yarn

Needle felting, Punch Rug Hooking, Dyed Yarn

I had another camper who fell in love with needle felting, creating a lovely bag, a pillow out of her punch rug work, and took home a gorgeous hand-dyed ball of yarn.  She couldn’t have been happier with her projects!

This week marks the last week of the camps, with another round of String Theory, and then Next Step Needlework.  I’m so excited to see what students create!

Resources for Teaching Children Fiberarts

child learning to knit

Learning Fiberarts!

This marks the end of the first weeks of the camps I’m running with Montgomery College, and I’m wrapping up one of my cornerstone camps, String Theory.  String Theory is a sampler camp: giving the children a taste of spinning, weaving, sewing and knitting.  The hope is, at the end of the camp, students will have found something they’re interested in, and pursue it further.  I thought it’d be helpful to have a reference post of resources for children – and ongoing fiberarts learning.

Sewing

Knitting

Weaving

learning to weave

Learning to Weave

  • Kid’s Weaving is where it’s at.  It’s one of the only book that is weaving and geared toward children, and it’s solid.
  • You Can Weave is older, and harder to find, but a good resource.


Show Notes from the Last Few Weeks

Aboard a cruise ship, sailing with Mr. Turtle, my parents and his parents.  It’ll be our second (third? – depends on how you count it) vacation together.  It’s all part of Mr. Turtle’s and my project to integrate our families.  You see, Michael’s grandparents didn’t get along, and he can’t remember a time when they were both in the same room.  In contrast, my grandparents were good friends, and I can remember many holidays, visits and trips where my family and grandparents were all in tow.

It was a perfect arrangement, really.  With 4 Crowley grandchildren and 4 grandparents, it was glorious to get some really good one-on-one grandparent love.  I want that for my family, so Mr. Turtle and I have been trying to create situations where our parents, who live pretty far away, can spend time together.


Which actually wasn’t what I was planning on writing about.

I was planning on writing about my missing sock.  You see, about a month ago I finished a pair of socks, for myself, that I’ve been wanting to finish for a while.

This is a really poor picture of the sock, but I didn't even get to take a picture of them!

This is a really poor picture of the sock, but I didn’t even get to take a picture of them!

I was pretty excited about them, so I wore them nearly for three days straight, washed them, and wore them once more.

And now one of the socks are missing.

The kicker is, the sock is somewhere in my house.  I figured, when we had company over this 4th of July, and were cleaning things, it’d turn up.  I wasn’t really concerned.

But now it’s after the 4th, the sock still hasn’t shown up, and I’m disappointed: I wanted to take them on the cruise with me.  No such luck.  I can’t find them anywhere, darn-it!

Have you ever lost a knitting or crochet item?  Did you find it again? After how long?  I’m really starting to get bummed about this missing sock.

My Easy Finishing Technique for Weaving in Bulky Yarn

Techniques for Weaving In Really Bulky Yarn

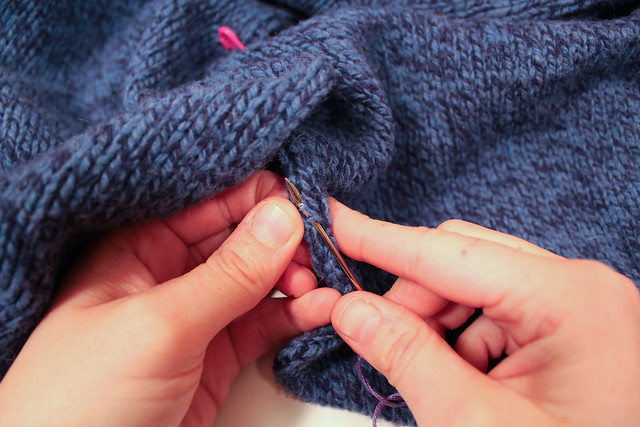
Today we have a quick little blog post that I’ve been meaning to do for a while, but haven’t quite gotten around to!  I thought it’d be the perfect thing to start out our week: a tutorial on weaving in really bulky yarns.  I think it’s a helpful finishing technique for both knitting and crochet.

What am I going to be talking about? Well, weaving in ends.  Now, I know weaving in ends isn’t everyone’s cup of tea, and I totally understand.  It’s one of the reasons I offer finishing services.  But for those of you who like to sweat the details, weaving in ends can be an important part of finishing a project.

Today’s little tutorial is specifically about weaving in really bulky yarns, which can be hard to pull through the fabric.  Now, this trick only works for plied yarns, but it’s a nice thing to have in your arsenal.

Onward!

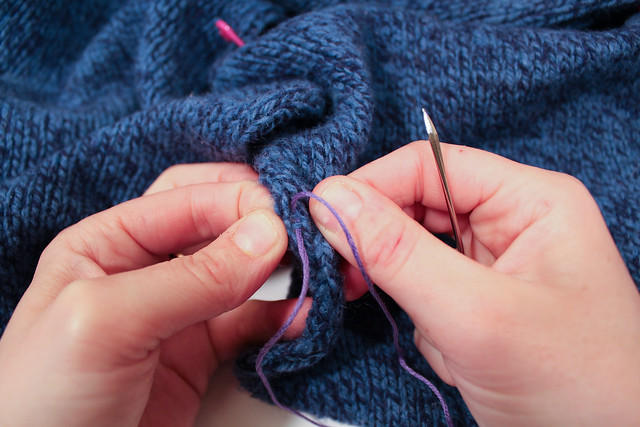
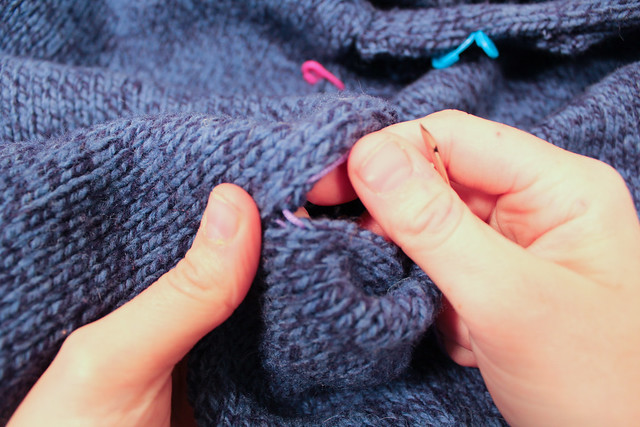
  1. First, we’re going to want to take the tail that we plan to weave in above.  See how it’s plied together – that is, it’s got multiple strands all twined around each other?  We’re going to separate those out.  You’ll want to do it by twisting the yarn in the opposite direction it’s twisted together, so the individual strands start standing out from one another.  Once you’ve got one you can grab, pull it from it’s neighbors, until you’ve got them all separated like this:
    Yarn separated out into it's individual plies.

    Yarn separated out into it’s individual plies.

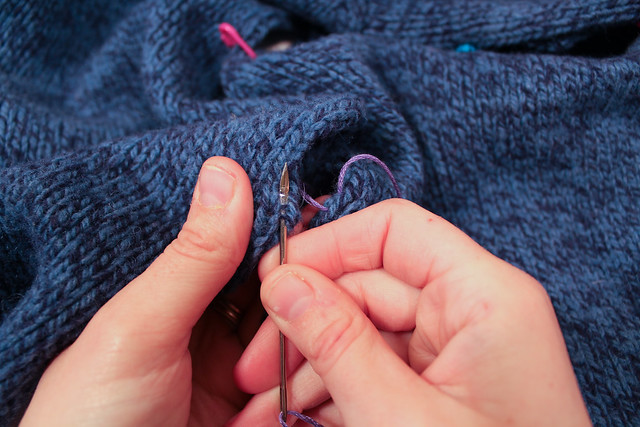
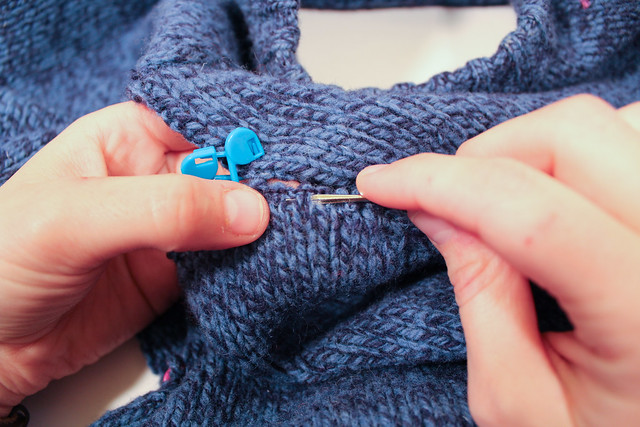
  2. Now that you’ve got the plies separated out, get a sharp-pointed needle and thread one of the plies onto the needle.  Like this:
    Thread one of the plies onto a sharp needle to weave in the end of the yarn.

    Thread one of the plies onto a sharp needle to weave in the end of the yarn.

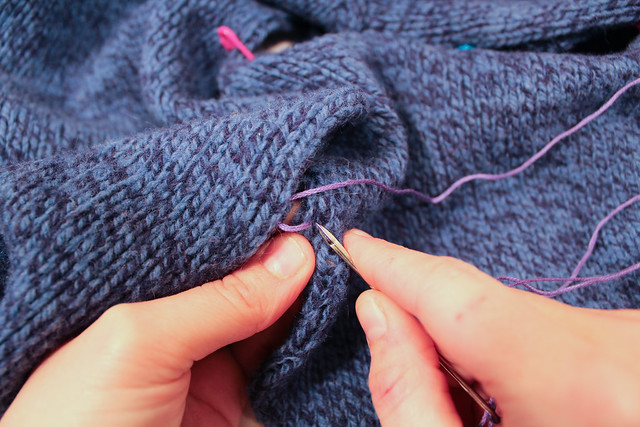
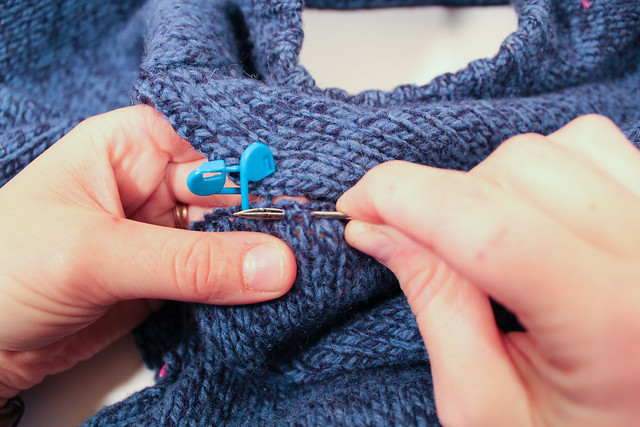
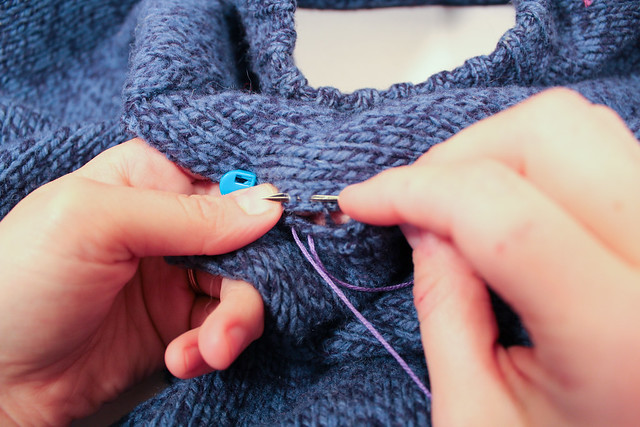
  3. Make sure the other ends are out of the way, and now, weave in the end.  Do the same with the other strands of the yarn.
    Nearly there: All but one end woven in!

    Nearly there: All but one end woven in!

  4. Finally, trim your ends away as close as you can to your project without cutting anything.
    Trim your ends away, and admire your work! You've finished weaving in your ends!

    Trim your ends away, and admire your work!


Do you have a favored method of weaving in ends, or a finishing technique that you love to share with others?  Tell me about it in the comments!  I love hearing from you!

Tinking Turtle’s Summer Camps: Knitting, Crochet, Sewing and More!
young child learning to sew

Sewing with Next Step Needlecraft from Tinking Turtle Designs

It’s that time of year again: the weather is warming (despite all the rain we’ve had this week), and on my walk this morning, I found the first delicious blackberries.  It’s summertime – and it won’t be long now until school wraps up and those hot days will be around the corner.  It won’t be long until Tinking Turtle’s Craft Summer Camps start!

For me, this means a shift in Tinking Turtle’s focus: I’m beginning to get ready for the summer camps that I’ll be running.  They’re one of my favorite parts of the year.

You see, way back before Tinking Turtle was a name written on a piece of paper, before I’d even dreamed up my first pair of socks, I was a camp counselor at Chimney Corners Camp.  I’ve talked about CCC (as it’s known to campers and alumni alike) before: it’s the place where I met my longtime friend Becca, and where Mr. Turtle proposed to me.  CCC’s been a huge part of my development as a person – not only personally, but professionally as well.  CCC was the place I taught my first students: figuring out how to break down knitting, crochet, embroidery and cross stitch to campers aged eight to fourteen.  I was only about seventeen myself, and I had very little clue what I was doing, but I figured out.

Since then, I’ve continued to love working and crafting with children.  I worked as a nanny for many, many years, and last year I ran the camp String Theory through Montgomery College.  It was a hit and a blast, and this year I’m adding to the lineup with two new classes: Next Step Needlecraft and Knockout Punch Rug Needlework.  Let me tell you a bit about the classes:

String Theory is my flagship class, now in it’s second year.  It’s a variety introduction to needlework

young girls showing off their finished knit mitts

Finished knitted mitts from String Theory!

and crafting for both boys and girls ages 8-12.  Campers learn how to knit a fingerless mitts (or two!), sew and decorate a project bag, learn to process, card and spin fiber, and the basics of how to dye wool.  This year we’re offering three sessions: 7/20 – 7/24 from 1-4 pm, 7/27 – 7/31 from 1-4 pm, and 8/3 – 8/7 from 9 – 12 pm.  You can click on the links to find out more and signup!

Because we received such a great response to String Theory, we’ve added Next Step Needlecraft.  Intended for campers who loved String Theory and want to learn more, or for older students looking to learn some more interesting crafts, it’s a great next step.  Students learn how to crochet, how to spin yarn, the basics of needle felting, and how to create stunning punch rug pieces.  This class is meant to sink students’ teeth into needlecrafts you don’t get exposed to nearly anywhere else.  This year I’m offering two sessions: 7/20 – 7/24 from 9-12 pm, and 8/3 – 8/7 from 1-4 pm.


My last class: Knockout Punch Rug Needlework is a very focused class.  Unlike the other two camps which focus on variety, this one dials down into the art of rug making.  In this class students will have a lot more independence to learn, plan and execute one, if not two projects.  This class focuses on giving students the independence to decide and plan their own projects, and my help to make them a reality.  We’ve got just one session of this camp, so if it sounds like something your child would enjoy, make sure to sign up as soon as possible. Knockout Punch Rugs will run 7/27 – 7/31 from 9 – 12 pm.

Child learning to knit with multicolored yarn

Learning to Knit in String Theory

If you’re looking for a great crafting camp for the summer, these camps are for you.  Don’t have children of your own?  Tell your friends about these camps.  Teaching kids crafts improves dexterity, problem solving and creativity – and preserves these traditions for the next generation.

Let me know what you think about the camps – and what other crafts I should look at adding to the repertoire!
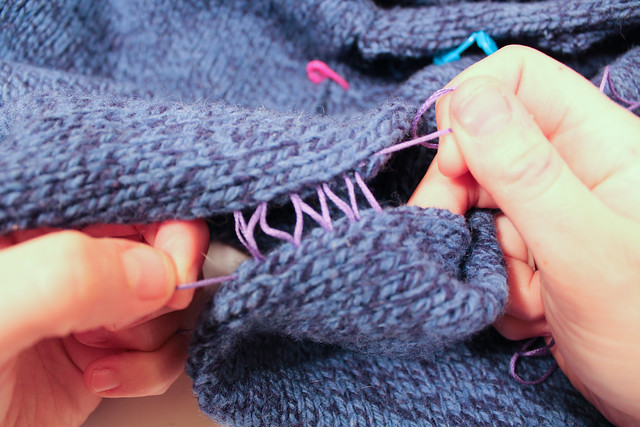
Photo Tutorial: Mattress Stitch

When I’m seaming a sweater, one of the most used stitches I use is the Mattress stitch.  Also known as the Ladder Stitch, I love this stitch because when done right, it’s nearly invisible, adds very little bulk to the seams, is quick to do, easy to take out, and practically perfect.  Let me tell you how I do the mattress stitch.

2 quick notes: here I start in the middle of a project.  Normally I start at the beginning of the seam and work my way up, but that’s hard to photograph well.  Also, I’m using embroidery floss in the tutorial, both because it’s in a contrast color, and because it’s cotton, and easy to pull out.  Most people like seaming with the yarn they used in the project, but if it’s too delicate, or too bulky, embroidery floss in a similar color works beautifully.  Mattress stitch done right should be practically invisible.

mattress stitch photo tutorial, ladder stitch photo tutorial, seaming knits together

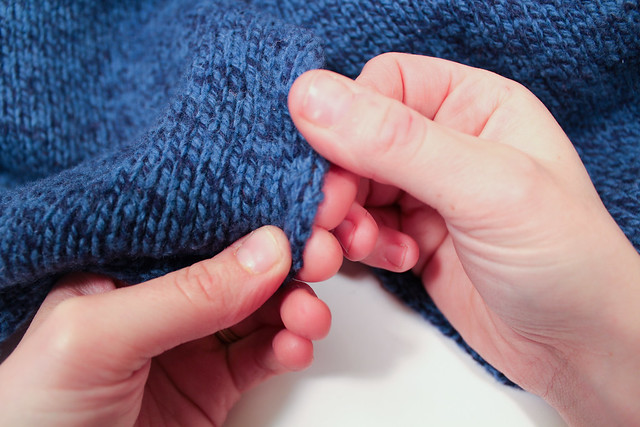
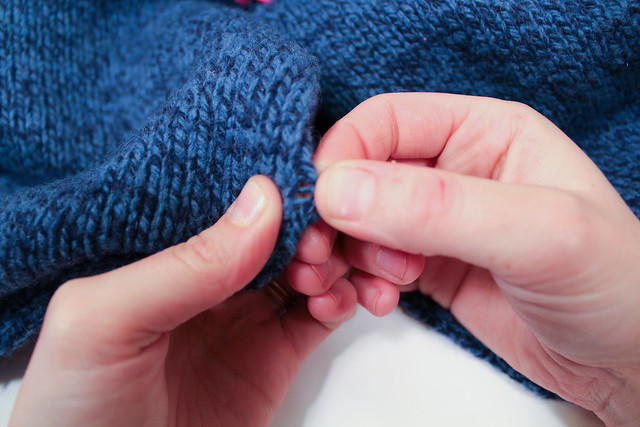
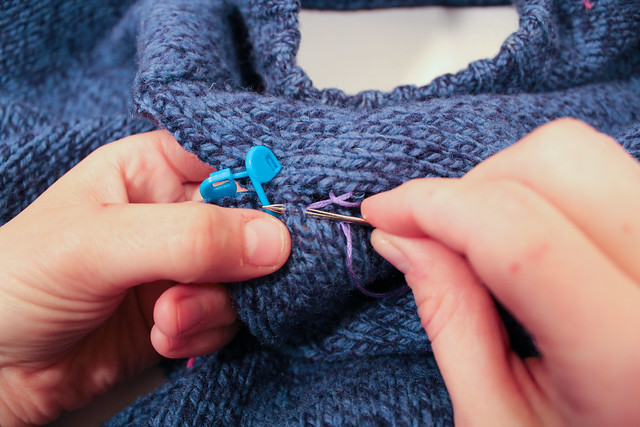
The first part of learning the mattress stitch involves taking a good look at your knitting.  Look between two stitches.  See the horizontal bars that run between the stitches?  This is where the sewing action will take place.  You’ll want to be working the mattress stitch between the 1st and 2nd columns of stitches on the edge of your work.  See Below?

mattress stitch photo tutorial, ladder stitch photo tutorial, seaming knits together

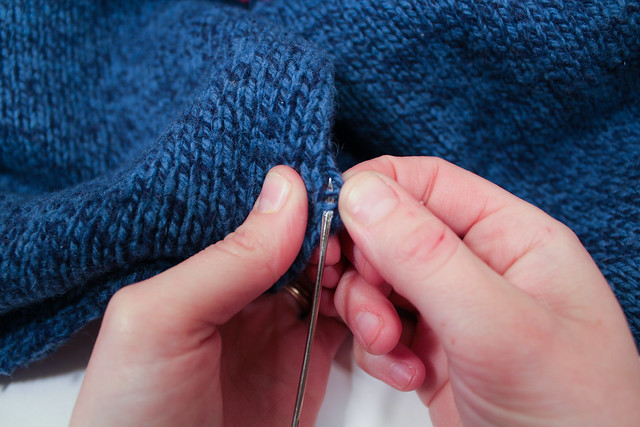
Don’t quite see it?  Let me show you with my sewing needle.  I’ve put 2 of the horizontal bars on my sewing needle.

mattress stitch photo tutorial, ladder stitch photo tutorial, seaming knits together

Okay, so that’s what the bars look like on the knit side.  What about the purl side?

mattress stitch photo tutorial, ladder stitch photo tutorial, seaming knits together

The bars that run between the stitches on the knit side are the purl bumps on the wrong side.  If you are having trouble ID’ing the purl bumps, turn your knitting over with your needle placed where you think the stitch should go.  The needle should be running between the 2 columns of stitches we found before.  See?

mattress stitch photo tutorial, ladder stitch photo tutorial, seaming knits together

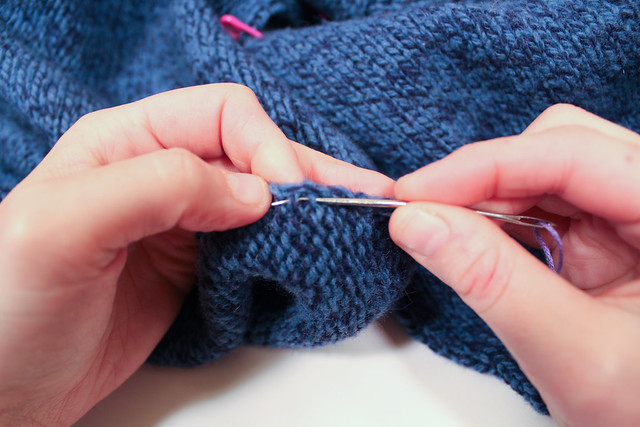
Right, so we now know where the stitches are supposed to go.  When I teach the matress stitch, I always say to go beneath 2 horizontal bars each time.  Some directions will tell you to go underneath only one bar, but when you’re first learning, it’s easier to go underneath 2.  I normally go underneath 2 bars if the yarn is an aran weight yarn or lighter, just because mattress stitch goes a lot more slowly when only going underneath 1 bar.  For aran weight yarns and higher (like bulky) I’ll go underneath only one bar, because each “stitch” is so big. So in most instances, just go underneath 2 bars between the stitches.  I like to start with the right side, just because I’m right handed.

mattress stitch photo tutorial, ladder stitch photo tutorial, seaming knits together

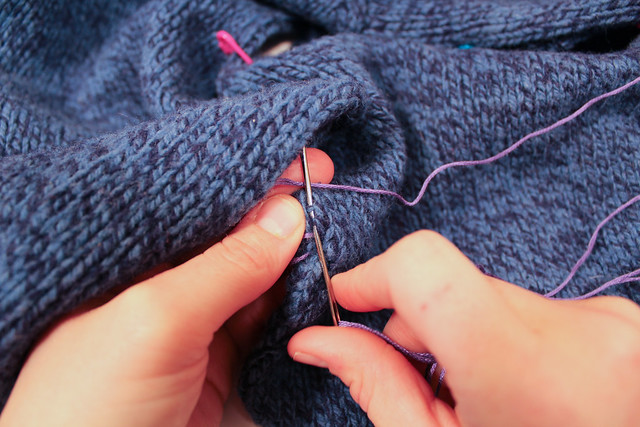
Now pull the needle through, leaving enough thread at the end for a couple of inches of tail.  Don’t pull the yarn through!  See how the thread goes underneath 2 bars?
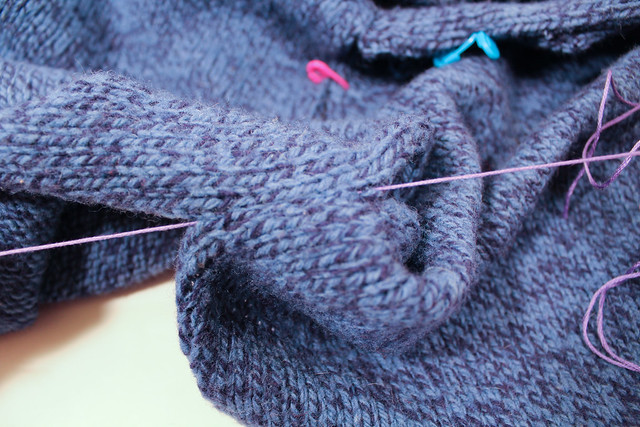
mattress stitch photo tutorial, ladder stitch photo tutorial, seaming knits together

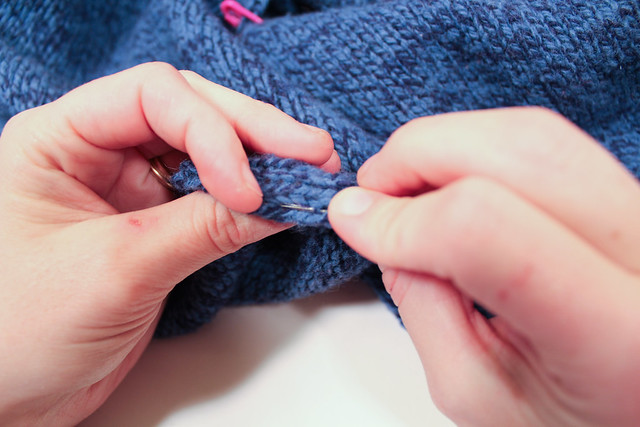
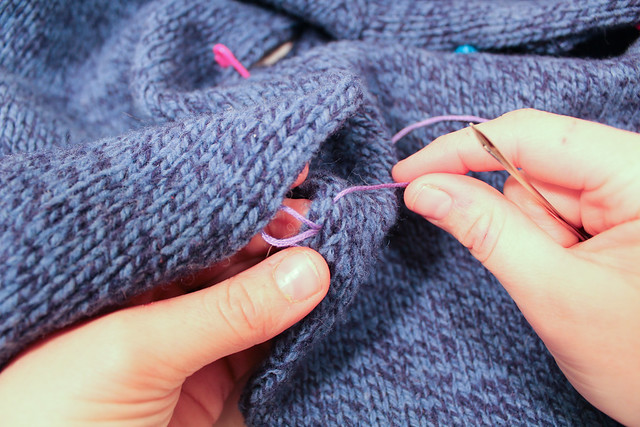
Now I go to the left side, and put my needle underneath 2 bars.

mattress stitch photo tutorial, ladder stitch photo tutorial, seaming knits together

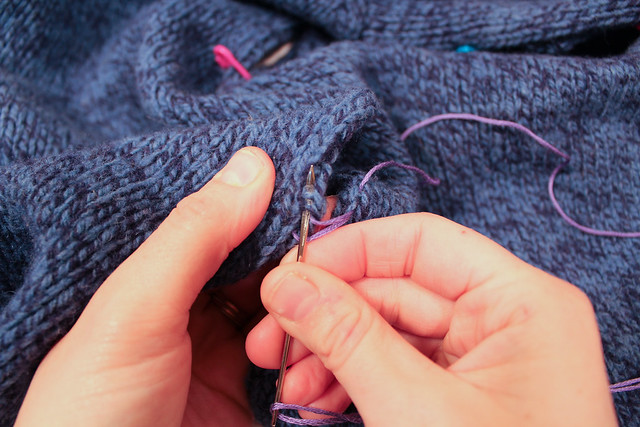
Pull through again.  Congrats, we’ve gotten started!  Now we’re back to the right side.  How do you know where to put your needle next?

mattress stitch photo tutorial, ladder stitch photo tutorial, seaming knits together

Look at the thread that’s coming out from the right side.  Put your needle down through the hole that thread is coming out of, and run it up under 2 more bars.

mattress stitch photo tutorial, ladder stitch photo tutorial, seaming knits together

Pull the needle through.

mattress stitch photo tutorial, ladder stitch photo tutorial, seaming knits together

Now we go back to the left side, find the thread coming out of the left side, and put our needle through the same way we did for the right.

mattress stitch photo tutorial, ladder stitch photo tutorial, seaming knits together

And pull the needle through again.

mattress stitch photo tutorial, ladder stitch photo tutorial, seaming knits together

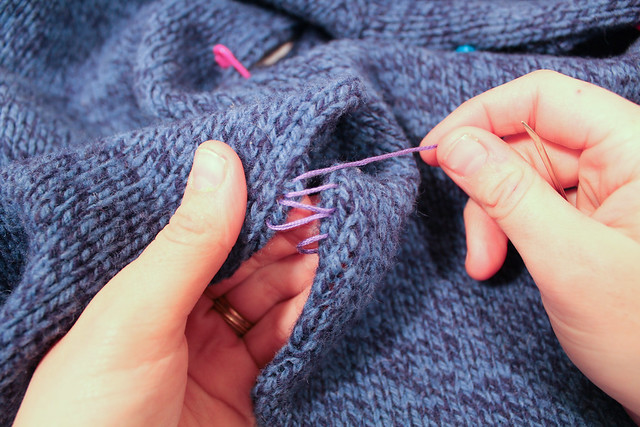
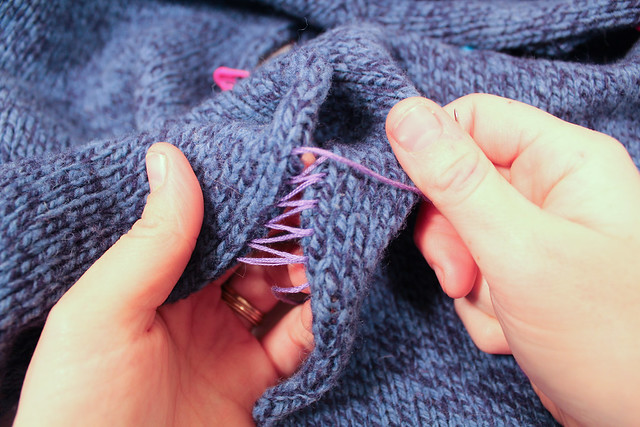
Now, we repeat the pattern, going under 2 bars on the right side, then two bars of the left side.  The stitch starts to look like rungs on a ladder, hence the alternative name “ladder stitch.”  Notice this whole time I’m not pulling the stitches tight, I’m leaving them loose.

mattress stitch photo tutorial, ladder stitch photo tutorial, seaming knits together

When I’ve got about 1″ to 2″ of stitching, I stop and admire my work, and make sure everything looks right.  Then, I take the tail, and the thread that’s attached to the needle?

mattress stitch photo tutorial, ladder stitch photo tutorial, seaming knits together

I pull both ends tight.  Note that I’m not letting the fabric wrinkle or scrunch.  I’m just pulling on the thread.

mattress stitch photo tutorial, ladder stitch photo tutorial, seaming knits together

There’s a quick trick to find out if you’ve pulled the thread tight enough.  If  you can pull the 2 pieces of fabric apart and you can see your stitches, it is still a little loose.  Pull both ends again.

mattress stitch photo tutorial, ladder stitch photo tutorial, seaming knits together

Now those stitches are tight.  See how I’m holding the thread with both ends?  At this point, neither end is secured, so if I pulled on the fabric without holding the ends tight, the stitches would again loosen up.  This will mitigate when you work more of the seam.

mattress stitch photo tutorial, ladder stitch photo tutorial, seaming knits together

Now, I loosen up the last stitch I did, so I can find where I need to go next, and I continue.

mattress stitch photo tutorial, ladder stitch photo tutorial, seaming knits together

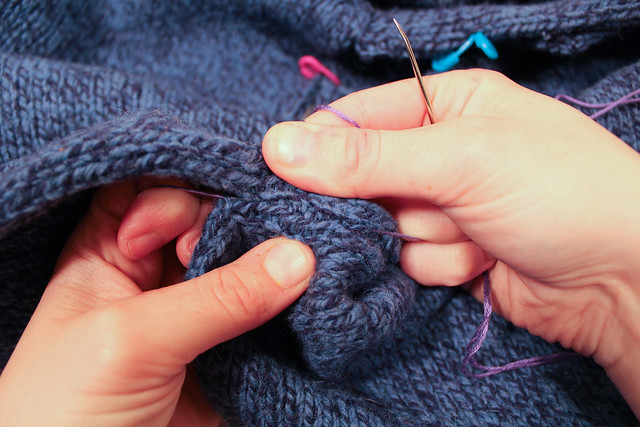
Now, what happens if you are working columns of stitches to rows of stitches?  You still use the mattress seam, the placement on the row side is just a little different.  Take a look at the edge of your knitting, where you bound off or cast on.  See how the v’s connect to make a zig-zag?  This is where we’ll be working.  Let’s look at an individual stitch.  Here, I’ve got it lifted up by my needle.

mattress stitch photo tutorial, ladder stitch photo tutorial, seaming knits together

You are going to go down through the middle of that stitch, between the 2 sides of the “V.”  Then, you’ll come up from under the fabric through the next “V.”  See how you still have 2 strands on the sewing needle?

mattress stitch photo tutorial, ladder stitch photo tutorial, seaming knits together

Pull the yarn through, leaving the same type of tail you left when working the mattress stitch before.  Now, on the column side, work the mattress stitch as normal.

mattress stitch photo tutorial, ladder stitch photo tutorial, seaming knits together

Now, go back down to the row stitch side.  See how the thread is coming out, same as it did with the other matress stitch?  You’re going to go down through the stitch with the thread, and go up through the next stitch.

mattress stitch photo tutorial, ladder stitch photo tutorial, seaming knits together

And repeat over and over again, until you run out of fabric to stitch on.

It’s important to note, you can switch between working columns to columns, columns to rows, rows to rows, and back again.  You can be seaming on the stockinette side, and then switch to seaming on the row side.

Got questions?  Please ask in the comments, on twitter, or on facebook.  Or, if you liked the tutorial, tweet it, facebook it, or share it!