MENU

Getting Cocky on a Sweater

Remember how yesterday I said I had everything left but the seaming?  Well, dear stitchers, that’s what I get for being over-confident.

Yesterday, oh yesterday, the future was looking bright.  I had a sweater nearly done, a window in which to finish it, and a baby that would look adorable in said sweater.  Turns out, not so much.

You see, the problem starts with the sleeves.  I’d worked on the sleeves over the weekend, when I was teaching at Fibre Space.  I’d mentioned before how I was winging it, a little, on the sweater?  I mean, I’d worked out some rough numbers, and I knew basically how a sweater was supposed to look and fit.  I figured I could go from there.

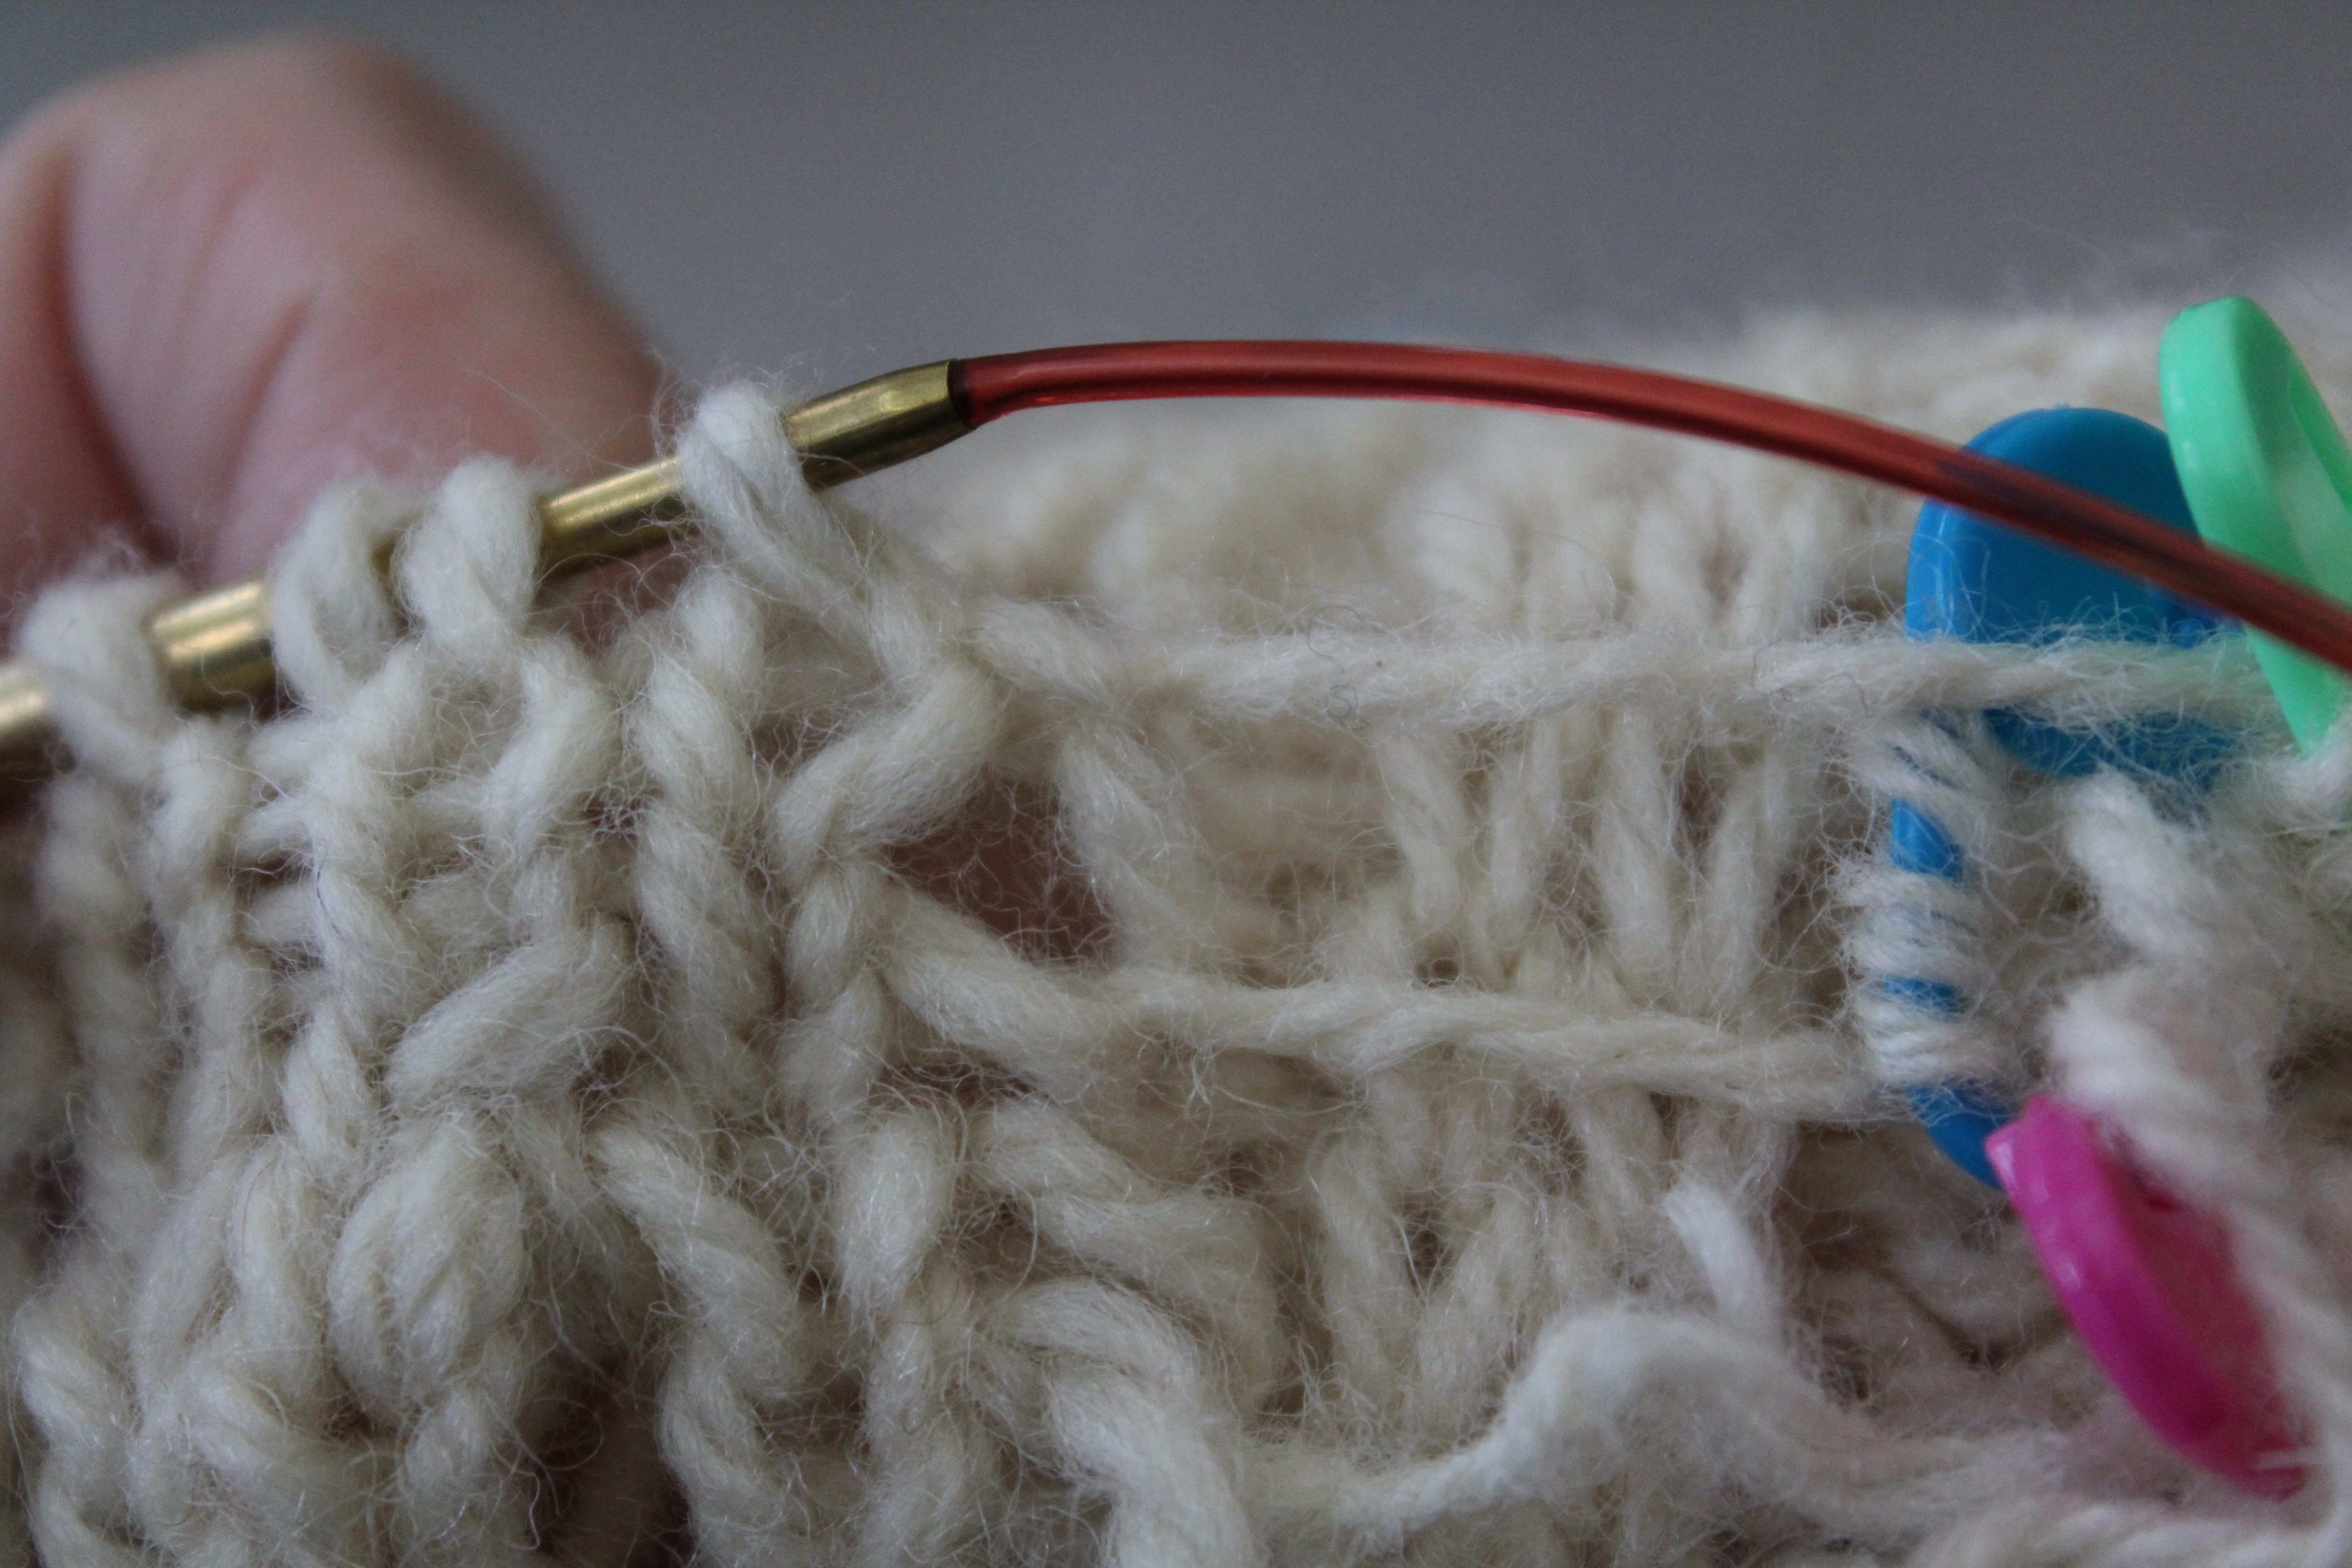
Since I had a limited amount of yarn left (I was rather committed to only using one skein, since I’d technically “stolen” it out of my business inventory), I decided to knit the sleeves two at a time.  That way, I wouldn’t have to remember the shaping decisions I made when I went to work the second sleeve.  Also, that way if I ran out of yarn, and the sleeves ended up a little short, I could just claim they were meant to be three-quarter sleeves.  Not a big deal.IMG_20170128_195444[1]

My first downfall would have probably been leaving the rough numbers and calculations I made at home.  My second downfall was deciding I’d just eyeball things.

And my third downfall was ignoring my little niggling feeling in the back of my mind when I looked at the sleeves two-thirds of the way through, and wondered if they would be wide enough.  Instead, I allowed myself to feel smug when I finished the sleeves with only a few yards left to go.  “Just enough to seam,” I thought.

I think you know where this is going.  The sleeves?  They’re really, really small.  See those sleeves?  Yes, they’re curling up, but even when they’re spread out, they’re still small.

Still, I was in enough denial (it’s the yarn fumes, I swear), that I managed to seam one of the sleeves together, and pin it to the body of the sweater.  And then, just to verify, I shoved my child’s arm down the sleeve to truly see if there was any hope of salvaging things.IMG_20170130_094404459[1]

If you can’t tell, that’s my child, with her arm out, rather puzzled as to why she can’t bend it.  Hint: the reason is the stitches are so stretched out in order to get her arm thru the sleeve that she can’t bend her arm.

So the sweater, is in timeout where I decide if I want to unravel and re-knit the sleeves or raid the business for another skein to finish things off.

And to look at my numbers to see where I went wrong.  Wish me luck.

Little Turtle’s Sweater

Kimono SweaterA while back I made a sweater for Rebecca that fit for all of two minutes, and I’ve been wanting to make another since then.

A spare skein of Dragonfly Fiber’s Traveller in Flannel Pajamas and a size 6 needle, and I was on my way.  Stacey Trock had made her daughter a sweater using a kimono type sweater pattern, and I remember how she loved it because it only had two fastenings.  I looked around at a couple of different styles, decided I really didn’t like anything (mostly because a lot of them tie up, and Rebecca would untie things as quick as fastened them).  So I played around with the numbers and started knitting.

You know when everything in knitting goes well?  It’s a simple pattern, minimal shaping, and the yarn is a joy to work with?  Well, this is that sort of project.  I love Dragonfly Fiber’s Traveller base, I love the colors, and I like anticipating how cute this sweater is going to look on Rebecca.  I’ve got great needles to work on (nice a pointy, how I like them), and it’s nice to be working on something that well, isn’t for work.   A little bit of a break, you could say.  I’m going to have this done this week, and Rebecca will be able to wear it for the rest of the season, and it’s going to be wonderful.

I’ve got the body done, and I’ve got the sleeves done too.  All that remains is the final bit of seaming.  I can’t wait to have Little Turtle in the sweater, ready to wear.  As it is, it makes a cute vest.

IMG_20170127_153327961[1]

I’ll keep you posted on how it goes.

PPS: also, appreciate this photo, above.  It’s really hard to get a picture of my daughter when she wants to wiggle.

A Perfect Sweater Repair

As I mentioned earlier this week, I’ve been hopping, trying to wrap up finishing projects before Christmas is truly upon us.  I’ve nearly pushed through the projects that are due in the next two weeks (and then the rest aren’t due until the New Year!).  I had one repair in particular that I wanted to share – a sweater repair in the Irish Knit Style.  The owner, AM, discovered me through the Washington Post article, and got in contact with me shortly thereafter.  She had a hole right in the front of the sweater, and could I please repair it?

As always, I told her I’d do the best I was able, but I was concerned – the yarn she had, a cream flecked with bits of brown, looked to be tricky to match.

This week I sat down to start on her repair, and when I pulled her sweater out of my bag, I couldn’t help wincing – this yarn was going to be really tricky to match.  I have a number of different creams on hand, but all of them were too light, and with too much “yellow” undertone.  AM’s sweater was a cream with an almost grey undertone.  And again, it had flecks of brown it it – tricky to match.  I checked the sweater – there wasn’t a good place to “harvest” yarn without going to a lot of effort, and I knew AM wanted to keep the costs down.  So matching the yarn from somewhere else would be a better option.

The hole itself was a lucky one: a row higher and it would be in the middle of a cable – a repair that’s much more finicky and tedious to do.  Two rows down there was the same problem.  This hole happened in exactly the right place – the few rows between two cables.

Well, it’d been a while since I’d been to one of the local yarn stores.  I figured it was time for a visit.

The Knitting B is a local yarn store about 25 minutes from where I live.  It’s the longest drive to a LYS I’ve had since I left my parents’ house.  So I don’t get there as often as I feel I should, and it’s too bad.  It’s a great store with lots of natural light, a solid selection of yarns, and a good parking area (always a plus!). Elizabeth, the owner, had an LYS in Charlottesville, VA for 25 years.  She’s a savvy businesswoman who knows here stuff.

When I got to the Knitting B one of the employees began helping me out trying to get a match.  Everything we pulled was not right.  Many of my go-to’s weren’t working.  And then, I remembered a trick I’d used before to get a good match.  Color changing yarns often will have sections that shift between colors, which means you get a lot of “bang” for your buck – and in this case, a couple of yards of yarn that match a hard to match yarn.  In this case, Noro Silk Garden came to the rescue.

The repair was pretty standard after that.

Because the yarn was awfully fuzzy, and hard to see what I was doing, I did a step I sometimes skip.  I ran guidelines: a different color of crochet thread for each row.  Because it’s the holidays, I decided to go with red and green.  I then unpicked the old yarn, pulling it out of the way.

Sweater repair with guidelines.

Sweater repair with guidelines.

I began tracing the yarn with the Noro Silk Garden.  My only complaint about Noro is that it’s really easy to pull apart, being a single-ply.  It was also a fraction less lofty than the original yarn, but the color matching was so perfect I didn’t care, as the repair was only 4 stitches across.  I ran the first row of yarn, adjusting the stitches to make sure they matched the gauge of the stitches around them.  Then I pulled out the green guideline.  It’s one of the reasons I love crochet cotton: it pulls out REALLY easily, and is nearly unbreakable without scissors.

Sweater repair half done, only red guidelines remain.

Sweater repair half done, only red guidelines remain.

I then ran the second set of yarn, and pulled out the red yarn.

Sweater repair, needing ends woven in.

Sweater repair, needing ends woven in.

See how nice the color match is?  Just let me be geeky for a moment – the under-color is SO close, and the flecks of brown is SOOO close too.  You’d really have to be looking to notice this.

Then got down to the tedious part: weaving in the old ends and the new ends, tweaking things as I go.

Sweater Repair, finished.

Sweater Repair, finished.

Can you spot the repair?  Yes?  Well then, I ask you.

How about now?

Sweater Repair, big view

Sweater Repair, big view

As always, if you’re looking to have a knit piece repaired, get in touch with me on my Finishing Page.  Got questions?  I’d love to hear from you.  Comment, or drop me a note!

What to do if your Family Heirloom is Falling Apart

working on repairs

As you are putting away your holiday decorations, you notice it: a hole, a tear, a rip or an unraveled bit of yarn.  Somewhere along the way this holiday season your childhood Christmas stocking, or that bit of lace your grandmother made, or other family heirloom has gotten a little beat up.

What do you do?

I’ve written before about checking your knit or crochet items to make sure they are staying well-cared-for, but what happens when the damage is already done?  What do you do?

First, make sure that the stressors on the item have been removed.  If the stocking was stuffed full of gifts, remove them.  If the lace tablecloth was hanging off the side of the table, move it to a more supported location.

A recent Christmas Stocking Repair, nearly finished. I was fortunate to be able to closely match the red and the cream.

Then, take a deep breath.  Old knitted and crochet objects have a wonderful thing going for them: the stitches and yarn have been sitting in the same way for a very long time.  They’ve settled and, perhaps in the case of wool, even felted a little bit.  That means unless you are pulling and tugging on the object, the stitches should stay in place and unravel no further.  If the yarn or fibers aren’t too delicate, fold the object up and put it in a bag that protects it from sun and dust.  If it’s plastic, don’t seal the bag: it can trap moisture in with the fibers, which isn’t ideal.

Next, get on the phone or the internet and see if you can find a Local Yarn Store.  If not, see if you can find a local museum or historical society that might deal with textiles.  Often someone will know of someone who might have the skills to repair your object.

Repairs to the edge of a sweater.

Then, think.  Before you talk to someone about repairing your heirloom
determine your goals.  Are you looking to restore it to it’s former glory?  Do you want to just have it fixed so you can continue using it?  What is feasible for caring for your heirloom in the future?

A local knitter, crocheter or stitcher of some great experience might be skilled enough to repair holes and return your heirloom to former use, but they might not have the resources to do a perfect restoration.  On the other hand, they might be more affordable.  Meanwhile, someone affiliated with a museum might have more resources to do a full restoration of your heirloom, but it will probably cost more.

Making a decision about your commitment to keeping the heirloom safe and preventing it from deteriorating further is also important.  If you plan to keep using the heirloom, it’s not feasible to have it under glass.  Sometimes the best ways of preserving textiles is to not use them, which can be problematic if the reason you love a heirloom is because of it’s tradition of use.

Repairs to the arm of a person on a stocking – not all color matches can be perfect.

Personally, I fall on the side of loving and using family heirlooms.  I’m careful about how I handle and store them, but it doesn’t prevent me from using the object.  As someone who creates, I think that useful objects (like furniture, clothing, blankets and many textiles) lose some of their meaning when they are no longer able to be used.  And if the object takes some damage?  Well, I’m fortunate enough to be able to make repairs myself.