MENU

My Easy Finishing Technique for Weaving in Bulky Yarn

Techniques for Weaving In Really Bulky Yarn

Today we have a quick little blog post that I’ve been meaning to do for a while, but haven’t quite gotten around to!  I thought it’d be the perfect thing to start out our week: a tutorial on weaving in really bulky yarns.  I think it’s a helpful finishing technique for both knitting and crochet.

What am I going to be talking about? Well, weaving in ends.  Now, I know weaving in ends isn’t everyone’s cup of tea, and I totally understand.  It’s one of the reasons I offer finishing services.  But for those of you who like to sweat the details, weaving in ends can be an important part of finishing a project.

Today’s little tutorial is specifically about weaving in really bulky yarns, which can be hard to pull through the fabric.  Now, this trick only works for plied yarns, but it’s a nice thing to have in your arsenal.

Onward!

  1. First, we’re going to want to take the tail that we plan to weave in above.  See how it’s plied together – that is, it’s got multiple strands all twined around each other?  We’re going to separate those out.  You’ll want to do it by twisting the yarn in the opposite direction it’s twisted together, so the individual strands start standing out from one another.  Once you’ve got one you can grab, pull it from it’s neighbors, until you’ve got them all separated like this:
    Yarn separated out into it's individual plies.

    Yarn separated out into it’s individual plies.

  2. Now that you’ve got the plies separated out, get a sharp-pointed needle and thread one of the plies onto the needle.  Like this:
    Thread one of the plies onto a sharp needle to weave in the end of the yarn.

    Thread one of the plies onto a sharp needle to weave in the end of the yarn.

  3. Make sure the other ends are out of the way, and now, weave in the end.  Do the same with the other strands of the yarn.
    Nearly there: All but one end woven in!

    Nearly there: All but one end woven in!

  4. Finally, trim your ends away as close as you can to your project without cutting anything.
    Trim your ends away, and admire your work! You've finished weaving in your ends!

    Trim your ends away, and admire your work!


Do you have a favored method of weaving in ends, or a finishing technique that you love to share with others?  Tell me about it in the comments!  I love hearing from you!

Finishing and Beginning

Tech edits on Trains

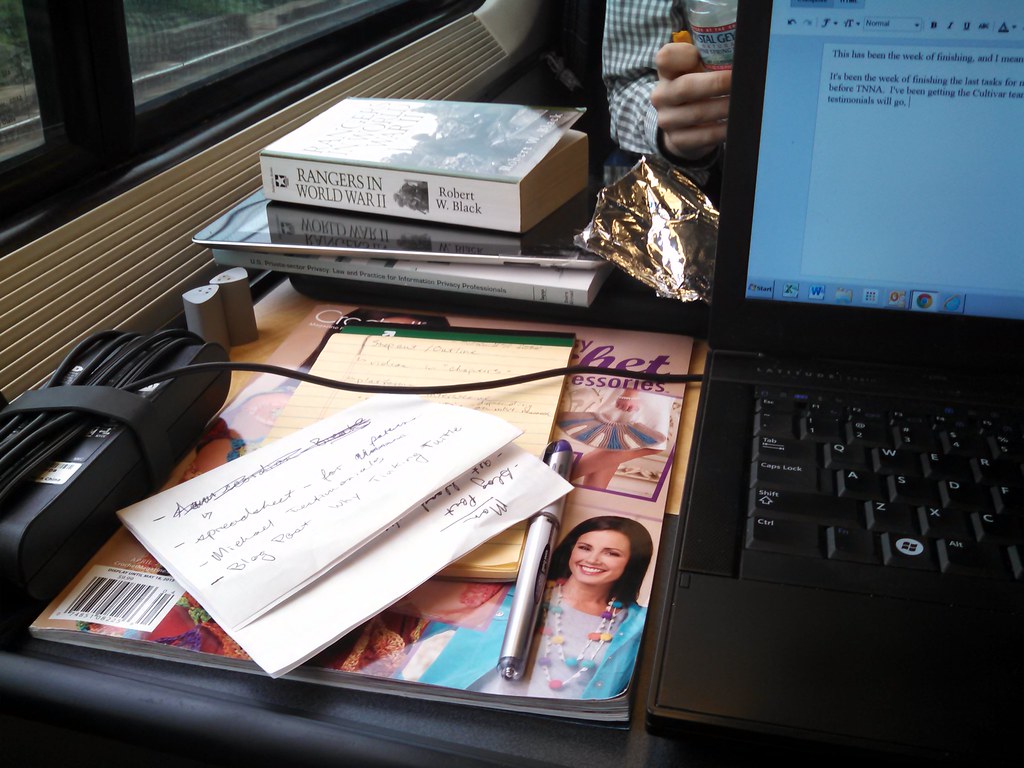
Right now I’m on the Acela heading from Washington, DC to Boston.  As per Mr. Turtle’s dream, we’re riding first class, and living the life for a long weekend.  We’re on vacation, and I couldn’t be happier.  It’s been much needed.

This has been the week of finishing, and I mean that in more than one way.

It’s been the week of finishing the last tasks for my new website: set to launch next Wednesday, right before TNNA.  I’ve been getting the Cultivar team the last of the copy, figuring out where testimonials will go, sorting through pictures, and making sure all the i’s are dotted and the t’s crossed (which, by the way, has become a saying that makes no sense to my brother, who grew-up in the land of typing but no cursive).

It’s been the week of wrapping up finishing and repair projects too: a pair of mittens with the thumbs worn out, a black sweater that needed the seams redone, a sweater & bootie combo that were adorable and needed to be seamed and blocked.  I wanted to get them all off, as my guest bedroom is being taken over by finishing projects.  Now, I just have three afghans in need of repair – which will be fun, as they are all quite of a size.  And then there’s one small and delicate christmas stocking, which is more holes than solid fabric, but much loved.

I’ve been finishing up tidying the house: there’s so many things that aren’t in their proper places.  Yarn’s everywhere the cat’s can’t get to.  I’ve got “body parts” everywhere: my father gave me a whole bunch of display pieces and they were immediately conscripted into work.

I’ve finished with 14 patterns since the beginning of the year – that’s just about the same number of patterns I published last year, total.  We’re wrapping up on tech edits now on most of the patterns… thank goodness!  I’ve got the pleasure of working with some amazing minds to make patterns the best they can be, but it’s still hard bopping between one pattern and the next to make sure everything is as perfect as it can be.

After TNNA (next weekend, and I’m so excited!) I’ll be gearing up for the summer season: which means getting ready for the camps and for the fall.  If you have or know a kid in the DC area looking for some really great craft based camps, you should check out the listing of camps here.

Traveling, Knitting, Repair

A couple of weeks ago I looked at my calendar and realized that every week until New Years I was committed to something that involved traveling.  And I realized that I needed to have a plan if I was going to get all the knitting and crochet I needed done by Christmas.
For this last week this meant traveling with a half blocked sweater (that got spread out in our Amtrak room to dry as we went to get dinner so I could finish sewing it), and two other sweaters in need of repair.  Then there was my sock knitting (a design!) and hat knitting (another design!).  Needless to say, we brought the big suitcase.

Michael and I were heading to a wedding.  We got on the Amtrak train in Washington, DC Friday night, ate dinner, worked, slept, ate breakfast, and got off at the station.  The wedding didn’t start until 4, and we didn’t have a hotel room, so I camped out in the Amtrak station to work on a sweater repair.  I got some odd looks.

Picked up stitches on circular needle, unraveling part that will be patched.
The sweater was possibly one of the most challenging patterns I’ve had in a while.  The tag said it was an “Irish Hand Knitted” sweater, and as far as I can tell, I believe it.  There’s simply no way to make that many cable crosses on a machine and make it cost effective.

The sweater had suffered from some poor storage, and had a hole about 4″ wide about a 1/2 from the left side seam.  The pattern was a doozy: a variation of a slipped puff/bobble stitch that involved using cabled slip stitches on the wrong side.  Normally I’d try to reconstruct the fabric around the hole, but in this case, it was more time effective to pull the section out and knit a patch.

Wrapping yarn around new patch yarn to create “retroactive intarsia.”

The old yarn, since it was on the edge, was long enough that each row, as I knit back and forth, I’d work a type of retroactive intarsia, wrapping the patch yarn around the old yarn, then weaving/skimming the old yarn into the original fabric.

At one point I had more than 45 locking stitch markers in play, holding various ends out of the way, holding live stitches, marking future holes to repair, and marking where I started.

So much fun!

Detail of “retroactive intarsia.”

I could kick myself though: while I got pictures of the process, because I had to turn this project around quickly, I neglected to get pictures of the finished repair.  Suffice to say, that when I handed the sweater to my husband to take a look at, it took him a good 3 minutes to find the patch.

I call that success.

The Holiday Season

Somehow, I’ve managed to book every weekend between Thanksgiving and New Year’s with traveling/big event.  Which is not particularly bad, as I’m going to get to visit with good friends and family.  But it does mean that my weeks have to be incredibly productive, as I try and get everything that needs to be done for the business done.

It also means that things like tidying up and cleaning?  Have gone right out the window.

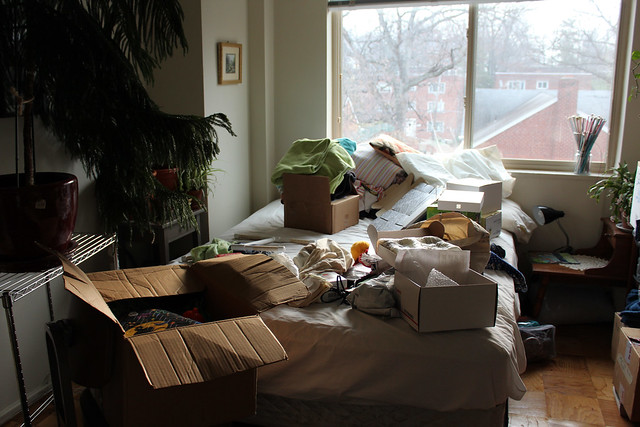
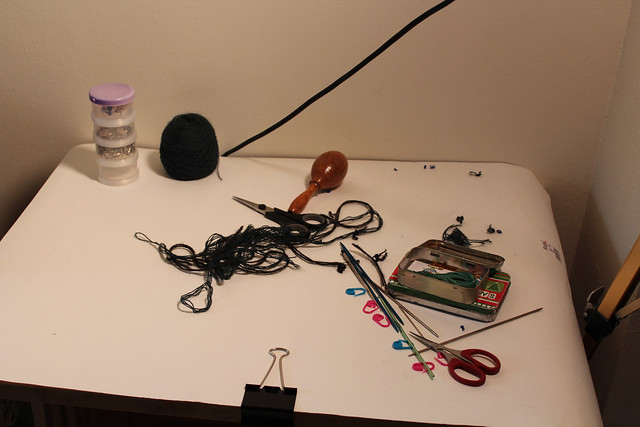
Yesterday I had to stop and take a look around the guest bedroom, which seconds as my workroom (for things like finishing, yarn storage, and storage of teaching materials).  It is a disaster.  And since I have no shame, and I figure there are other people out there who value things other than tidiness, I thought I’d share.

Below you’ll see the state of the guest bed.  Blankets and pillows are thrown to the top of the bed, as I had some rush blocking last week that I needed to get done.  You can see the towels I used to block (thankfully dry) folded near the pillows.  On the left is a tree that my husband brought home from work.  There’s the open Canon box, as my driver for my camera cards that is installed in my laptop isn’t working, and I now have to download my pictures off the camera with the cable.  There’s an open box of holiday decorations, as our attempts to put away Fall/Halloween decorations and pull out Christmas ones has gone in fits and starts.

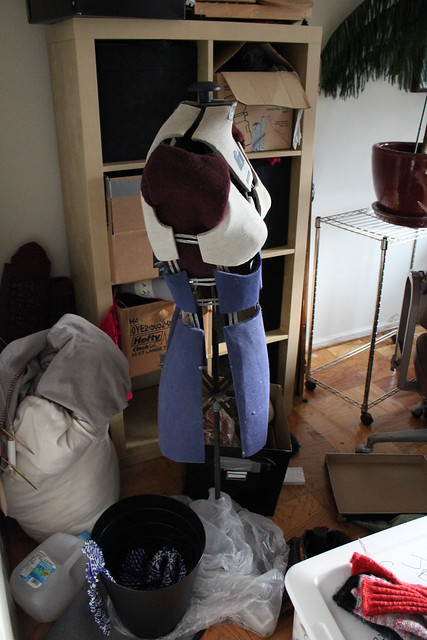
Looking to the left of the tree, you have my dress form (with padded shoulders as I was blocking something that needed more room around the shoulders), a trash can where not quite everything made it to the can, and an overflowing bag of fabric.  Most of the yarn is tucked away in the shelves, thank goodness.

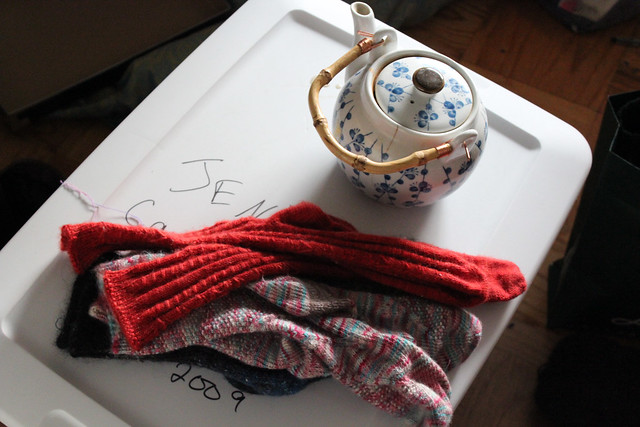
On a Rubbermaid container, I’ve got a random assorted pile of my hand-knit socks, pulled from the washer (as I don’t tumble-dry my socks), and haphazardly tossed in the room, with the vague intention of hanging them on my sock blockers.  This was about a week ago.  The socks are dry.  They never made it onto the sock blockers.  Next to that we have a half pot of tea that I’ve since remembered to bring into the kitchen and empty.

On the right of the door is my work desk.  A few days ago I covered it with the paper I use in my lightbox, with the intention of setting up the lightbox over it.  That never happened.  Instead, you’ll see an electrical cord running up in the back of the picture?  That’s going to one of my two work lamps, clamped to one of the two tripods I have.  Both lamps are shining on the table, so I can take pictures.  As long as I’m careful of shadows, I don’t have to set up the lightbox.  It’s also been where I’ve been working on finishing, so you’ll see a various assortment of tools exploded about, along with a pile of yarn scraps.

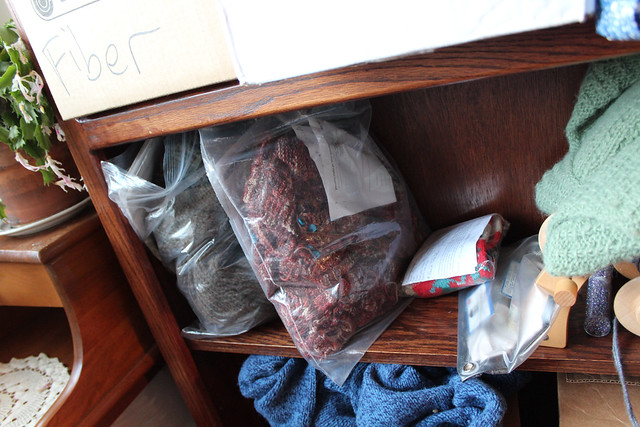
The one shining beacon is the bookshelf, where I’ve managed to stay organized, mostly out of necessity.  This is where I keep finishing projects that are in the queue.  See them all tidy?

4 Warning Signs Your Handmade Afghan is Falling Apart

My business has many arms – my teaching, pattern writing, and more recently, finishing.  Normally finishing involves piecing together sweaters or blocking shawls, but sometimes I get another type of request.  Sometimes I get requests to do repairs on well loved a
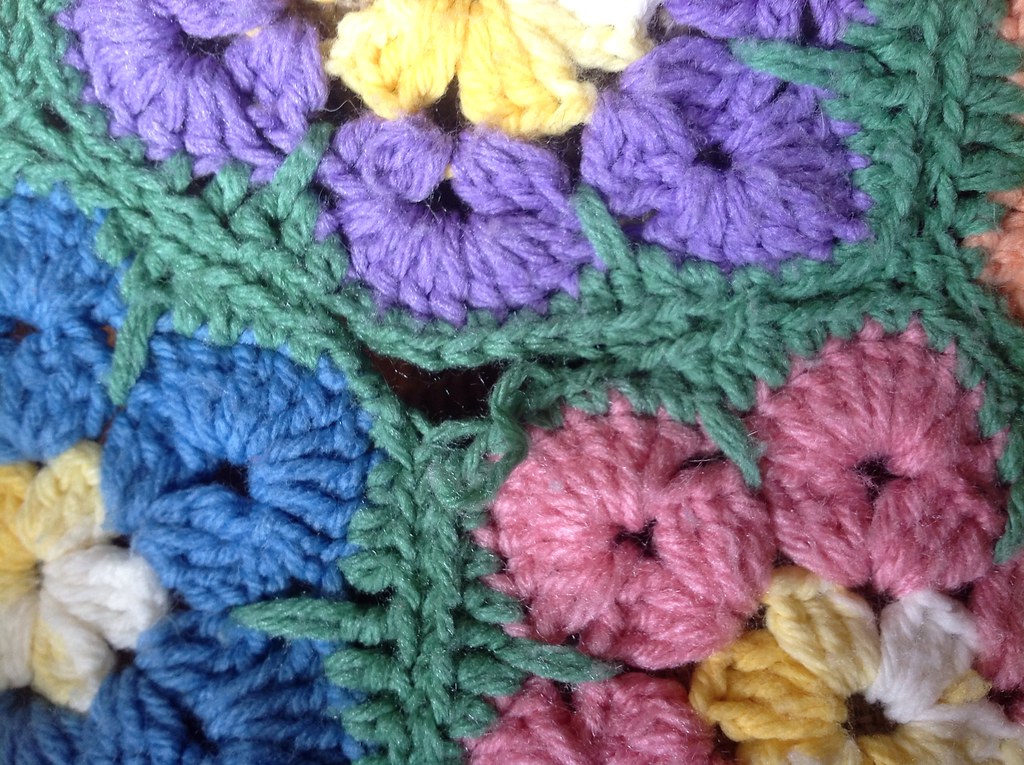
fghans and blankets that are lovingly knitted or crochet.  Many times I’m able to fix things before they get too bad, but sometimes I have to be the person saying, “I’m sorry, but there is no way to fix your family heirloom.”  This is a terrible thing to say, and so I have a list of things to look for to know when your afghan is in need of repair, before it gets irreparable.

  • At the First Sign of Trouble, seek help.  There’s an old adage that says, “A stitch in time saves 9.”  And it is so true – making repairs before they happen is the best way to prevent tears, rips and holes.  Look for weak spots in your knitting or crochet – where the thread is getting thin or wispy.  These are places where holes will form.  Find someone to help you retrace the stitches and reinforce the work.
  • Pulls or loose threads.  Sometimes yarn that has been carefully woven in works its way loose, or gets caught and creates a pull or snag.  Don’t panic! If the thread is not broken, just stretched and out of the weave of the fabric, carefully pull it in different directions, and see if you can ease it back into place.  If not, see if you can find someone (like a finisher or a more experienced knitter or crocheter, that can help you work the yarn back into the stitch.

  • Seams coming undone. So many crochet (and even knit) afghans have their seams come undone.  One of my very first repairs to a blanket was my father’s well-loved afghan, made in long strips of knitting and seamed together.  If a seam comes undone, don’t panic.  Take a bit of matching yarn or thread, and carefully seam the edges back together, using a ladder stitch or running stitch.
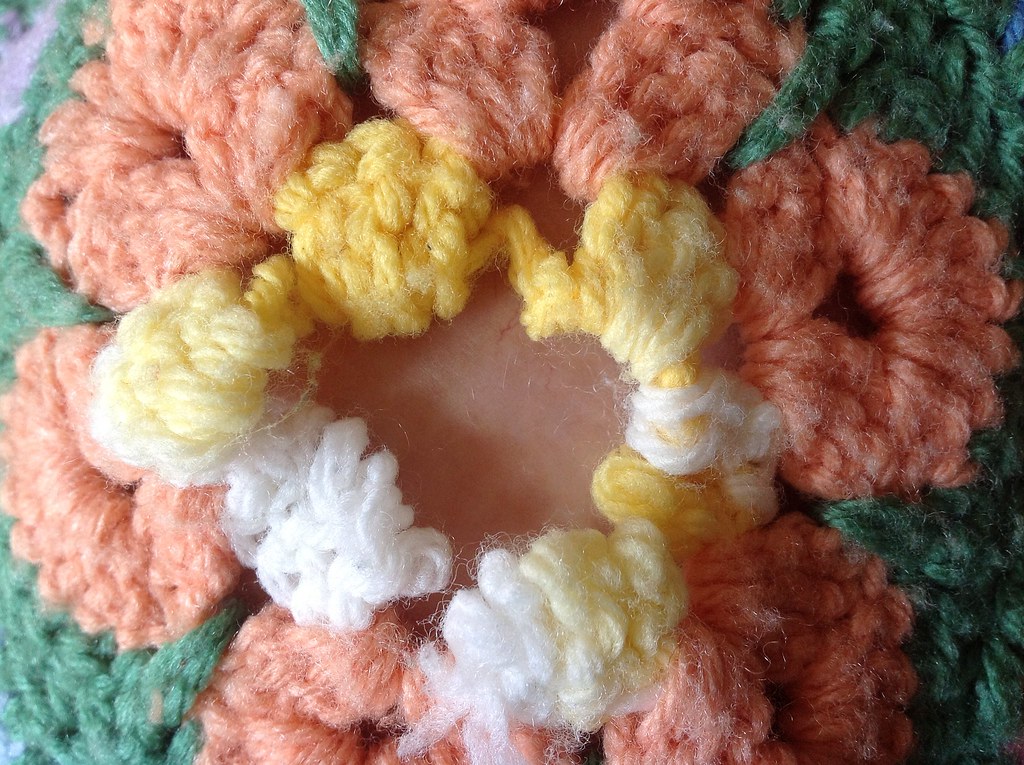
  • The center of motifs are a common place I see in need of repair.  Either because the original creator didn’t secure the ends enough, or just because of stress, this can be a common cause for problems.  If you can, try to pick up as many of the loose loops and put them on a stitch older or locking stitch marker, to prevent further unraveling. This is one repair I’d say, if you can, to get a professional to do, as it takes a deft touch and a good understanding of how stitches work to get it back to matching the others.
The key to all of these problems is if they are caught early, they can be fairly painless repairs.  If you let the problem go, the worse things get, and the more likely that the afghan will need to be reconstructed or have more extensive repairs.Have you ever had to repair a project?  Tell me about it on twitter or facebook.  Looking to have your own repaired?  Get in touch with me through my finishing form!