MENU

Free Pattern: Water Babies!

You’re in for a real treat today: a free pattern!  As a policy, I rarely make free patterns, but Jordana Paige sweet-talked me into creating one last year.  Since it’s the heat of summer, I thought this would be the perfect repost, a sweet little something for kids and adults alike to enjoy.  Quick to make up, you can use these as intended and inflate a water balloon (either with water or air) to use as stuffing, or you can stuff and have as a forever-stuffed animal.
When I was younger and my mother needed something to keep my
siblings and I occupied, she’d make water babies.  Filling balloons with water, she’d hand us
markers and we’d go to town, decorating our water babies, taking boxes lined
with tissue to make beds, and making various outfits for them.  Inevitably, though we’d drop the balloon on
the grass, or it would brush up against the edge of paper or something else
sharp, and our beloved water babies would be gone – popped in a rush of water.
Being an enterprising young child, I decided that my water
babies needed an outfit, a protective cover to protect it from the world.  Being handy with a hook, I made small bags
that my balloon would rest in, to be protected. 
Over time these developed into quite elaborate creatures in their own
right.
And then, I grew up and forgot about them.
Recently, however, these water baby costumes were brought
back to mind.  I have two young girls in
my life, and they were playing with water babies the other week.  Inevitably, one got dropped on the hot
asphalt, and burst… leading to some quite natural tears.  I decided it was time for me to break out my
hook and an old idea, and give it a new twist.
And so, I present to you, a modern twist on my 20 year old
water baby pattern.
Free Pattern Water Baby
MATERIALS
Gauge: 7 sts and 6 rows equal 1”
Hook: F/5 3.75 mm
Yarn: Worsted weight yarn, 4 colors plus black and white.
C1: Dark Blue
C2: Green
C3: Red
C4: Light Blue
INSTRUCTIONS
Using C1, Create sloppy slip knot, sc 2.
Round 1: 6 sc in circle. (6 sts)
Round 2: *sc twice in next st. Repeat from * 6 times total.
(12 sts) Join to next st with sl st. BO.
Round 3: Switch to C2. *sc twice in same st, sc in next st,
repeat from * 6 times total.(18 sts)
Round 4: Switch to C3. *sc twice in same st, sc in next 2
sts, repeat from * 6 times total. (24 sts)
Round 5: *sc twice in next st, sc in next 3 sts, repeat from
* 6 times total. (30 sts)
Round 6: *sc twice in next st, sc in next 4 sts, repeat from
* 6 times total. (36 sts)
Round 7: Switch to C4. *sc twice in next st, sc in next 5
sts, repeat from * 6 times total. (42 sts)
Round 8: Switch to C1. *sc twice in next st, sc in next 6
sts, repeat from * 6 times total. (48 sts)
Round 9: *sc twice in next st, sc in next 7 sts, repeat from
* 6 times total. (54 sts)
Round 10: *sc twice in next st, sc in next 8 sts, repeat
from * 6 times total. (60 sts)
Round 11-12: *sc twice in next st, sc in next 14 sts, repeat
from * 4 times total. (60 sts)
Round 13-16: Switch to C2. Sc all around.
Round 17: *sc2tog, sc in next 8 sts, repeat from * 6 times
total. (54 sts)
Round 18: *sc2tog, sc in next 7 sts, repeat from * 6 times
total. (48 sts)
Round 19: *sc2tog, sc in next 6 sts, repeat from * 6 times
total. (42 sts)
Round 20: Switch to C3. *sc2tog, sc in next 5 sts, repeat
from * 6 times total. (36 sts)
Round 21: *sc2tog, sc in next 4 sts, repeat from * 6 times
total. (30 sts)
Round 22: Switch to C1. *sc2tog, sc in next 3 sts, repeat
from * 6 times total. (24 sts) At this point you should stuff your orange ball.
Round 23: *sc2tog, sc in next 2 sts, repeat from * 6 times
total. (18 sts)
Round 29: *sc2tog, sc in next st, repeat from * 6 times
total. BO. (12 sts)
Ears:
Using Green, foundation double crochet 12 sts. Bind off. Tie
a knot in one end, use the tail to attach the other end to the water baby.
Eyes:
Using White: Create sloppy slip knot, sc 2.
Round 1: 6 sc in circle. (6 sts)
Round 2: *sc twice in next st. Repeat from * 6 times total.
(12 sts) Join to next st with sl st. BO.
Round 3: Join C2, ch 1. *sc twice in same st, sc in next st,
repeat from * 6 times total. Join to Ch 1 with sl st. BO.(18 sts)
Using Black: Create a sloppy slip knit, sc 2.
Round 1: 6 sc in circle. BO. (6 sts)
Nose:
Using C2: Create sloppy slip knot, sc 2.
Round 1: 6 sc in circle. (6 sts)
Round 2-3: Sc all around.

Assembly: Sew eyes, nose and ears to water baby. Insert a
balloon into the back, fill with water or air. Tie balloon end in knot and
play!

Historic Stitching: Vintage Crochet Made New

This is a post that, in its original form, appeared for Jordana Paige’s blog.  The rights reverted back to me, and in light of the publication of Time Traveler

Photocredit: Sockupied
My Historically inspired socks

, I thought it was a timely blog post.  I’ve made updates and edits to this post, as time has reflected.

One of my favorite things to do when I get a little bit of time
(between teaching crochet and knit, designing, and writing) is to peruse
historical patterns.  It’s a fortunate
function of our digital age that the casual crocheters or knitter can, with a
click of their mouse, find a wealth of historical magazines online.
Now, I will not claim that reading historical patterns is
for everyone.  For one, half of my
digital collection is in French and German, and it can sometimes be a little
challenging to translate patterns.  And
even in English, patterns can trip the casual reader up, using the same name
for different stitches, or using terms that are no longer commonly used.
There exists a wealth of resources where you can find
historical patterns online.  To get you
started, I have listed some of my favorite resources:
http://archive.org/
(search knitting or crochet)
If you’re willing to do some digging in other languages, there’s a few other resources I can recommend:
http://gallica.bnf.fr/
(French, search tricoter and crochet)
http://www.collectionscanada.gc.ca
(Canadian, search knitting, crochet, or tricoter)
When you go to any of them, just search “crochet” or
“knitting” or “needlework.”  You’ll find
tons of patterns, though unlike modern resources, knitting, crochet and needlework
were not so sharply divided.  In the same
magazine you might find a pattern that calls for use of crochet, knitting and
sewing.  I think that’s half of the fun.
If you are willing to squint at some old etchings and
problem solve when things don’t quite go right, it can be a fun way to get a
glimpse of the past.  And maybe you’ll find some new patterns to love!
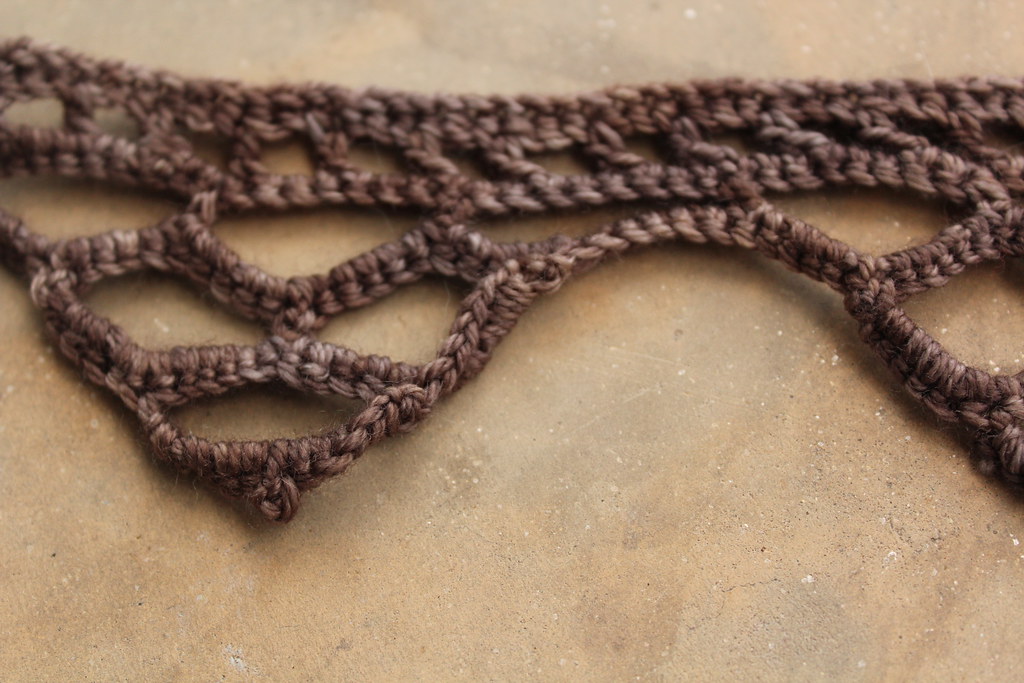
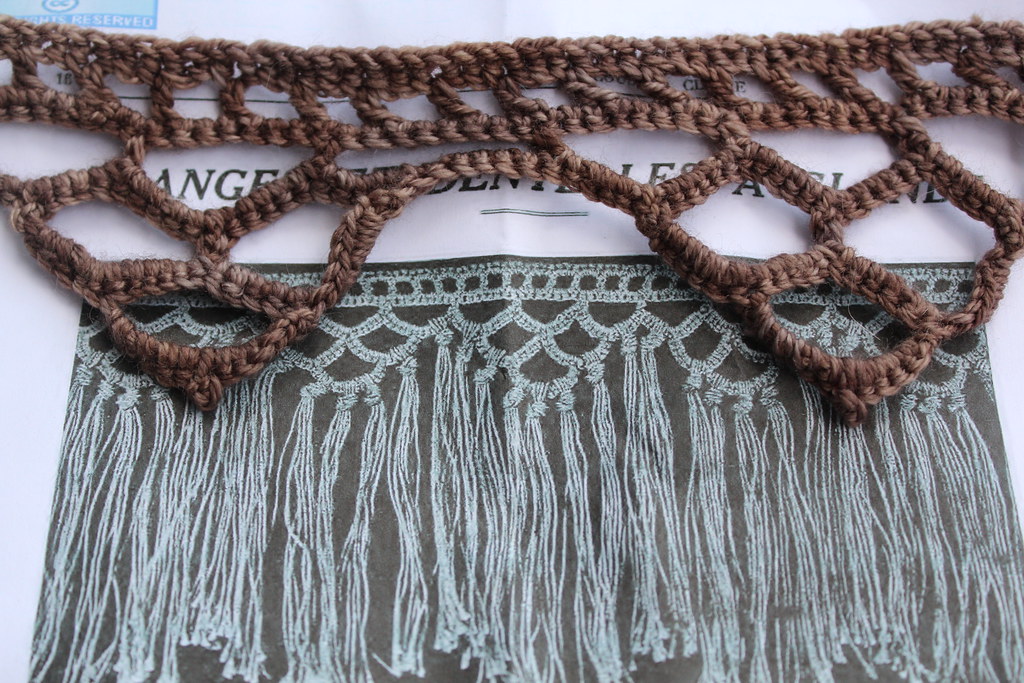
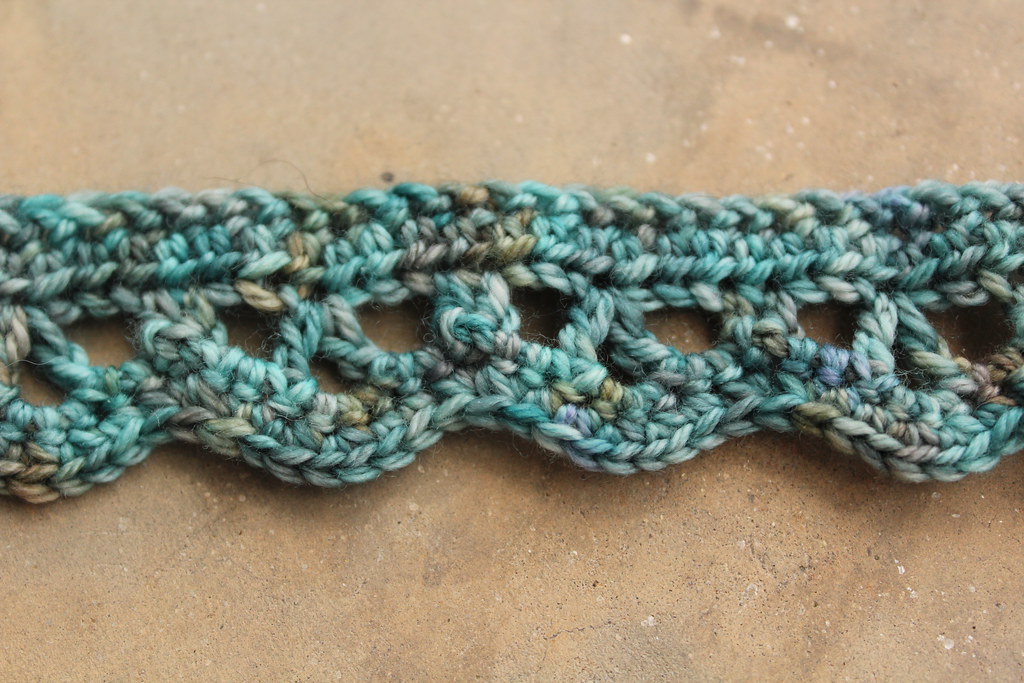
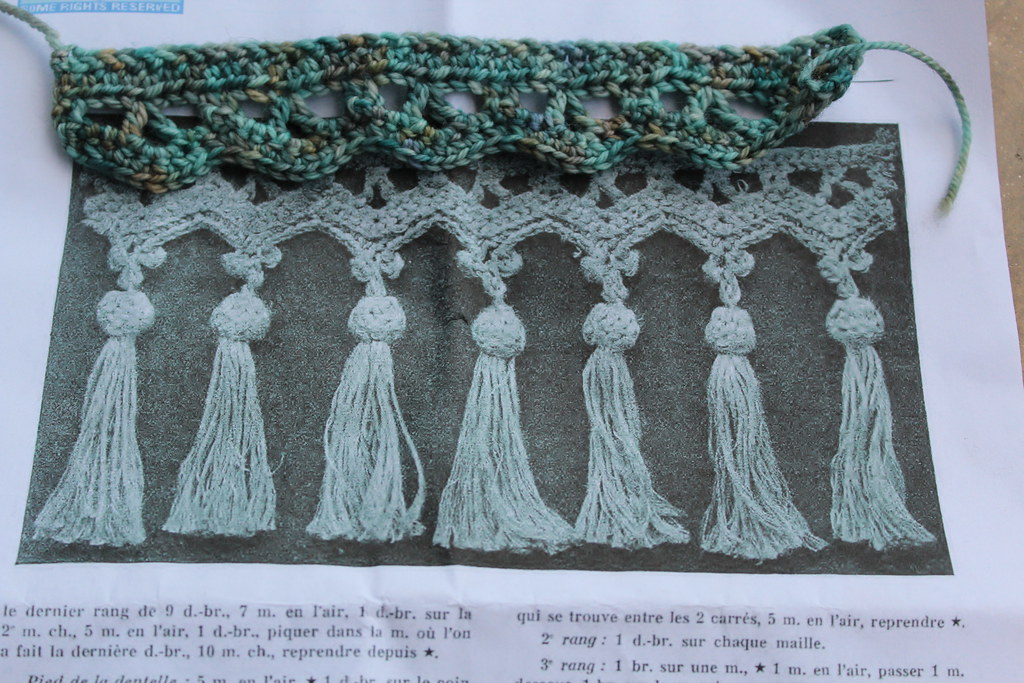
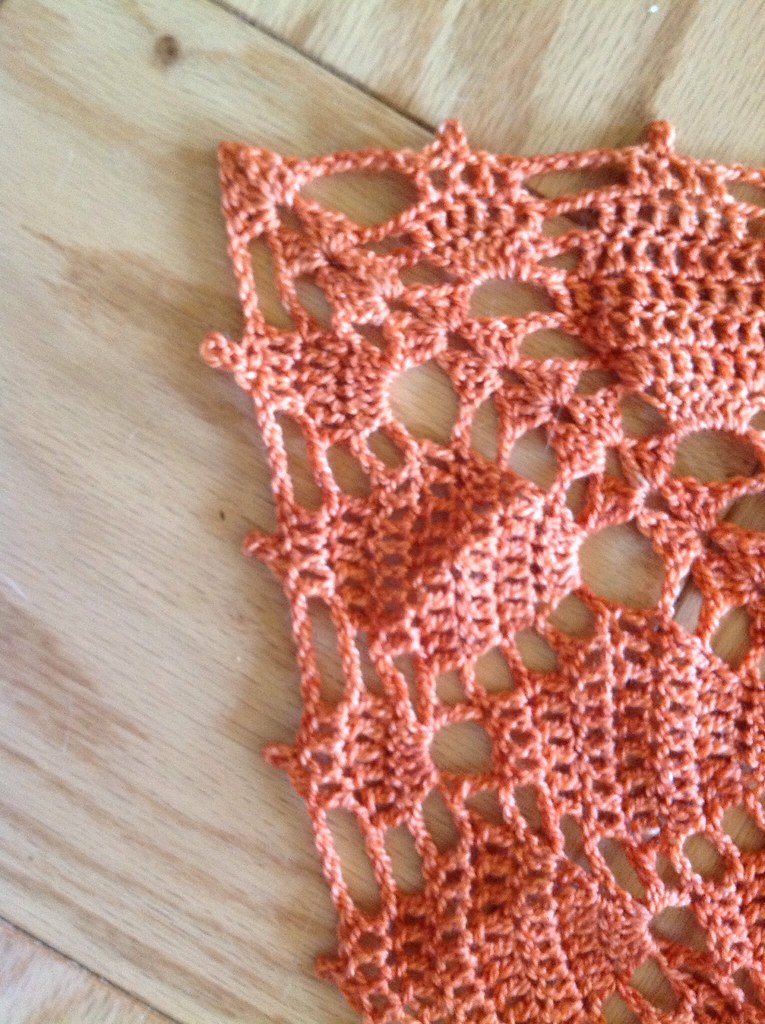
Below, I’ve written out two edgings that I adapted from “Le
Crochet, Album de Travaux de Cousine Claire.” 
These come from page 16-18 of the book, in the section titled “Franges
Et Dentelles a Glands.”  While the
original patterns served as an influence, I couldn’t help but add my own twist!
 

Tiers and Hills
Tiers and Hills
Ch 24 +1
Sample with original pattern.
Ch 2, sk 1st st, hdc all sts afterward. Turn
Ch 3 (counts as dc), *ch 2, sk 2, dc into next st. Repeat
from * until end. Turn
Ch1, sc into every st. Turn
Ch1, sc into 1st st. ch 8, sk next 7 sts, sc into next st.
Repeat until end. Turn
Ch 1, sc 11 times into ch 8 space. Repeat until all ch 8
spaces are worked. Break yarn and turn.
Sk 1st 5 sts, join yarn to 6th sc. *Ch 8, sk next 10 sts, sc
in 11th st, repeat from * once more. Turn, * sc 11 sts in ch 8 space, repeat
from * once more. Break yarn and turn.
Sk 1st 5 sts, join yarn to 6th sc. Ch 8, sk next 10 sts, sc
in 11th st. Turn, sc 11 sts in ch 8 space. Break yarn and turn.
Repeat steps 7 & 8 over next 3 ch bumps. Continue until
entire edging is worked.
 

Lacy Chevron
Lacy Chevron
Ch multiple of 7

Sample with original pattern.
Hdc in each st. Turn.
Ch 2 (counts as hdc) *hdc in 1st st, ch 2, sk next 2 sts, dc
in next st, ch 2, dc in same st, ch 2, sk next 2 sts, hdc in next st. Repeat
from * until end of row. Turn.
Ch 1, *sc in 1st hdc, sc twice in ch 2 sp, sc 4 in next ch 2
sp, sc 2 in next ch 2 sp, sc in hdc. Repeat from * until end of row. Turn.

Ch 1, *sc2tog in next 2 sts. Sc in next 2 sts. 2 sc in next
st, 2 sc in next st, sc in next 2 sts, sc2tog. Repeat from * until all sts are
worked.

Sale on Sweet Strawberries!

I’m carving out a few minutes of time to write between going to the Farmer’s Market, this morning, and heading to Ashland’s Strawberry Faire, this morning and afternoon.  The festival started at 10, and after Michael finishes making breakfast for our company, we’ll walk the 3 blocks to the festival and immerse ourselves in, what I’m expecting to be, an amazing festival.

I’ve even unpacked my own Strawberries, which I’m planning to wear, Stacy Trock style, in my hair.  If she can do it with Birds, than Strawberries are certainly appropriate!

Made in simple single crochet and chains, this quick and easy to work up pattern works like a dream!

In honor of the Strawberry Festival, for the next two weeks, Sweet Strawberries, on Ravelry, will be on Sale for 50% off!  Just enter the Coupon code Ashland in at checkout, and you’ll get the pattern for $2.50 – what deal!

And if you’re in the Ashland, Virginia area today, I hope to see you at the Faire!

Knitting Roots

Over this last weekend, after we have moved the last of the stuff out of our apartment, after we’d said goodbye to our apartment complex, after we’d driven 2 hours with the mattresses strapped to the top of the car, after we’d moved everything into our apartment, I walked our new property.

It’s a tradition, you see.  Many evenings in the spring, summer and fall, after my father came home from work, my parents would walk the garden, talking about what they planned to do, what my mother had worked on over the day, or just observing what had bloomed and grown.  I’ve inherited (or have been taught) a love of gardening.

Gardening, to me, is a lot like knitting or crochet.  There’s an initial rush for both – for stitching it can be buying the yarn, picking out the project, casting on those first stitches.  The potential streams in front of you, waiting to be fulfilled.  Gardening is similar – the planning, the dreaming, the buying of plants and thinking of what’s to come.

Stitching and gardening also have that initial sense of great progress, as the stitches stack up on one another, or as the sprouts shoot out of the ground.  But then, in the middle, there’s the long haul – where nothing much seems to be happening, even as you know that you’ve been knitting forever or as you water each day.

After slogging through for who knows how long, the end, all of a sudden, is in sight.  Fruit or flowers start appearing on plants.  The bindoff draws near.  Suddenly, all the progress and effort becomes worth it.

There’s probably a reason I have hobbies that have a long payoff, and I’m not quite sure what it is.

10 Things to Prepare for Maryland Sheep and Wool

Maryland Sheep and Wool is a lot of fun, but it’s more fun if you are prepared.  Some things to think about before you go.

  1. Sunscreen and layers: last year I went on Sunday and it was cool, the day before on Saturday my friends were coming home complaining of sunburn.  Take precautions to guard against sun and cold, so you can have fun.
  2. Money: For some, this means they will only be bringing cash.  For others, this means that they bring a 2nd credit card.  Whichever way you go, it’s very easy to break your budget at Maryland Sheep and Wool.  Plan beforehand.  If you are using a credit card, call your provider beforhand and let them know that you might be making purchases that look like they are coming from all over.  Vendors bring their own payment processing systems, and some of them register as being in other states (because the business is out of state).
  3. Good Walking Shoes: I forgot this one last year, and I regretted it.  Remember, Maryland Sheep and Wool is not only about yarn, there are also livestock.  Wear sturdy shoes that you don’t mind getting a little dirty.
  4. A buying plan: You say, “Wait, I already set my budget.” Now, you need to figure out what you need or want: a new spindle? Yarn for a new sweater? Do you want to try out spinning wheels? Figure out what you are looking for so you don’t go home with things you’ll never use.
  5. Figure out a way to remember where your car is located: The only detractor for the parking situation at Maryland Sheep and Wool is the rows aren’t well labeled.  Every year I’m so excited I forget to take note of where my car is, and I race in.  Every year I leave the fair and wonder where the heck I parked.  Save yourself a headake and a bunch of walking – remember where your car is.
  6. Look at the schedule beforehand and memorize map: It’s much easier to get around Maryland Sheep and Wool if you are familar how the fairgrounds are laid out.  I like to think of the fairgrounds as having two main streets: one where the animals are, and the other where the food is.  Between the two “streets” are most of the vendors, with some scattered at the far ends of the fairgrounds.
  7. Make a list of the things you cannot miss: There’s a lot going on a the festival, so take a look at the schedule beforehand.  Do you want to see the sheepdog demo (answer, you do, it’s cool)?  Is there there a talk that’s only happening once?  Decide where you want to be when.
  8. Figure out which of your favorite vendors will be there – and the most efficient route between them: If you are at Maryland Sheep and Wool for the shopping, you want to get the best deals and you want to have the maximum choices.  Figure out where the highpoints are, and then plan your route around it.
  9. Are you going Saturday or Sunday or both? Saturday has more things going on, but the fairgrounds are more crowded.  The lines will be longer.  Sunday is more laid back, and there are normally less people, but the trade-off is that vendor’s stock is more depleted, especially towards the end of the day.
  10. Bring a Sherpa: I joke, but figure out a way to haul your booty.  Planning a mid-day trip to the car? Bringing a significant other?  One person I saw had their own radio flyer wagon for their haul.

Breaking Down Blocking Knit and Crochet Items

The other day I got a question in my inbox, and I got permission to post it in its entirety, because I thought it was such a good question!

I got some blocking mats, pins, and wires and have been
experimenting with blocking some smaller things that I made, like
scarves.  I recently finished a crochet project that I’ve been working on
for a while (Daisy Wrap) and I don’t know where to start with blocking
it….well, after I soak it in water for a while anyway.  The blocking
instructions say to pin each picot and there are a lot of them.  What would
you recommend for blocking?  Fold it in half?  I have enough blocking
mats to block it full length.  I don’t know where to start with this!
 Thanks,An Overwhelmed Student

Blocking shawls with lots of points can be a particularly daunting task – and I’ve been known to futz around with a project to get them all exactly right for the better part of an hour.  This is what I wrote back to Sue:

I’d would fold
it in half, just because it’d reduce the amount of pinning I’d have to do by
half.  There’s no two ways around it… if you want to have all those picots
standing out the way they look in the pattern, you need to pin them out. I’d probably
take a blocking wire and run it through the two or three picots that are at the
point of each of the arches, and pull those out on each side, just so I didn’t have to pin all of the picots.  I’d pull those out, and then just pin out
the picots that didn’t get picked up by the wire.

My own Freshly Blocked Firefly Shawl
That was my answer to Student, but I wanted to expand upon it here.  Blocking lace (especially shawls) can be one of the most important steps of finishing a project!  It can truly transform the results.  The Designer, Kristen TenDyke, was blocking Daisy Wrap had a particularly striking picture of the shawl half-blocked, and I love how you can see the difference between the two sides.  Another Ravelry user has a great picture of the effect blocking out each of the picots has on the final product.
Since blocking is so important in this case, it’s a question of how to block the shawl, not if.
If you have the space and the blocking matts, blocking it out as the designer did is not a bad idea.  I love the blocking mats that have a grid on them – they make it much easier to evenly space pins.  If you are squeezed for space, you could fold the shawl in half and block the same way – with just two layers of fabric instead of one.  My caution would be to make sure you are always pinning out both layers of fabric – so all the picots stand out evenly!
One of the things I love most about blocking is how reversible it is – if you block the piece out and you don’t like how it turned out; wet it and try again!  It’s a lot easier than picking back stitches.

Visiting Atlantic Beach

I wrote this post once already, hit save, went to do something else, then went back to edit it and it was gone.  I did everything right and I’m still having to rewrite it.  *Grumbles*

I’m catching up on things that happened while I was super busy and couldn’t keep up with everything.  One of the things I wanted to share was a trip Michael and I took with his parents to Atlantic Beach.  It’s become a tradition for them to visit the beach in the off season – when the rates are cheap, the beaches are empty, and you can have the ocean all to yourself.  I have to admit I probably like the beach better this way.  I don’t mind the cold, particularly.  In fact, when you are bundled up there isn’t really a chance of getting sunburned, which is what I’ve done every time I’ve went to a beach in the summer.

Unfortunately for me it was a working vacation – I had a number of designs due at the end of January and beginning of February and I couldn’t just not work on them.  But I only did the essentials – so no email or answering the phone.

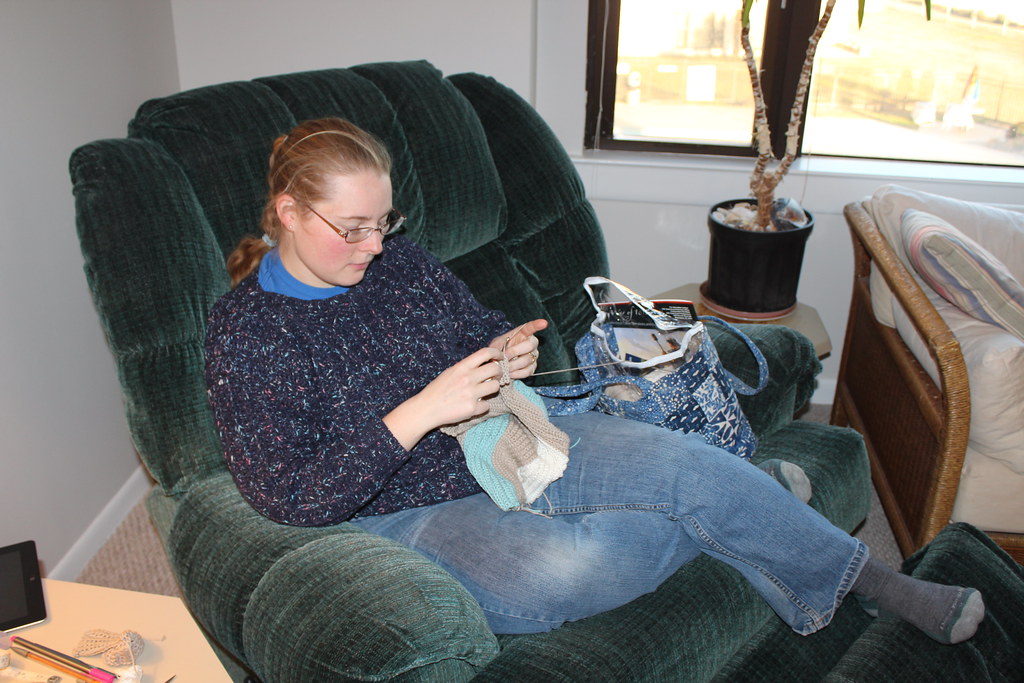
The unit where we stayed had a GIANT easychair, which I took possession of early in the weekend, and worked on most of my crochet/knitting there.  It was an amazing chair.

The lovely lovely easy chair, where most of my knitting or crocheting took place.
beach vegetation against sunset
Me, watching sunset (Michael can’t seem to get a horizon line straight)
Michael, looking picturesque.
more vegetation
And all along, I stitched away.

My favorite Reference Books

Michael and I had to travel unexpectedly this last weekend, and I ended up having to take a lot of work with me, as I had several design calls and patterns to finish up.  This meant I ended up packing several parts of my library, for reference.  I’m not sure what took up more space; the yarn, or the books.

I thought I’d share some of the books I took with me.

Around the Corner Crochet Borders by Edie Eckman:

I love this book for the fun colors and variety of orders, and how each of them is shown going around a corner, so I can think about how I’d adapt things for curves.  I love this one for the inspiration.

Crochet Edgings and Trims, edited by Kate Haxell

Another great reference, this simmer volume I use to supplement the previous one.  Between the two of these they’ve got most of the more complicated trims represented.  I occasionally come across something new, but these two make for a solid edgings collection.


Power Cables, by Lily Chin

Again, great for inspiration, though I rarely use anything in it without modifying it myself, it gives me some good thoughts on how to use texture, if the stitch is a cable or not.


The Essential Guide to Color Knitting Techniques by Margaret Radcliffe

I love her use of color, and I love the variety of stitches featured in here, especially the slipped stitch section.  I love just paging through this book when I need to refresh my brain.


The Principles of Knitting, by June Hemmons Hiatt

Whenever I need a different perspective on how to explain something, I go here.  There is truly very few things missing from this book, and I love how it’s laid out.  It’s a tomb to carry (and there’s a kindle version, but I find that I like the paper).  If you don’t own this book and you love learning the why things work, you should get it.

What do you have in your library and love to refer to?  It doesn’t have to be knitting or crochet related!

Breaking it Down: Embroidering with Crochet

Today I’ve got a fun and different tutorial for you.  It’s crochet based, but it’s also based on embroidery.  This is actually a technique that is called tambour, and it’s usually worked with a specialty tool, much like a crochet hook.  But for beginners, or for those who are just interested in the craft, this is a good way to start.
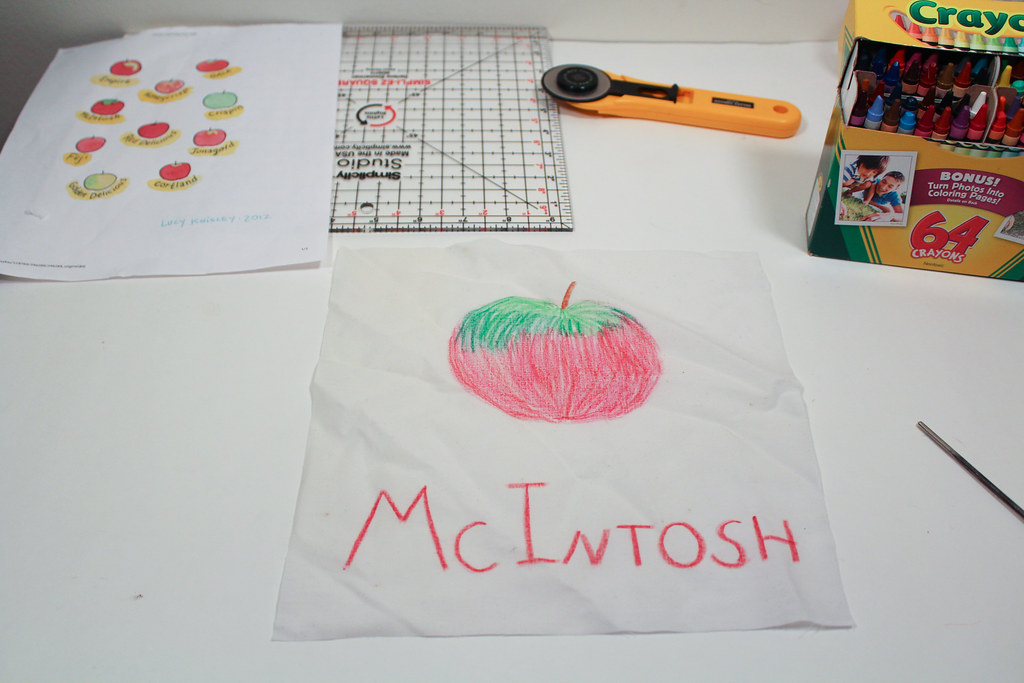
For this tutorial you’ll need some fabric, a very fine crochet hook (I used a size 10 steel hook), embroidery floss, some crayons, a piece of paper, and an iron.  You’ll also need an embroidery frame.

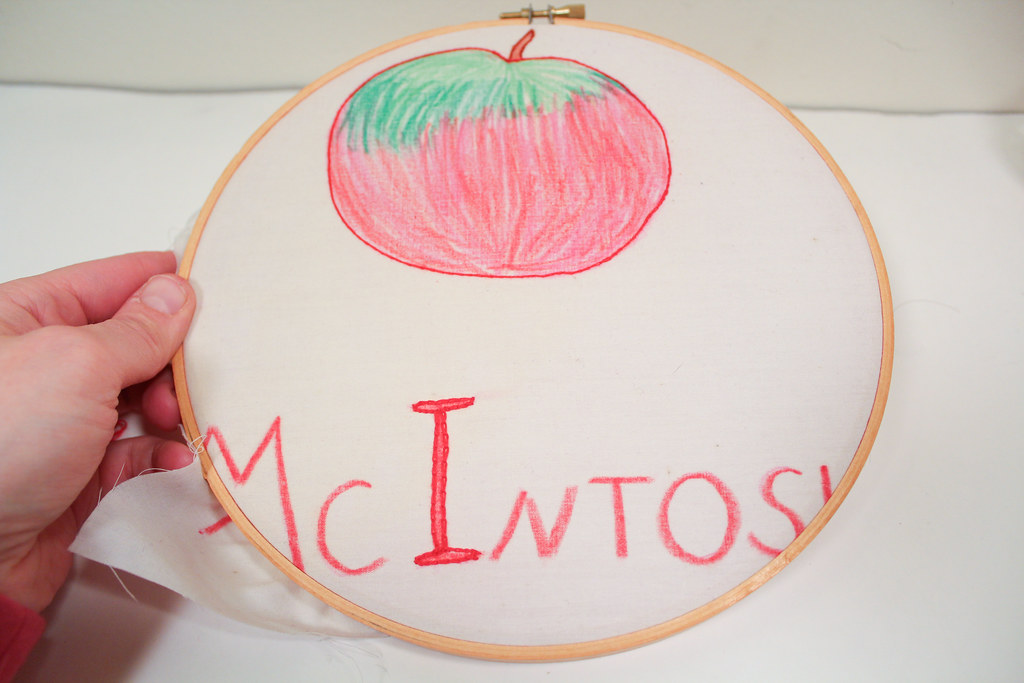
First, you’ll sketch out your design in the crayons.  I prefer crayola crayons, because they seem to have the best color.  Press well and make sure that your color is the depth of color you want.  Coloring in the background means if you don’t embroider everything, the color will show through, which is a neat effect, I think.

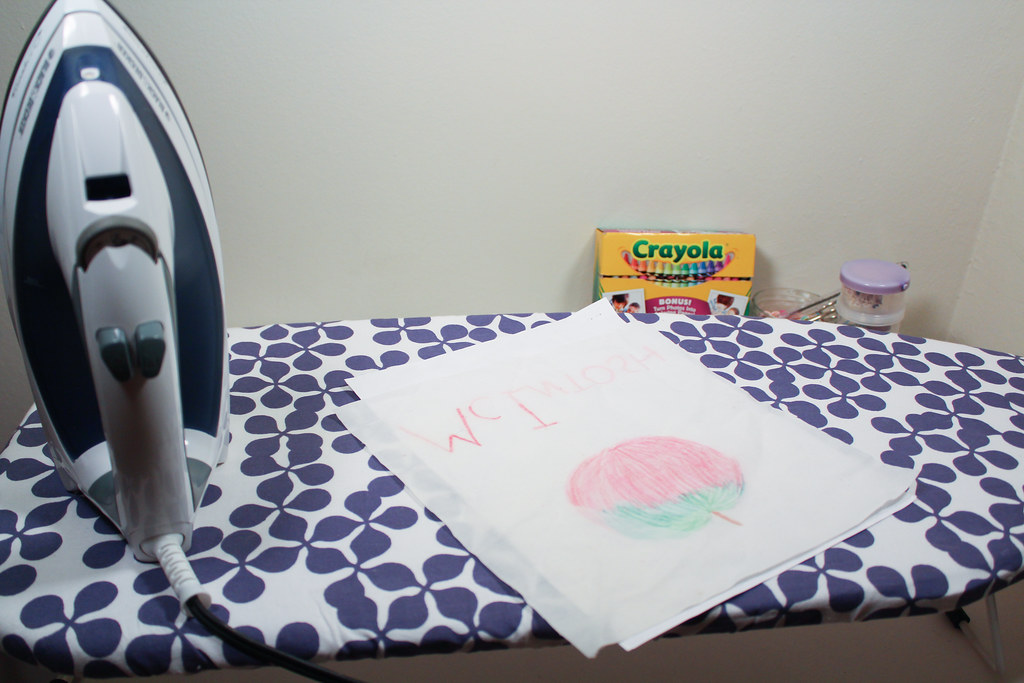
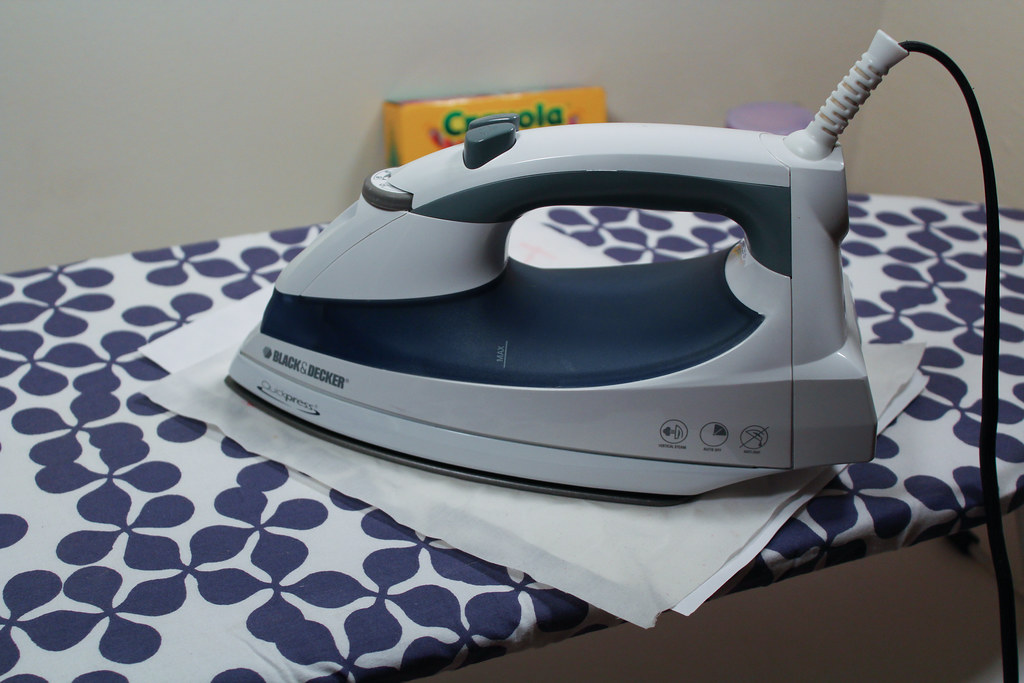
Next, iron the design into the fabric.  I use the highest heat setting.  Put the side with the colored design face down with a piece of paper underneath (as some of the wax from the crayons will melt off).

Then, proceed to iron.

See the faint impression of the crayon?  This is why the ironing is important.

Secure your design in an embroidery frame, making sure the fabric is tight.

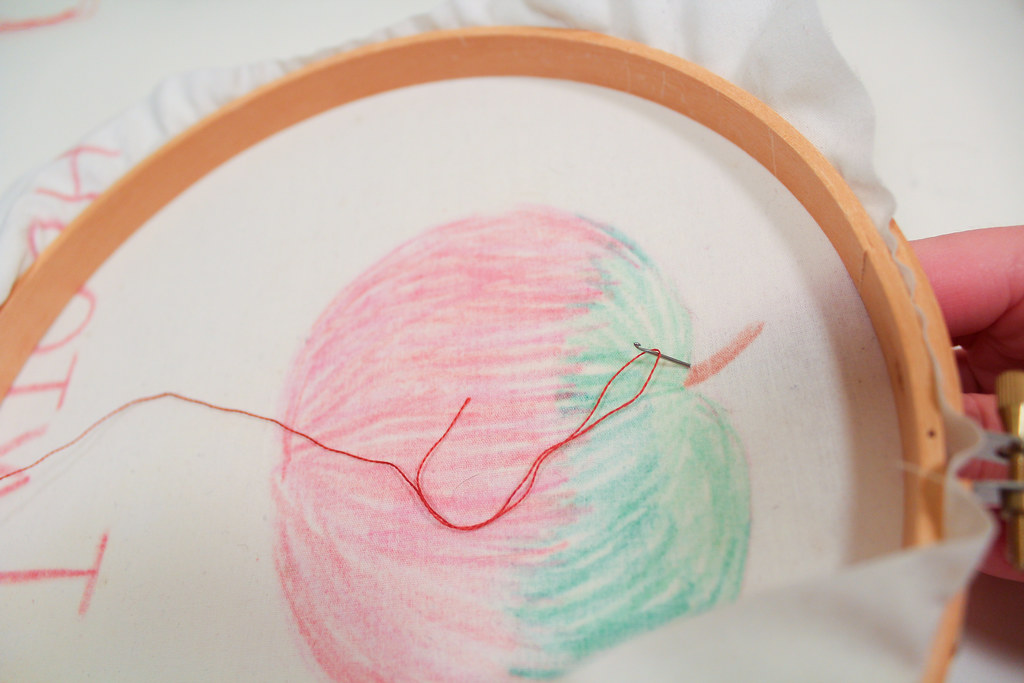
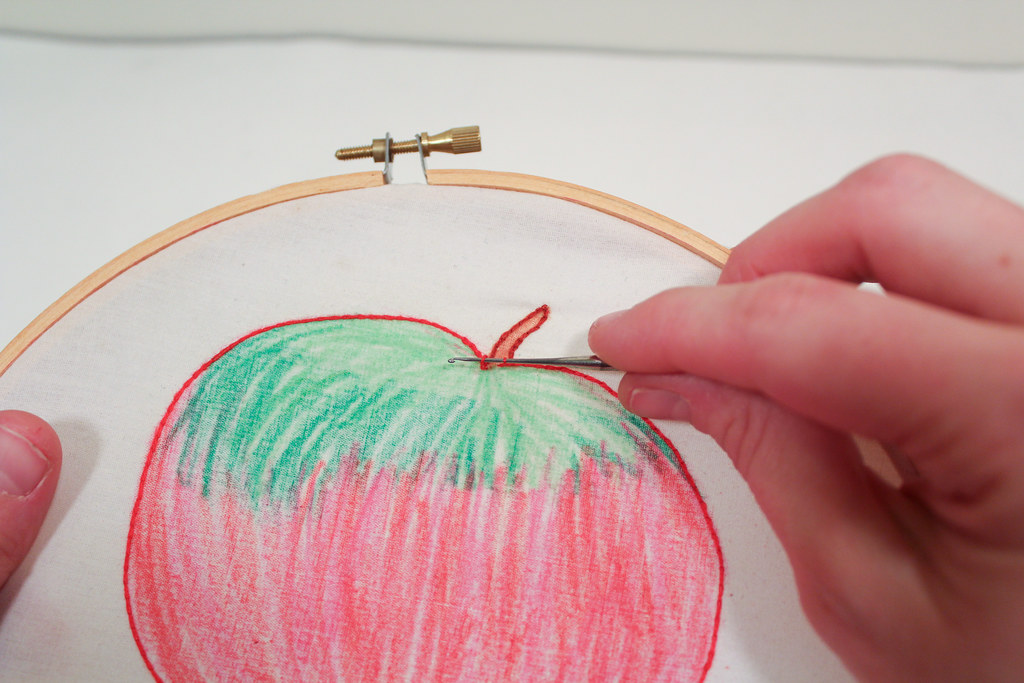
Take the embroidery floss and the tiny crochet hook.  Insert the crochet hook from the front to the back, and pull a loop of the floss through the fabric.

It might take a bit of wiggling, but it’ll work.

Pull the loop up to the front side.  You now have your working loop.

Now, punch through, grab another loop from the yarn in the back, and pull that through the fabric.  Pull the first loop through the second loop.

Continue, punching the hook through the fabric,

Grabbing a loop and pulling it through the fabric,

… and pulling the new loop through the old loop.

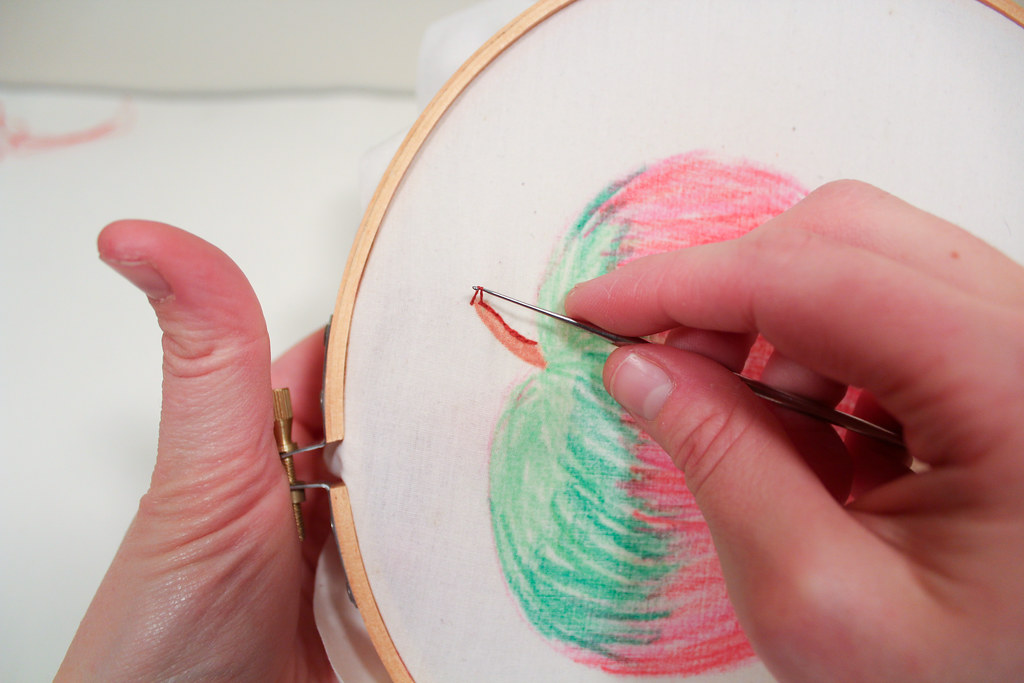
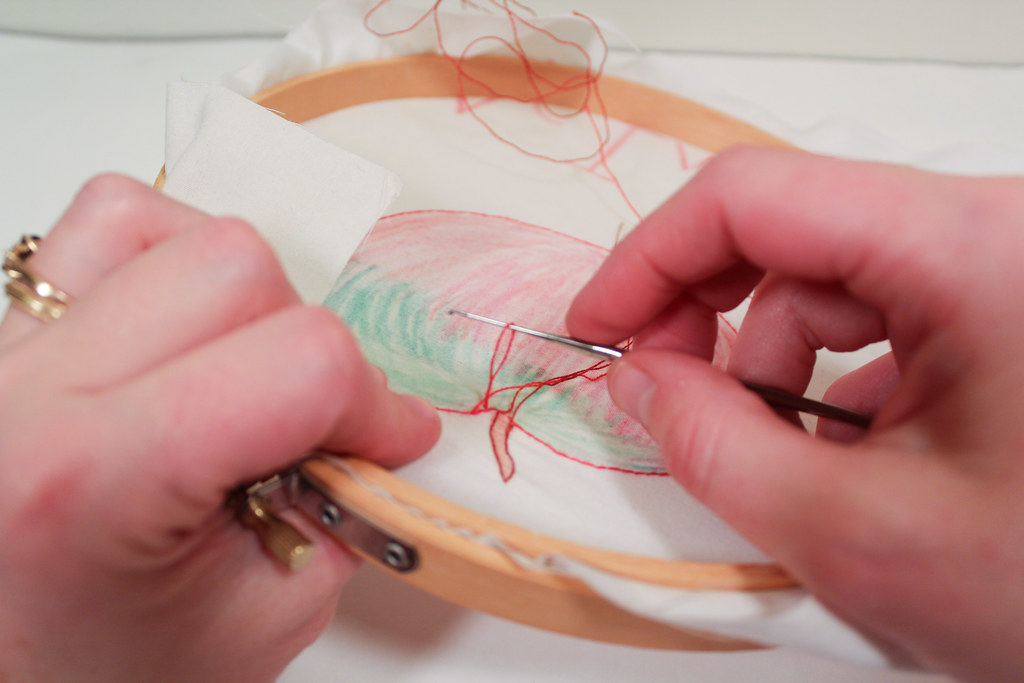
At this point you should be tracing the outside of the design.  The back should look like a straight line, while the front should look like the chains stitch.  Here’s a look at the view from the back, the hook coming through the fabric,

And pulling grabbing the loop,

and pulling it through to the front-side.

Now, you pull the first loop through the second loop.

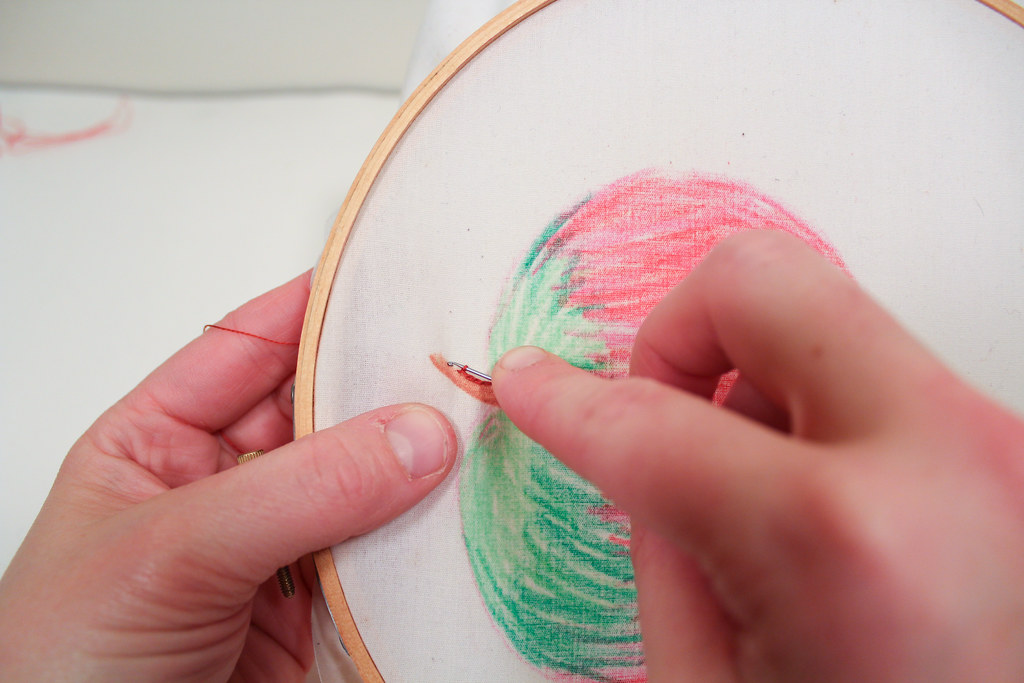
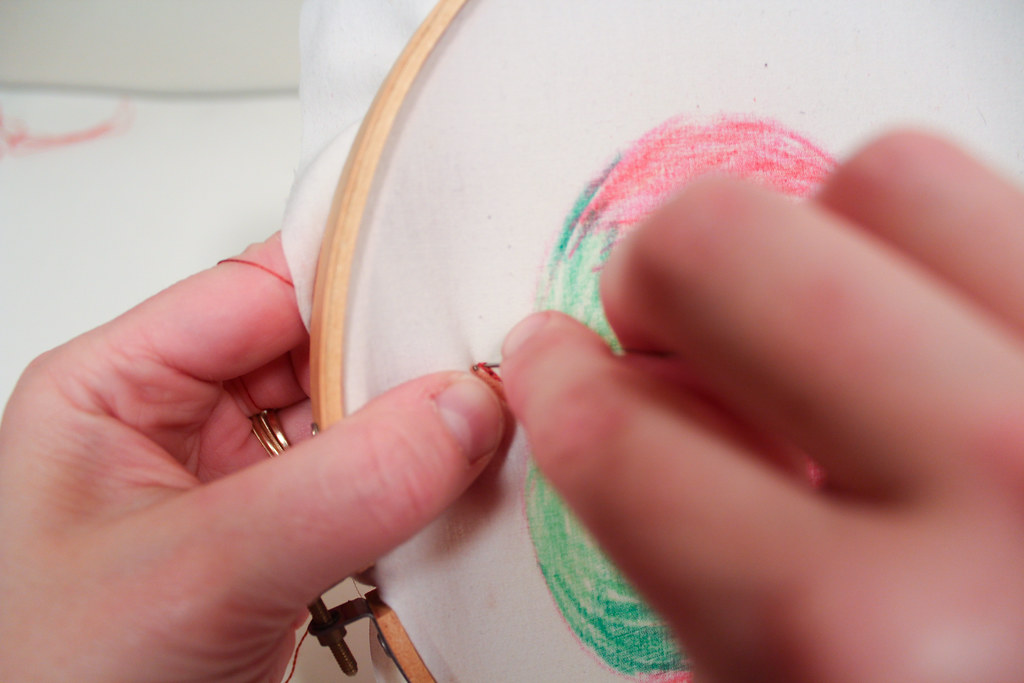
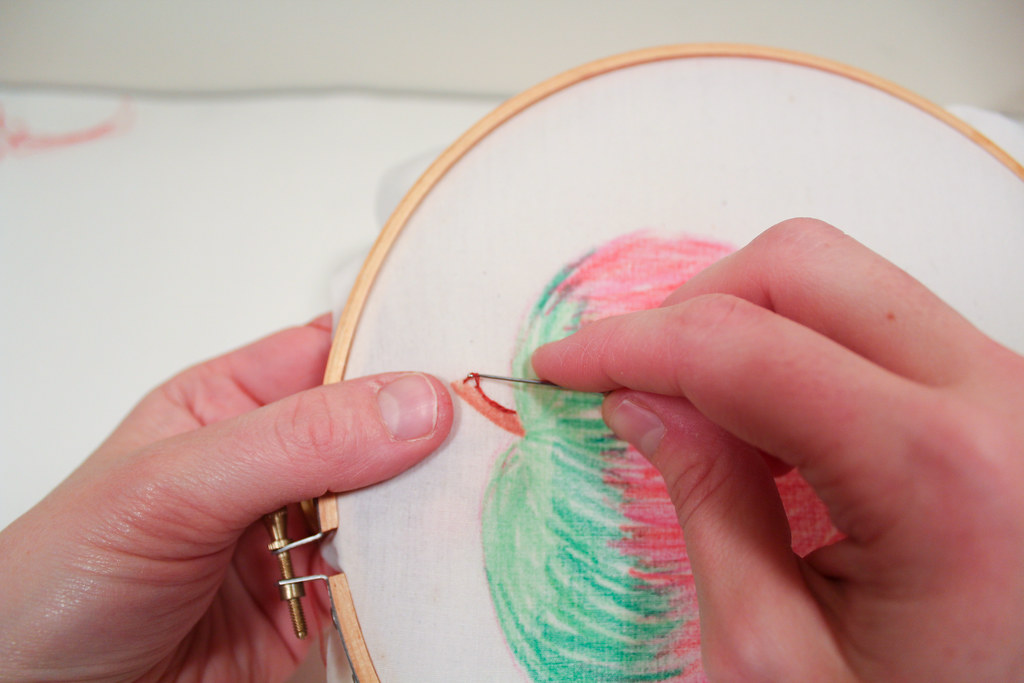
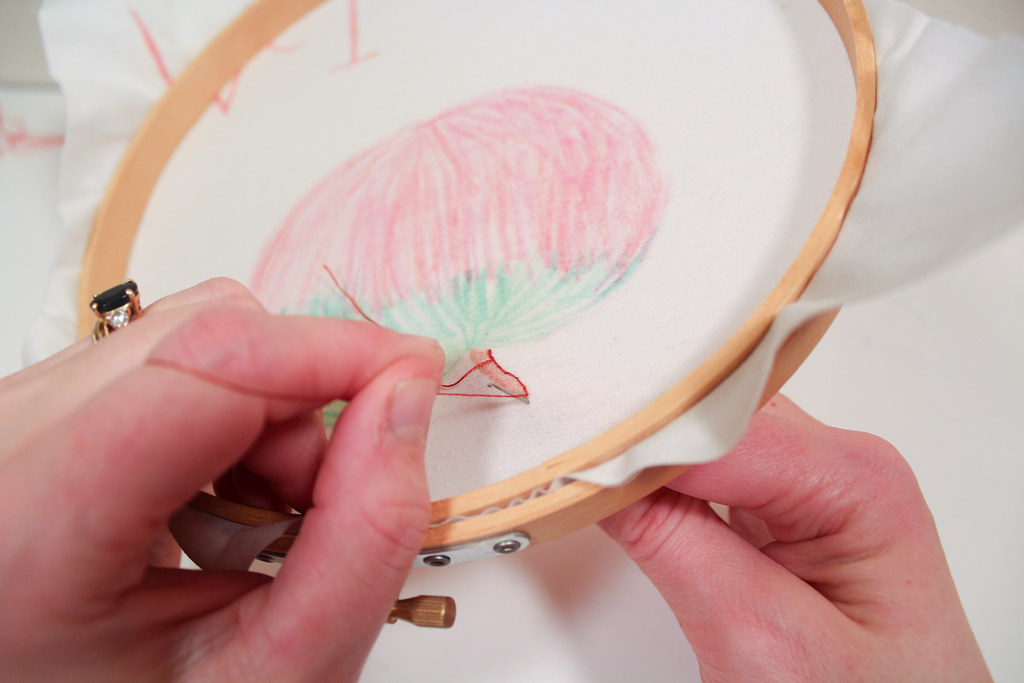
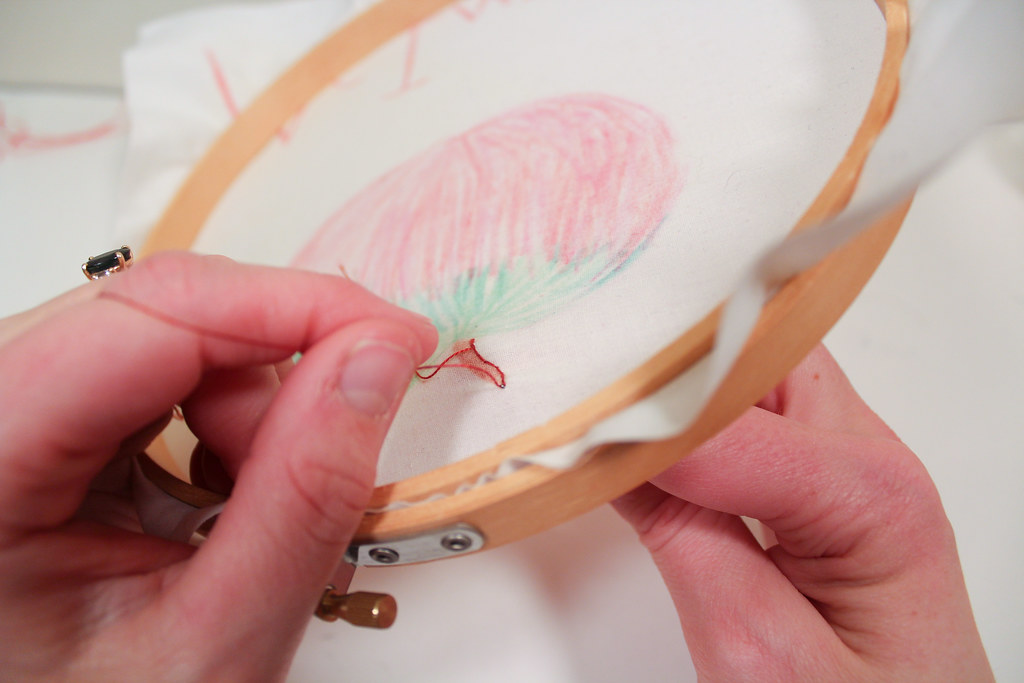
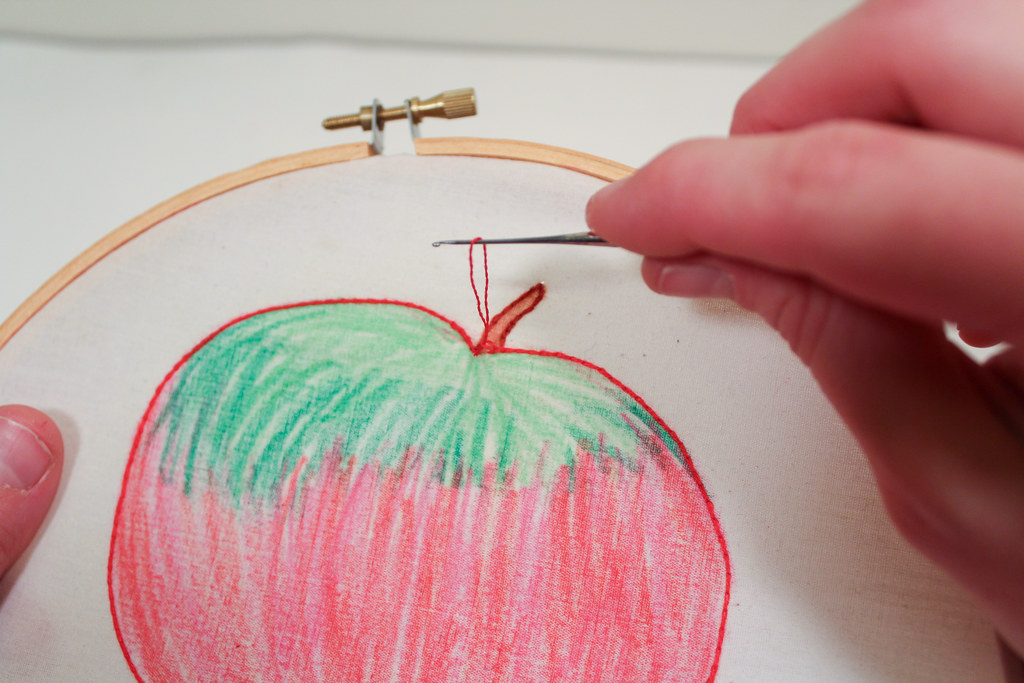
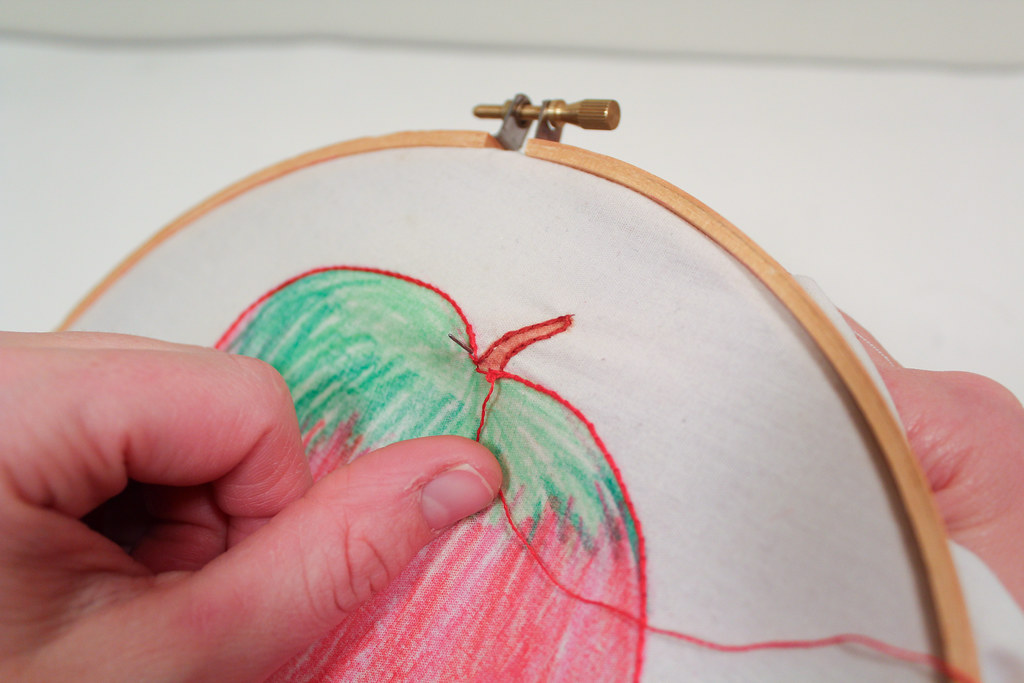
Here, I’ve traced the outside of the apple, and I’ve finished with this series of stitches.  How do I finish the chain stitches off?  First, I begin pulling the live loop through the fabric.

More…

And more….

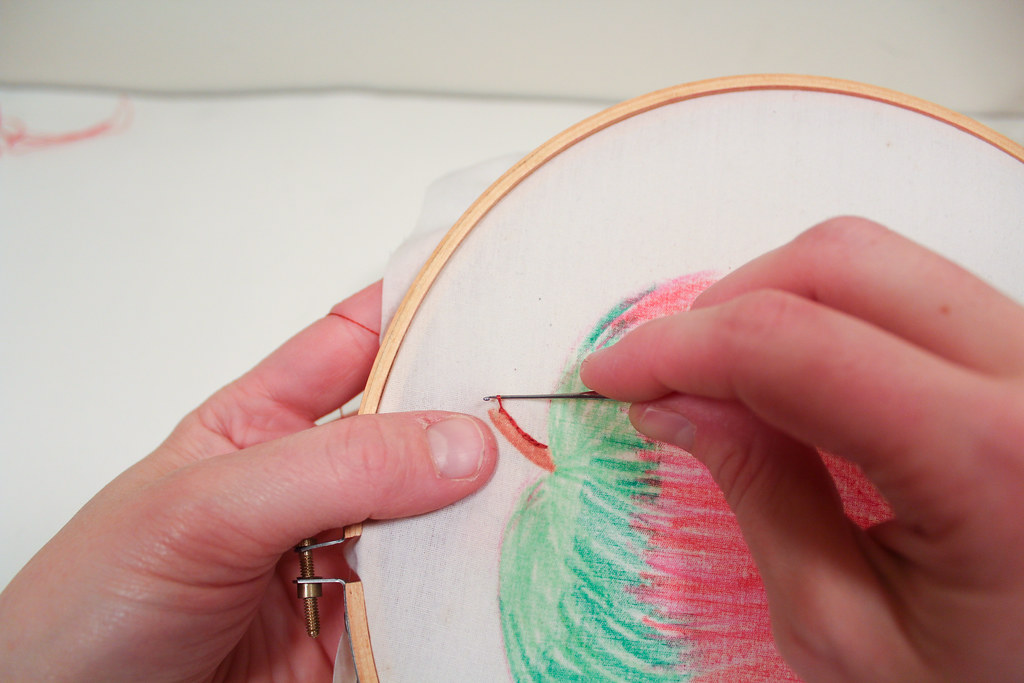
Until the floss in the loop is all on the front side.  But now my leftover floss is on the wrong side of the work.  What next?

Now I grab the thread from the other side (the wrong side) and pull it through the fabric once more.

All the way to the back!  Here, I can knot it and weave in the ends!

Tah-Dah!  What do you think?