MENU

Family and Thanksgiving

Packing last night to get ready to go, I noticed one of my favorite pairs of socks had a hole in it – like nearly half of the hand-knit socks I own right now.  They’ve went in the repair bag, to take along with me this weekend.

We’re heading up to my parents in Upstate New York, and it’s bound to be a lovely trip.  My youngest brother I haven’t seen in person for nearly a year.

What are you doing for the holidays?21657912859_40b7ff2d54_o

Coming Home From Holiday

A quick update from the Turtle front…

Last week Mr. Turtle and I took a much needed trip with two of our close college friends, to a small island off of Puerto Rico, called Culebra.  It was wonderous.

20151112_6928

We went hiking along the coast, making our way along crystal clear beaches – some sandy and some rocky.

20151113_6887

We had the opportunity to to go snorkeling – one of my favorite activities!  We played games, got sun, caught up on sleep – I even managed to get some knitting in.

20151115_6789

Right now the inbox is full to overflowing, as I try to catch up on 5 days of missed work.  Please be patient with me as I attempt to catch up in the next few days!

Normal blog posts and updates will resume shortly.

How to Set a Zipper in a Sweater

The rights have reverted back to me for a number of blog posts I did for Jordana Paige’s blog a few years ago, and I’ve begun re-posting them on occasion to have them on my own website, and so students can reference them.  This particular tutorial about setting a zipper into a sweater, I’ve updated and refreshed, but much of the technique remains the same.


Setting in a zipper is a process that takes time, patience, and a certain amount of willingness to fiddle.  Not everyone likes to do that, which is why so many of the finishing projects I do involve setting in zippers.  But if you’re willing to take the time, setting in a zipper can be very satisfying!

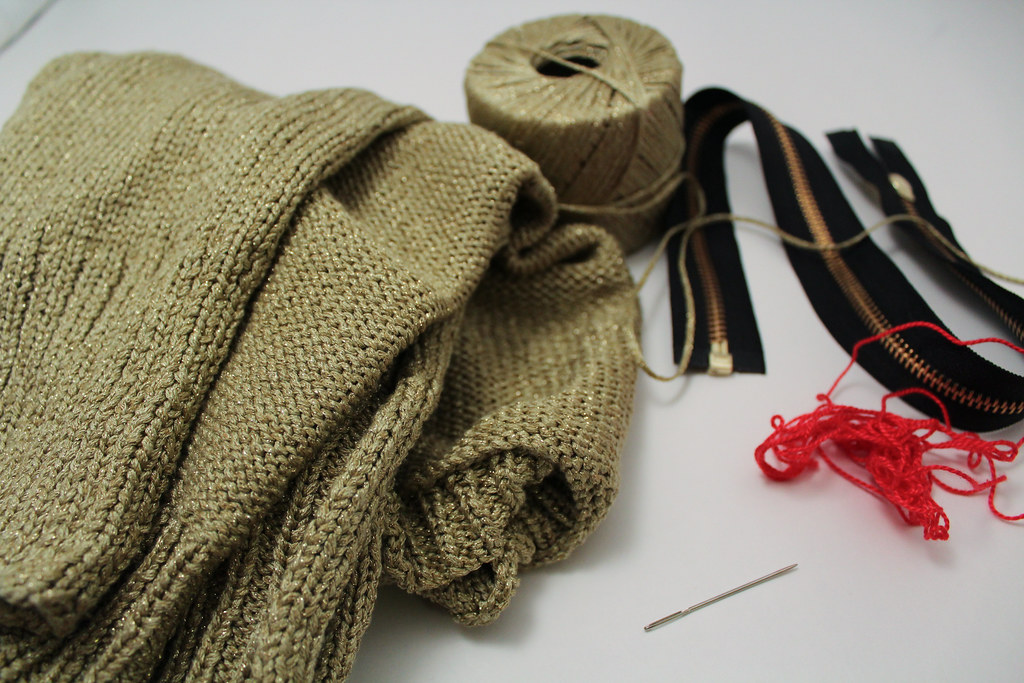
To set in a zipper you will need: a zipper, yarn to match the garment, yarn (or embroidery floss) in a contrasting color, a sewing needle (with a sharp point!), pins, and the 2 sides that you are attaching to the zipper.

a sweater, matching yarn, a zipper, needle and red embroidery floss are shown on a white background.

It’s helpful to have all your materials available!

Please note: When purchasing a zipper, make sure you get the correct type!  You don’t want a zipper for a bag, as it is attached together at both ends – you’d never be able to get your garment off!  Same thing with double ended zippers.  Take time to read the package and know what you are getting.  Also pay attention to length.  As I explain below, get the right size zipper, or a little longer.

The first thing I do is block the two fronts to the garment I’m attaching the zipper to.  Make sure the front is blocked to the correct measurements, and that your zipper will match those measurements, or be slightly longer.  If you need to, you can trim the top of the zipper to the length you want.  Make sure you use a file to eliminate any rough edges, and sew a new stopper so your zipper tab doesn’t come off.

Next, pin the zipper into place on the inside of the garment.  Make sure that you are not pulling or distorting the knit fabric – at all.  If you pull the fabric to stretch to the zipper, it can cause the zipper to pucker or wave.  After you’ve gotten things in place, I like to run a basting stitch along the zipper, as I don’t like to get poked with pins.  It also makes super-sure your zipper doesn’t shift around.

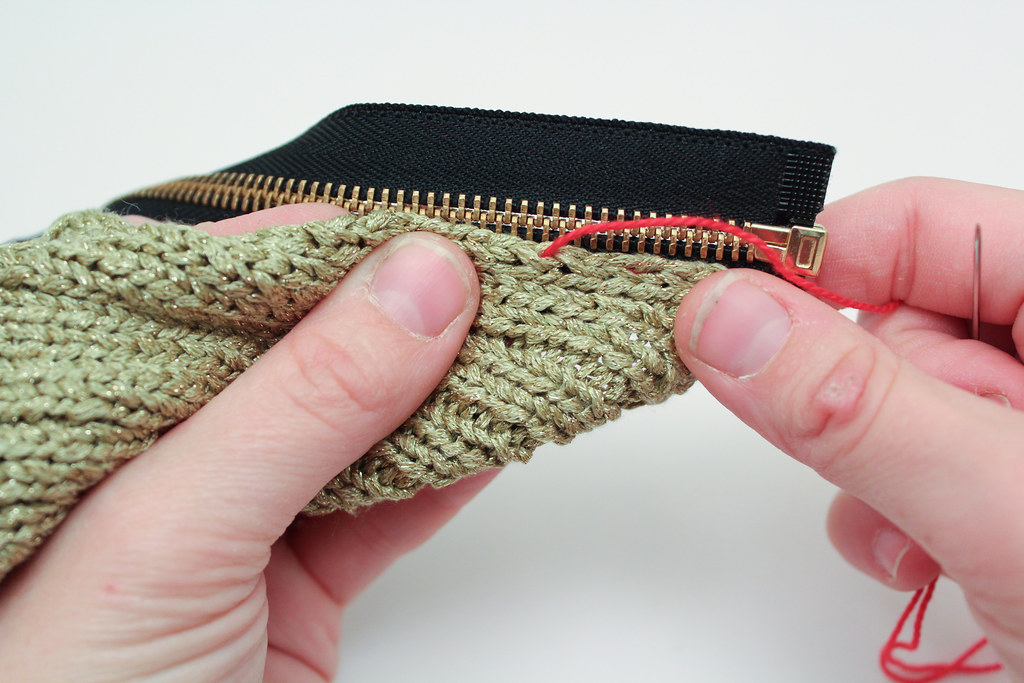
To do a basting stitch, take some waste yarn or thread, and use a running stitch, sewing the zipper to the fabric with big stitches.  When you’re done attaching the zipper, you can remove the basting stitch, so don’t worry if the basting stitch isn’t perfect.

Using a running stitch to baste the zipper to the fabric.


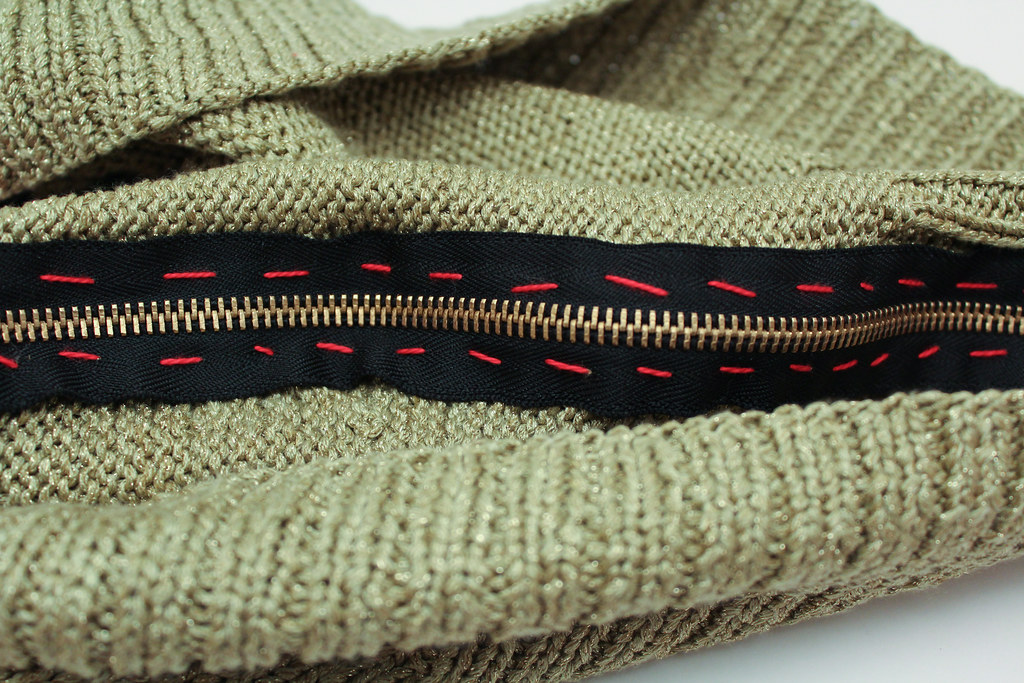
After I’ve finished basting (and this is another good reason to baste your work, because you can’t do this if the zipper is pinned), I check to make sure that the zipper can zip up and down without catching on any fabric.  Better to find this out now than after I’ve sewed everything together!  This is your opportunity to make any adjustments.

The basting stitch on the wrong side of your work.

Finally, you can sew the zipper to the piece.  Depending on the piece, sometimes I use the yarn the sweater was worked in.  Other times, if the yarn is delicate, loosely plied, or extremely fuzzy, I’ll use sewing thread in a color that is close to the color of the yarn.  Either way, I use the same technique.

Working from the back, I secure the yarn.  When I sew, I make sure that each time I’m going over only a single strand of yarn between two stitches.  Basically go into the purl bump if viewing from the back.  Mostly, I choose the space between the first and second stitches against the edge.

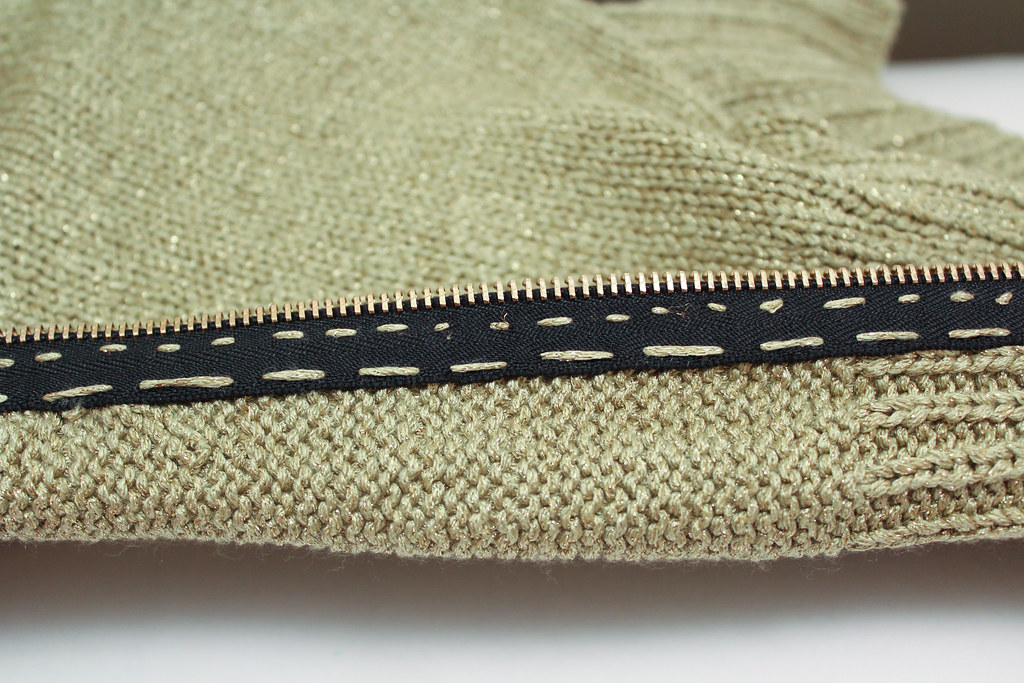
Working very slowly, I sew my way up one side, then up the other.  Be patient. Take your time. Check your work often.  Use small stitches.  Because the zipper is located at the front of the sweater, I’m super careful to make sure that my sewing doesn’t show.  Sometimes, if the fabric is wide, I’ll run a second set of stitches further out along the zipper band, so it doesn’t flop and lies nicely down.  You can see I did this from the picture below.

The zipper, sewn to the sweater with two rows of stitches.


When you’ve finished attaching the zipper to both sides of the fabric, I check my work.  Check again to make sure the zipper moves smoothly along the track.  Then, and only then, if I’m happy with what I’ve done do I remove the basting stitches.  Finally, weave in your ends.

Zipper in sweater


Crochetscene 2015: Bow Wrap

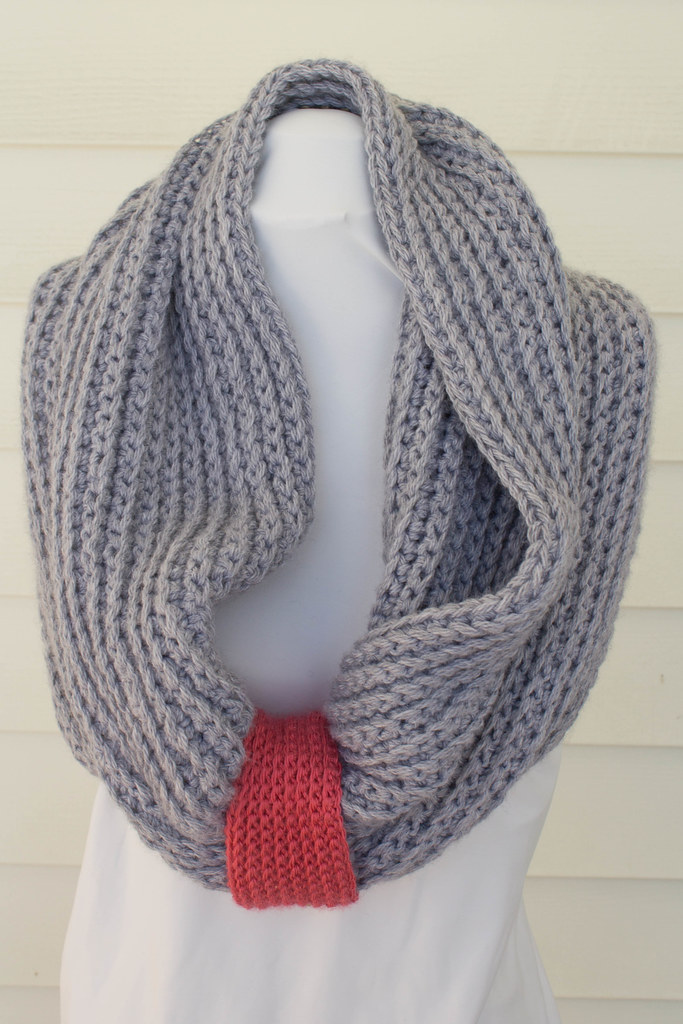
Bow Wrap from Interweave Crochetscene 2015 by Jennifer Raymond

Photo Credit: Interweave/Harper Point Photography

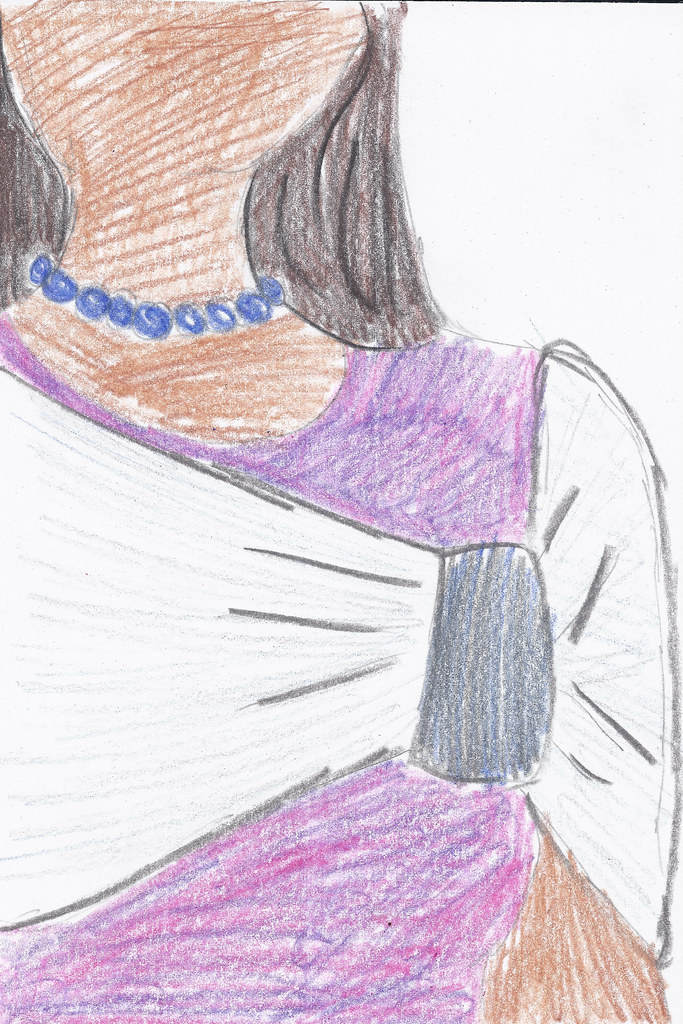
My original sketch for the design proposal.

They say that copying is the highest form of flattery.  While I’m not quite sure that’s true, this piece is directly inspired by a cute little miniature wrap I saw on a small child last winter.  While I wouldn’t be surprised if the little girl’s version was more complicated, I immediately thought that I’d wear her wrap, in an adult size.  Bow Wrap was then put in my brain’s back pocket, until I submitted the idea to Crochetscene.

As I mentioned on Monday, when I was working on proposing these designs for Crochetscene, I was also coming off of working on a few projects in finer yarn, and I knew that I wanted something a little bit more sized up.  Bow Wrap is made holding two yarns together, but you could easily substitute for a bulkier yarn with similar results.  Holding the two yarns together creates a cushy, stretchy and warm ribbed fabric.  The ribbed fabric is created by working crochet through the back loop.

The “gather” is made in a contrast color, with a single yarn held together.  I toyed with the idea of creating another version of this, in a sparkly yarn or fastening some glittery pin over top of the gather, for some added class and interest.  Well, I may yet make a second version!

Bow Wrap from Crochetscene 2015

I love the look of the textured stitches, and the way the wrap drapes over the shoulders!

There’s two things I think that make Bow Wrap stand out as a project.  The first is simplicity: Bow Wrap is essentially made up of two squares – the magic happens in the seaming.


Bow Wrap by Jennifer Raymond

Wear over the neck and shoulders to keep out the chill!


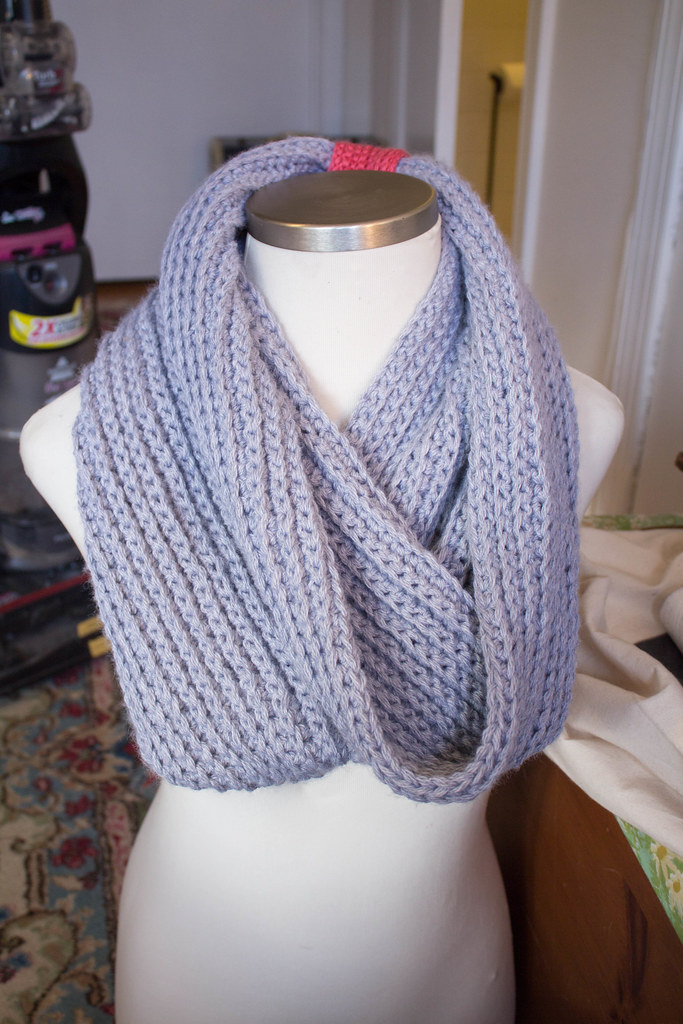
The second thing I love about Bow Wrap is the styling options.  It can be worn like it’s featured in the magazine, but it can also be worn a few other ways!  I had fun taking pictures of a couple of different styling options.


Bow Wrap by Jennifer Raymond

Wear it like a traditional cowl, with the “gather” in the back

Bow Wrap can be found in the latest issue of Crochetscene 2015, or on Interweave’s website.  For more information and notes about my sample, you can read about it in my Bow Wrap pattern page.

On the Stands Now: My Interview with Inside Crochet

Inside Crochet Cover
Just a quick note from me this Friday afternoon, as I attempt to beat back my email inbox.

CaptureIf you live in the UK, or happen to get Inside Crochet Magazine, you should go take a gander at the issue.  I’ve got an interview with the Deputy Editor, Rhian Drinkwater, in a feature titled “Crochet Entrepreneurs!

We talk about a number of my upcoming patterns, a few of my role models, and how I got my start!

I also talk about something that really made me feel vulnerable, but I think talking about it is important: making mistakes.

You can pick up an online copy here, or buy it wherever the magazine is sold.  And if you’re in the UK, take a picture of it if you come across it and send it to me!  It’s my first international publication I’ve been in!

Show Notes from the Last Few Weeks

Aboard a cruise ship, sailing with Mr. Turtle, my parents and his parents.  It’ll be our second (third? – depends on how you count it) vacation together.  It’s all part of Mr. Turtle’s and my project to integrate our families.  You see, Michael’s grandparents didn’t get along, and he can’t remember a time when they were both in the same room.  In contrast, my grandparents were good friends, and I can remember many holidays, visits and trips where my family and grandparents were all in tow.

It was a perfect arrangement, really.  With 4 Crowley grandchildren and 4 grandparents, it was glorious to get some really good one-on-one grandparent love.  I want that for my family, so Mr. Turtle and I have been trying to create situations where our parents, who live pretty far away, can spend time together.


Which actually wasn’t what I was planning on writing about.

I was planning on writing about my missing sock.  You see, about a month ago I finished a pair of socks, for myself, that I’ve been wanting to finish for a while.

This is a really poor picture of the sock, but I didn't even get to take a picture of them!

This is a really poor picture of the sock, but I didn’t even get to take a picture of them!

I was pretty excited about them, so I wore them nearly for three days straight, washed them, and wore them once more.

And now one of the socks are missing.

The kicker is, the sock is somewhere in my house.  I figured, when we had company over this 4th of July, and were cleaning things, it’d turn up.  I wasn’t really concerned.

But now it’s after the 4th, the sock still hasn’t shown up, and I’m disappointed: I wanted to take them on the cruise with me.  No such luck.  I can’t find them anywhere, darn-it!

Have you ever lost a knitting or crochet item?  Did you find it again? After how long?  I’m really starting to get bummed about this missing sock.

Now available: Make a Crochet Rug Using Piping Cord and Crochet Motifs!

Matryoshka Baskets from Crochet World

I’ve been really enjoying playing with padded crochet lately, if you haven’t noticed.  Last year with Crochet World I published the Matryoshka Baskets, and this past week my Rag-ety Rug came out.  Now, this week I have another wonderful piece of news to share with you!

Remember how a couple of months ago I talked about filming classes with Interweave?  Well, the first of them are out, and I couldn’t be more excited!

Let me tell you about the class.

Titled Make a Crochet Rug Using Piping Cord and Crochet Motifs with Jennifer Raymond, this class covers all you’d need to know in order to make Stained Glass Rug.  While the pattern by itself stands alone, you do need a basic understanding of padded crochet to make the project work.

With my online class, not only do I show you the basics of padded crochet, but I also show you all my tricks I developed and learned while making the rug.  You’ll learn the best ways of finishing off your cord, the easiest ways to join the motifs, and how to adapt the pattern for other purposes.

Make a Crochet Rug Using Piping Cord and Crochet Motifs

Make a Crochet Rug Using Piping Cord and Crochet Motifs

As I mentioned before, this class focuses around Stained Glass Rug, which was featured on KDTV’s episode 1409. I love this pattern.  It’s infinitely customizable, as you can make the rug as large or small as you want it.  The padded crochet makes the rug both cushy under the feet, durable, and the project works up really fast!  There’s plenty of room for color play, in the form of using up scraps, creating color blocks, or making magic balls to use.  And I love how, just worked in the yarn I used for the original project, each piece looks a little bit like the stained glass you see in churches.

Make a Crochet Rug Using Piping Cord and Crochet Motifs with Jennifer Raymond is available for pre-ordering as a DVD, or you can download it right now onto your computer.

You should checkout the preview:

Have you ever worked padded crochet? What do you think of the preview?

Finishing and Beginning

Tech edits on Trains

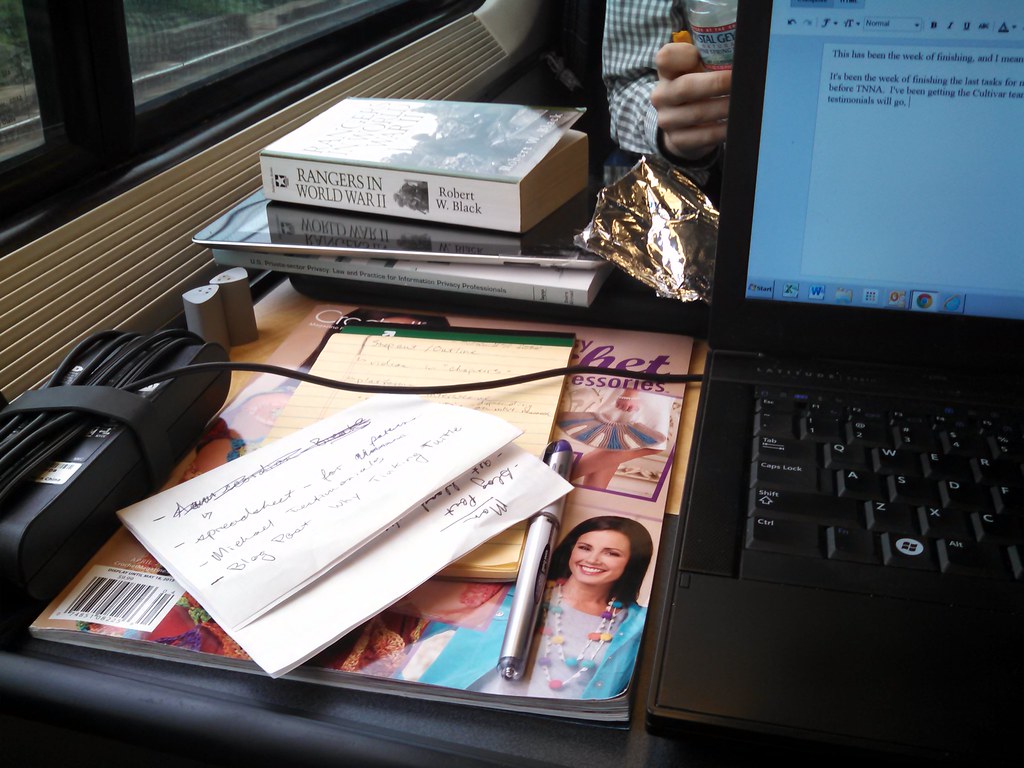
Right now I’m on the Acela heading from Washington, DC to Boston.  As per Mr. Turtle’s dream, we’re riding first class, and living the life for a long weekend.  We’re on vacation, and I couldn’t be happier.  It’s been much needed.

This has been the week of finishing, and I mean that in more than one way.

It’s been the week of finishing the last tasks for my new website: set to launch next Wednesday, right before TNNA.  I’ve been getting the Cultivar team the last of the copy, figuring out where testimonials will go, sorting through pictures, and making sure all the i’s are dotted and the t’s crossed (which, by the way, has become a saying that makes no sense to my brother, who grew-up in the land of typing but no cursive).

It’s been the week of wrapping up finishing and repair projects too: a pair of mittens with the thumbs worn out, a black sweater that needed the seams redone, a sweater & bootie combo that were adorable and needed to be seamed and blocked.  I wanted to get them all off, as my guest bedroom is being taken over by finishing projects.  Now, I just have three afghans in need of repair – which will be fun, as they are all quite of a size.  And then there’s one small and delicate christmas stocking, which is more holes than solid fabric, but much loved.

I’ve been finishing up tidying the house: there’s so many things that aren’t in their proper places.  Yarn’s everywhere the cat’s can’t get to.  I’ve got “body parts” everywhere: my father gave me a whole bunch of display pieces and they were immediately conscripted into work.

I’ve finished with 14 patterns since the beginning of the year – that’s just about the same number of patterns I published last year, total.  We’re wrapping up on tech edits now on most of the patterns… thank goodness!  I’ve got the pleasure of working with some amazing minds to make patterns the best they can be, but it’s still hard bopping between one pattern and the next to make sure everything is as perfect as it can be.

After TNNA (next weekend, and I’m so excited!) I’ll be gearing up for the summer season: which means getting ready for the camps and for the fall.  If you have or know a kid in the DC area looking for some really great craft based camps, you should check out the listing of camps here.

Catching Up – and a little bit of Gardening

After threatening rain all day, it’s finally started.  This Monday’s been a slow one, as I’m getting my momentum moving after a week of being a little slow and lazy.

I’ve spoken before about how I’ve been going, going, going since January, and this last week I finally took a break.  Oh, I didn’t stop working, but I went nearly a week with only doing a minimum of crocheting or knitting.  It was necessary on a few different levels; creatively and physically I needed a break.

So I’ve been trying to tidy up the mess that has become our home, as I’m slowly sucking in the clutter that has taken over… well, any space that Mr. Turtle would let me.  It’s not done by a long shot, but I’ve been given a deadline: put it away before TNNA, or it won’t be there when I come back.  *grins* I think it’s more than fair.

I’ve also been working with Cultivar Designs on the new website.  Two weeks ago I was feeling very grim about the project: it felt like I’d been having meeting after meeting with the Cultivar team, and nothing was showing for the work.  Now, that has nothing to do with Cultivar, and everything to do with my mood two weeks ago. Now, this last week I got to the the beginnings of the developed site (dev site), and I can finally see where this whole project is going.

I’ve also been working on the garden this spring.

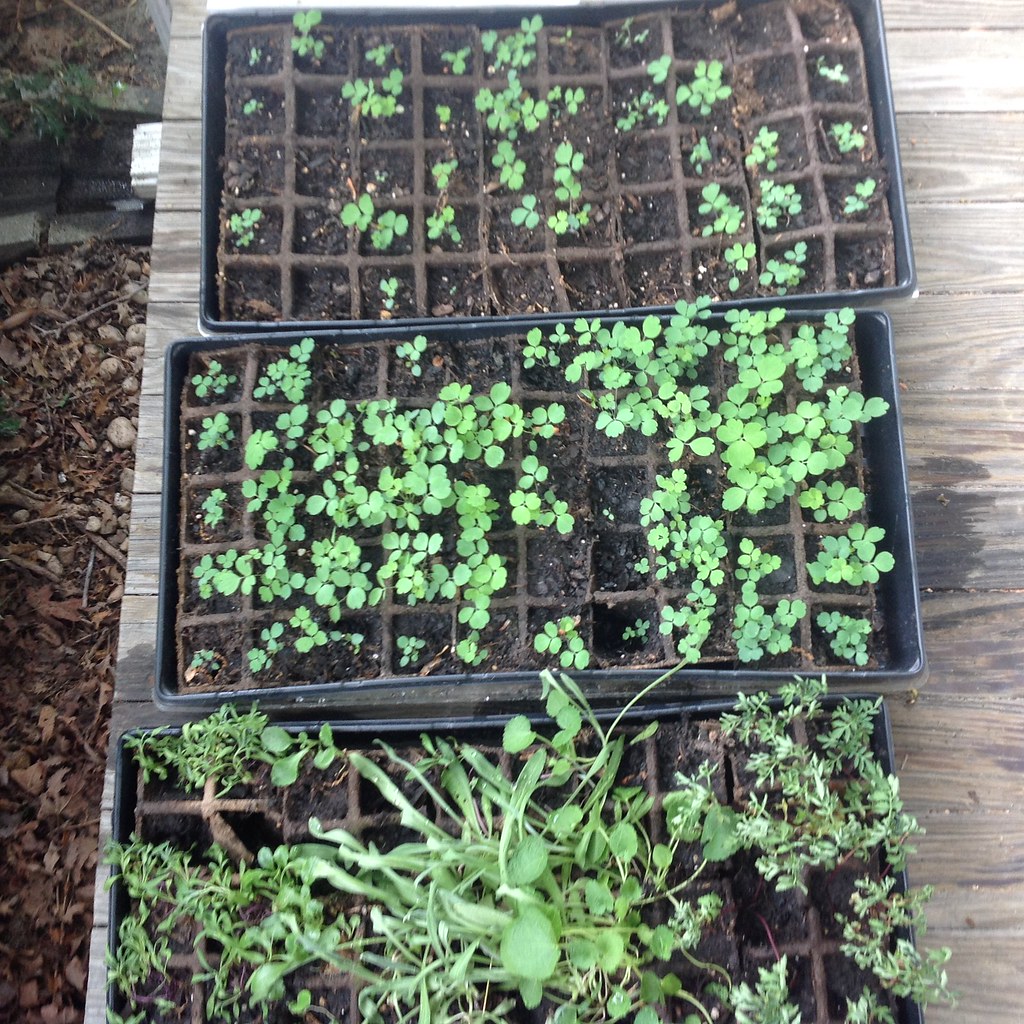
Columbine Seedlings, along with some other fun plants.

(You remember the garden?  The woefully neglected one?  And then my knitting friends gave me plants, and I moved things around, and it was a little better, but then then weeds took over?)

Well, a lot has happened since then.  I may have lost my head at one time and bought 150 bulbs from Costco.  And then I started about 50 Columbine plants from seed… because I could, and I was worried that they wouldn’t grow.

In order to facilitate getting the plants in the ground, Mr. Turtle and I had a “garden party” which involved getting our friends over, bullying them into helping get vegetable plants in the ground and the garden mulched, feeding everyone cookout food, and then sending them home with their own seedlings to plant.  It worked out rather well, and the veggie garden is coming along a lot nicer than last year, already.

The peas in particular are pretty happy.

I’m trying out sheet mulching – a method for reducing weeds in garden beds that have been long neglected (which could easily describe the gardens at the house we’re renting).  I’ve been putting down cardboard and then putting down wood mulch on top.  Since we’re on a budget, the wood mulch is coming from the local dump.  The locals I’ve talked to have different opinions on the much.  Some say that it’s pretty “dirty and seedy” – in that the much is made of a lot of different types of wood, and sometimes contains plastic and other bits.  Others said that if you dig into the pile (where the much heats up), you can get much that’s less contaminated.  We’re going to give it a try, seeing as I don’t think it can be very much worse than what I’ve got already.

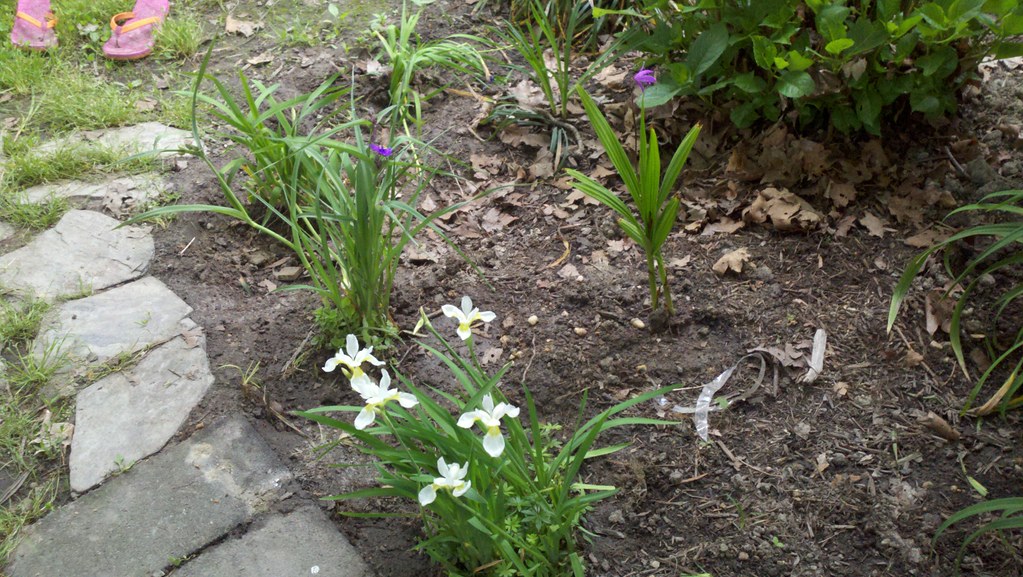
This would be the flower bed last year (you can orient by that purple flower in the middle)
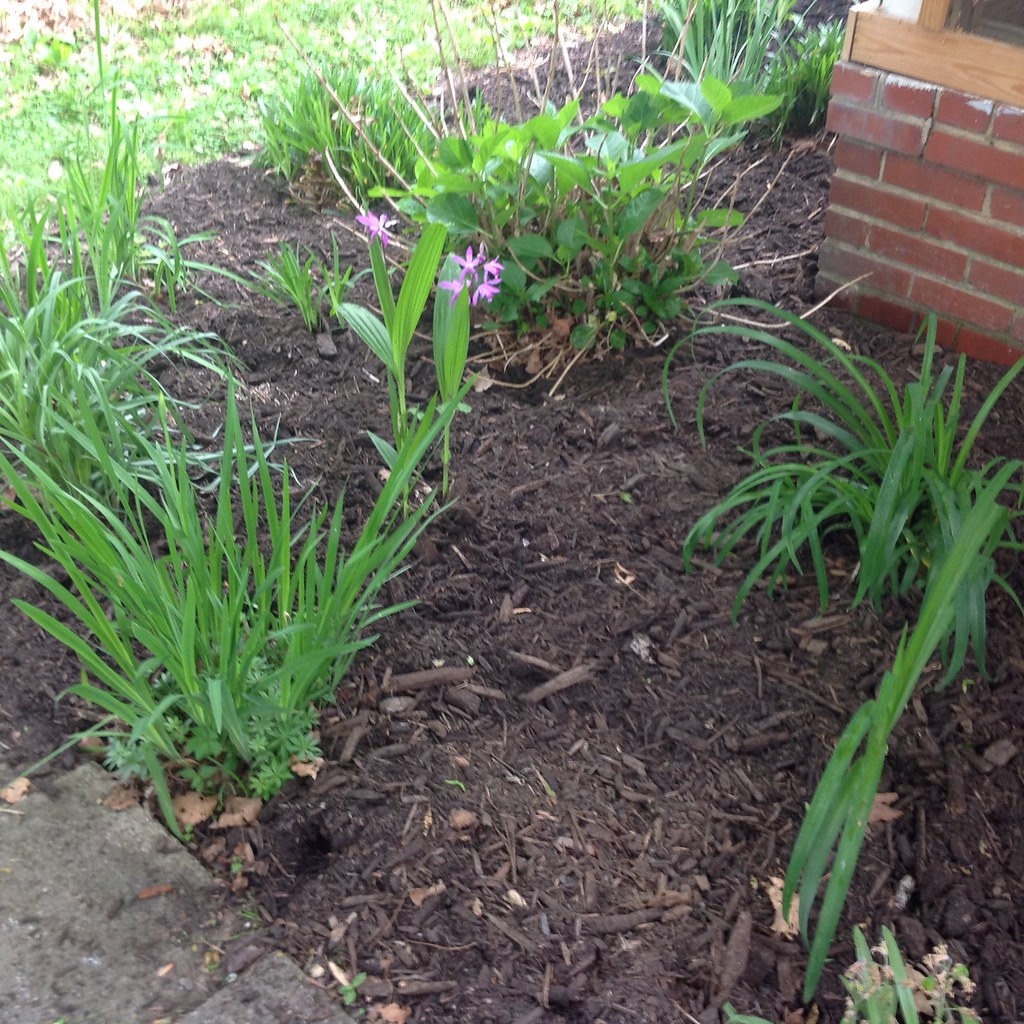
And this would be the same bed, with the same purple flower, this year, looking more happy.

Unfortunately, even with all the cardboard I saved up over the winter, I’m running out.  But… again, knitters come to the rescue – a call out to my knitting friends, and I’ve been picking up and finding cardboard on my front porch all weekend.  Two more trips, I think, and things will be good.

What have you been working on, outside of stitching?

Follow-ups and a few other details, including a new LYS I’ll be teaching at!

Wow, I’ve gotten a lot of responses to my previous post  – I appreciate the support, emails, and congrats!

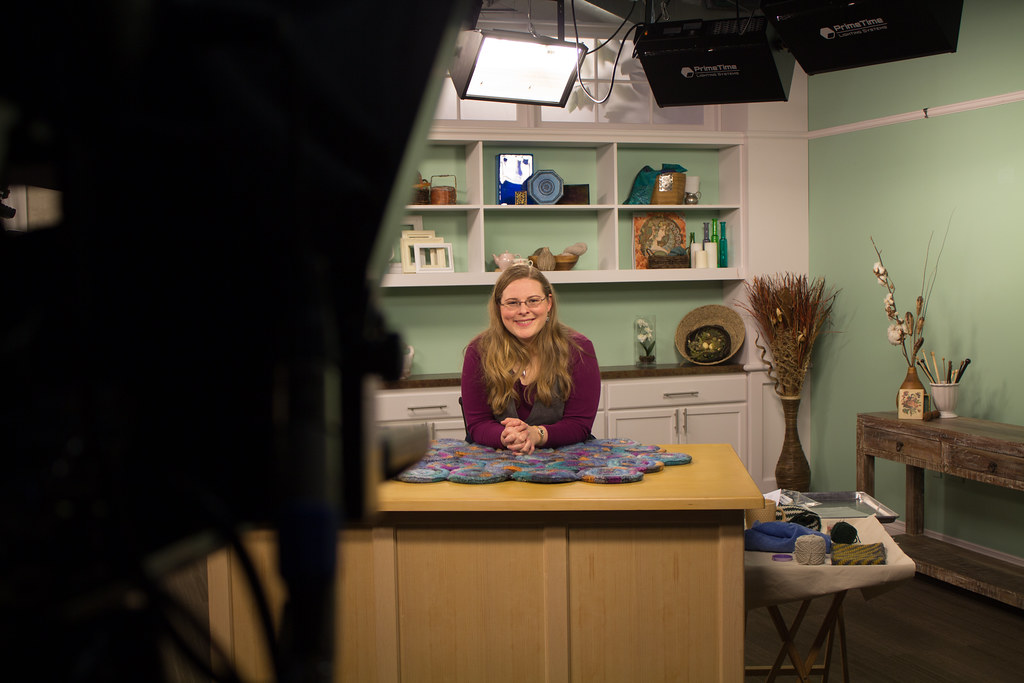
I wanted to talk a little bit more about the process of filming with Interweave, since I’ve gotten a fair amount of questions about it.

One of the biggest questions I got was: how did you manage to film four classes in two days?

First, Interweave’s got a great team that make the filming process smooth and intuitive.  They were a huge help in making sure everything went smoothly.  Having worked backstage more than once, I have a little bit of an idea of what goes on to prepare for a shoot.  The second biggest thing that makes a difference when filming the classes is the preparation I did before we even began filming.

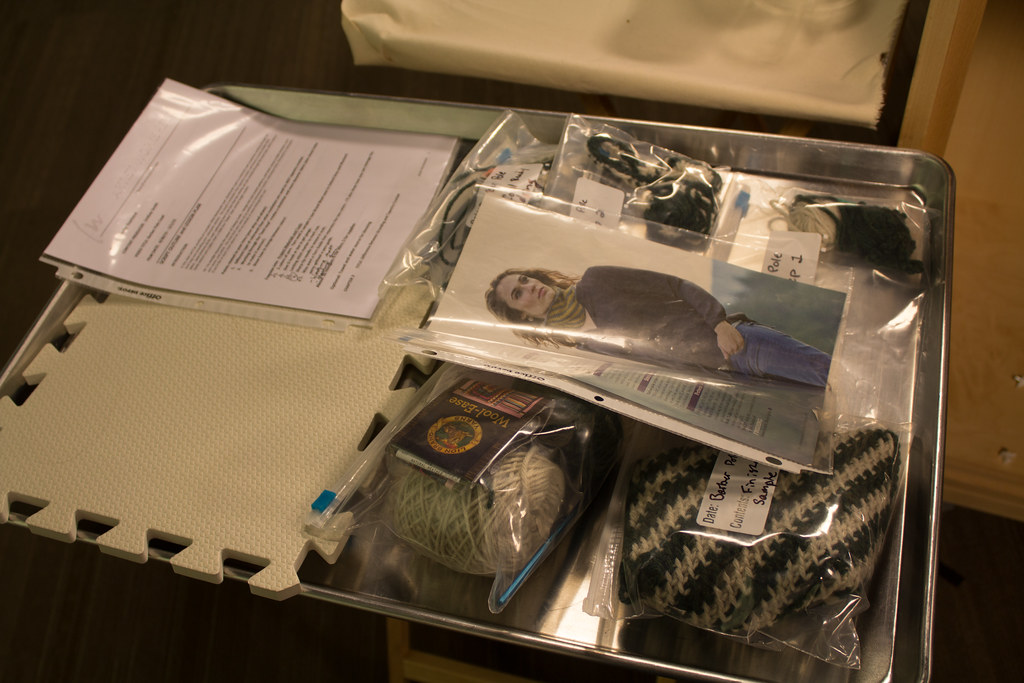
When I began packing for CO, all of my clothes went into my checked luggage.  The luggage I carried with me, and refused to surrender?  Was filled with something called “step-outs.”

What are step-outs, you might ask?  Think of nearly any cooking show you’ve ever seen.  That moment, when the host puts an uncooked cake in the oven, and the next moment pulls out the finished product?  I bet you wouldn’t be surprised to find out that the entire filming crew isn’t waiting around for the cake to bake.  The host, team, or someone has baked a cake beforehand, to enable the host to go onto the next step.

When preparing for the filming, I did something similar.

The last two weeks have been a flurry of working the same project over and over, each time working one “step” further.  When we’re filming, I simply grab the project that’s on the next step, allowing me to skip ahead.  Each of these unfinished projects is called a step-out, and they’re an important part of making a film class run smoothly.

Different people manage their step outs different ways.  Each of mine went into a separate plastic bag, labeled with it’s order, and with a few different “hints” to remind me why I created the step out, and what it was supposed to be used for.  They then all went on a tray, where I could grab them in between takes.

These were the ones for the barber pole cowl, along with my notes.
Using step-outs for class isn’t anything new: I often create similar things for my workshops.  Still, having to have all the step outs for for classes has consumed most of my time for the last two weeks.  And I have to admit it wasn’t even very absorbing work: basically, I did the same project over and over, each time going onto the next step.
Even if I love a design, the process became boring.
Still, it meant on filming day, I could grab and go, use the step-out, and move onto the next step.  It also means that now that I’m back, I’m having to sort through everything that I tossed into my luggage at the end of the day.
Which kind of is a metaphor for how I’ve been conducting my life for the last two months.
I’m taking some time now to step back.  In a month I leave for TNNA, and there’s some larger-picture goals I have for the show this year.  Meanwhile, I have two guest bedrooms, and office, and other spaces around the house that have become a disaster.  I’ve went two steps beyond “I can’t find anything,” and have launched myself into “I must leap over the piles to get to anything.”
As Mr. Turtle has reminded me, the floor should not be used for a shelf.
So the next two weeks are going to be devoted unpacking, organizing and getting back into the normal Tinking Turtle grove.  If you haven’t heard from me, chances are your email is lurking in the bottom of my inbox – please be patient.

In other news, I’m adding a LYS to my teaching roster: Untangled Purls, in Fredericksburg, VA.  I’ve added the class offerings to my calendar – take a look.

Finally, I’ve been working the last few months with the Cultivar Design team to create a new Tinking Turtle website.  It was time, and I’ve been saving up for this endeavor for a while.  In the next couple of weeks you’ll be hearing and seeing some changes – and hopefully the result being a website where you can find out what you need a little bit faster.

One of the things I’m looking forward to is an updated calendar, which I’m absolutely excited and thrilled to have… since the google calendar I use now does the job, but not elegantly, and it’s really hard to add pictures.  You should, with the new calendar, be able to be able to see where classes are located a little bit better.